power xl air fryer manual pdf

PowerXL Air Fryer Manual PDF⁚ A Comprehensive Guide

This comprehensive guide provides essential information for using your PowerXL Air Fryer․ Find your specific model’s manual online for detailed instructions and safety precautions․ Download the PDF manual for easy access to cooking tips and troubleshooting advice․ Master key features and functions to unlock culinary possibilities․

Finding Your Specific Model Manual

Locating the correct PowerXL Air Fryer manual is crucial for safe and effective operation․ Begin by identifying your model number․ This alphanumeric code, usually found on a sticker on the appliance’s base or in the original packaging, is essential for finding the precise manual․ Many PowerXL models exist, including the Vortex, Air Fryer Pro, and others, each with unique features and instructions․ Don’t rely on generic manuals; inconsistencies may lead to incorrect usage or even safety hazards․

Once you’ve located your model number, use it to search on the official PowerXL website․ Their support section usually offers a searchable database of manuals, often available as downloadable PDFs․ Alternatively, you can use a web search engine․ Include the model number in your search query to filter results effectively․ Be wary of unofficial websites offering downloads; ensure the source is trustworthy to avoid downloading potentially harmful files․

If you are unable to find the manual online, contact PowerXL customer support directly․ They can guide you toward obtaining the appropriate documentation or provide assistance via phone or email․ Remember, having the correct manual is vital․ It provides safety warnings, operating instructions, cleaning procedures, and troubleshooting tips specific to your model, ensuring safe and successful air frying․

Downloading the PDF Manual

After locating your PowerXL Air Fryer’s manual online, downloading the PDF version offers several advantages․ PDFs are universally accessible, requiring only a PDF reader (like Adobe Acrobat Reader, often pre-installed on computers) to open and view the document․ This eliminates compatibility issues associated with other file formats․ Furthermore, PDFs allow for easy printing, providing a handy hard copy for kitchen use, especially if you prefer not to use electronic devices near appliances․ A printed manual is less susceptible to technical issues such as software crashes or internet outages․

To download, simply locate the download link on the official PowerXL website or the reputable source you found it on․ Click the link, and your browser will typically prompt you to save the file to your computer․ Choose a convenient location, like your “Downloads” folder․ Once downloaded, locate the saved file and double-click it to open it with your PDF reader․ Ensure you have sufficient disk space on your device before initiating the download to prevent interruption or errors during the process․

Always download manuals from official or highly trustworthy sources․ Avoid suspicious websites or links, as they may contain malware or corrupted files․ If the downloaded PDF seems unusual or contains suspicious content, do not open it; delete it immediately and report the suspicious website to the appropriate authorities․ A legitimate PDF should open smoothly and display the expected PowerXL Air Fryer manual content clearly and legibly․

Understanding Key Features and Functions

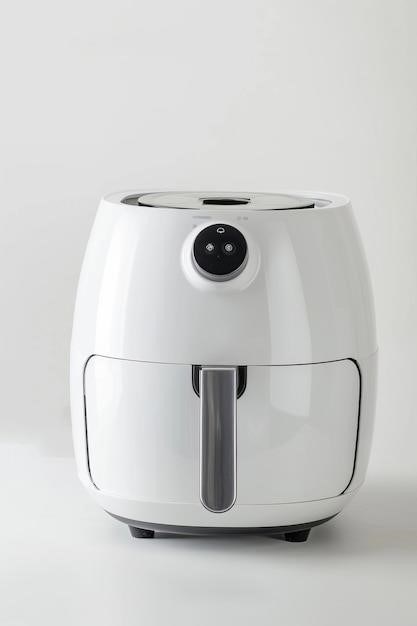
The PowerXL Air Fryer manual details various features designed for optimal cooking․ Familiarize yourself with the control panel, understanding the functions of buttons for temperature adjustment, timer settings, and pre-programmed cooking options․ Many models offer presets for common foods like fries, chicken, and vegetables, simplifying the cooking process․ Learn how to adjust cooking time and temperature manually for greater control over the final result․ The manual should illustrate the basket and tray’s proper placement within the unit․ Pay close attention to warnings regarding the hot air outlet vent and other safety features․

Understanding the air circulation system is crucial․ The PowerXL Air Fryer utilizes rapid air circulation technology to cook food evenly and crisply with minimal oil․ The manual will explain how this technology works and how to maximize its efficiency․ Explore the various cooking functions your specific model supports, such as air frying, baking, roasting, or grilling․ Each function might require slightly different preheating techniques and cooking times․ Mastering these functions will allow you to unlock the Air Fryer’s full culinary potential, extending beyond simple air frying․

Pay attention to the appliance’s specifications, including wattage, capacity, and temperature range․ This information is vital for safe and effective operation․ The manual may also include helpful tips for optimizing cooking results based on food type and quantity․ Reading this section thoroughly will ensure you are well-prepared to use your PowerXL Air Fryer safely and efficiently․

Operating Instructions⁚ A Step-by-Step Guide

The PowerXL Air Fryer manual provides a detailed, step-by-step guide to operating your appliance․ Begin by unpacking your air fryer and ensuring all components are present, referring to the parts diagram in your manual․ Familiarize yourself with the safety precautions before proceeding․ Properly plug the air fryer into a grounded outlet and ensure it’s placed on a stable, heat-resistant surface away from flammable materials․ Never operate the air fryer without the basket and tray correctly positioned inside․

The manual will guide you through the preheating process, if required by your model․ This is often a crucial step for achieving optimal results․ Once preheated, carefully load your food into the basket, ensuring it’s not overcrowded to allow for proper air circulation․ Select your desired cooking function and adjust the time and temperature settings according to the recipe or manual recommendations․ Avoid opening the lid during cooking unless absolutely necessary, as this can disrupt the cooking process and affect the final outcome․

Upon completion of the cooking cycle, the air fryer will usually signal completion with an audible alert․ Always use oven mitts or pot holders to remove the hot basket and tray․ Allow the food to cool slightly before serving․ Refer to the cleaning instructions within the manual to properly care for your appliance․ Regular cleaning is crucial for maintaining optimal performance and longevity․ The manual often includes troubleshooting advice to help resolve minor issues․

Preheating and Cooking Time Settings

Your PowerXL Air Fryer manual will detail the importance of preheating, a step often necessary for optimal cooking results; The manual will specify whether preheating is needed for your specific model and, if so, the recommended preheating time․ This usually ranges from a few minutes to ensure even heat distribution throughout the appliance․ Failure to preheat correctly might lead to unevenly cooked food or longer overall cooking times․

The manual provides comprehensive guidance on setting cooking times and temperatures․ These settings vary greatly depending on the food type, quantity, and desired level of doneness․ Consult the manual’s recipe section or the included recipe guide for specific recommendations on time and temperature settings for various dishes․ For example, frozen foods typically require longer cooking times than fresh ingredients․

Remember that overcrowding the air fryer basket can significantly impact cooking times and results․ Ensure sufficient space between food items for optimal air circulation․ The manual might offer suggestions for food quantities to avoid overcrowding and for adjusting cooking time accordingly․ Always monitor the cooking process and adjust settings as needed to achieve your desired results․ The manual emphasizes the importance of checking food frequently, especially during the initial cooking stages․ Use caution when removing hot food from the air fryer․

Recipes and Culinary Inspiration

Many PowerXL Air Fryer manuals include a dedicated section brimming with delicious and diverse recipes․ These recipes are specifically tailored to the capabilities of your air fryer, providing optimal cooking times and temperatures for various dishes․ The recipes often range from classic favorites like crispy fries and juicy chicken wings to more adventurous options, showcasing the versatility of the appliance․

Beyond the included recipes, the manual might direct you to online resources or a dedicated website where you can find an expanded collection of PowerXL-approved recipes․ These online resources frequently feature user-submitted recipes, allowing you to tap into a vast community of air fryer enthusiasts and discover new culinary inspirations․ Many users share their tips, tricks, and modifications to existing recipes, fostering a collaborative and engaging online community․

The manual might also suggest recipe modifications based on personal preferences․ For instance, it may guide you on adjusting seasonings, incorporating different herbs and spices, or adding unique ingredients to customize the dishes․ This aspect encourages experimentation and creative exploration within the context of air frying․ Remember to always follow the basic cooking principles outlined in your manual to ensure successful and safe cooking experiences․ The potential for culinary creativity is extensive with your PowerXL Air Fryer․

Cleaning and Maintenance Procedures

Your PowerXL Air Fryer manual emphasizes the importance of regular cleaning for optimal performance and longevity․ The cleaning instructions typically begin with disconnecting the appliance from the power source before any cleaning attempt․ Many models feature removable parts, such as the basket and crisper tray, that are often dishwasher-safe for convenient cleaning․ However, always refer to your specific model’s manual, as some components might require hand washing to avoid damage․

For hand washing, the manual usually recommends using warm, soapy water and a non-abrasive sponge or cloth․ Avoid using harsh chemicals or abrasive scrubbers, as these could scratch the non-stick surfaces․ After washing, thoroughly rinse all parts and allow them to air dry completely before reassembling the air fryer․ Never immerse the main unit in water or any other liquid; always wipe it down gently with a damp cloth․

The manual may also include specific instructions for cleaning hard-to-reach areas or stubborn food residue․ It might suggest using a soft brush or toothpick to remove any debris from vents or crevices․ Regular cleaning will maintain your air fryer’s efficiency and prevent the buildup of grease and odors․ Proper cleaning and maintenance are crucial for safe and enjoyable use of your appliance, ensuring many years of delicious cooking․

Troubleshooting Common Issues

The PowerXL Air Fryer manual dedicates a section to troubleshooting common problems․ If your air fryer isn’t heating properly, the manual might suggest checking the power cord connection, ensuring the unit is plugged into a working outlet, and verifying the temperature settings․ Food cooked unevenly? The manual may recommend arranging food in a single layer to ensure even air circulation or adjusting cooking time and temperature according to food type and quantity․ Strange noises emanating from the appliance? The manual often advises checking for any obstructions within the air fryer, such as food debris blocking the vents․

If your air fryer is not turning on, the manual will likely guide you through checking the power supply, circuit breaker, and ensuring the power cord is securely connected․ Issues with the digital display or control panel might require a review of the user interface instructions within the manual․ The manual may also address concerns about food sticking to the basket or tray, suggesting the use of cooking spray or parchment paper to facilitate easier cleaning and food release․ Addressing issues related to the timer or pre-programmed settings will be thoroughly explained․

Remember, always consult the specific troubleshooting section in your PowerXL Air Fryer manual for model-specific solutions․ If the problem persists after trying the suggested solutions, contacting customer support is recommended․ The manual usually includes contact information for warranty claims and technical assistance, ensuring you receive the necessary support for your appliance․

Safety Precautions and Warnings

Your PowerXL Air Fryer manual emphasizes safety; Crucially, it warns against operating the appliance near flammable materials, such as curtains or paper towels, to prevent fire hazards․ Never leave the air fryer unattended while in operation, especially during preheating or cooking․ The manual strongly advises against immersing the appliance in water or other liquids for cleaning, as this could lead to electric shock; Always unplug the air fryer from the power outlet before cleaning and when not in use․

The manual highlights the importance of using oven mitts or heat-resistant gloves when handling the hot basket, tray, and appliance itself to avoid burns․ Children and pets should be kept at a safe distance from the operating air fryer․ The manual usually stresses the importance of supervising children in the vicinity of the appliance and storing it out of reach․ Never attempt to repair the air fryer yourself; instead, contact authorized service personnel for any repairs or maintenance․

The manual may also include specific warnings about the high temperatures involved during operation․ It might advise against touching the hot air outlet vent during or immediately after use․ Regularly inspect the power cord for any damage; if damaged, immediately discontinue use and replace the cord․ Following these safety precautions and warnings outlined in your PowerXL Air Fryer manual ensures safe and efficient operation of your appliance․

Warranty Information and Customer Support

Your PowerXL Air Fryer’s warranty information, typically detailed in the PDF manual, outlines the manufacturer’s commitment to product quality and customer satisfaction․ This section usually specifies the duration of the warranty coverage, typically a year from the date of purchase․ It clearly defines what is covered under warranty, such as defects in materials and workmanship, and what is not covered, such as damage caused by misuse or neglect․ The warranty terms often exclude damage resulting from unauthorized repairs or modifications․

The manual provides clear instructions on how to file a warranty claim, often requiring proof of purchase, such as a receipt or store invoice․ It may specify where to send the defective appliance or which parts are eligible for replacement․ Beyond the warranty, the manual will usually provide contact information for customer support, such as a toll-free telephone number or an email address․ This allows users to seek assistance with troubleshooting issues, obtain answers to frequently asked questions, or request additional information․

The customer support section of the manual may also include links to the manufacturer’s website, where you can access a comprehensive FAQ section, download additional resources, or register your product for warranty purposes․ Accessing this information proactively ensures a smooth and positive experience with your PowerXL Air Fryer, allowing you to resolve any questions or concerns efficiently and effectively․

pacific energy super 27 manual

Pacific Energy Super 27 Manual⁚ A Comprehensive Guide

This manual provides a complete guide to the Pacific Energy Super 27 wood stove, covering installation, operation, maintenance, troubleshooting, features, specifications, parts ordering, warranty, and compliance information. Downloadable PDFs are available online. Safety precautions are crucial for proper installation and use.

Safety Precautions and Installation

Before beginning any installation or operation, carefully read all safety warnings and instructions provided in the Pacific Energy Super 27 manual. Improper installation can lead to house fires; always comply with local building and fire codes. Consult local officials regarding restrictions and inspection requirements. Ensure the stove is installed by a qualified professional if you lack experience. Never connect the heater to any air distribution duct. The chimney and all components must be installed according to the manufacturer’s instructions. Use only dry, seasoned firewood, up to 457mm long, to prevent creosote buildup and chimney fires. Regularly inspect the stove and chimney for damage, paying attention to firebricks, gaskets, and rails. Always keep the loading door closed during operation, as the stove is not designed for open-door burning. The proper installation of a smoke detector is strongly recommended. Maintain appropriate clearances to combustible materials as specified in the manual’s diagrams. Understand and follow the instructions on combustion air intake. The use of a floor protector is also advised. Proper installation is critical for safe and efficient operation. Failure to follow these instructions could void your warranty and create a dangerous situation.

Understanding the Super 27’s Components

The Pacific Energy Super 27 features a robust design incorporating several key components. The firebox, constructed of durable materials, is designed for efficient combustion and optimal heat output. Firebricks line the interior, radiating heat and enhancing the burning process. A sturdy door, typically featuring a porcelain enamel finish, provides secure closure and easy access for loading fuel and cleaning. An ash system, either integrated or optional, facilitates convenient ash removal. The exterior casing, often steel or porcelain enamel, protects the internal components and contributes to the stove’s overall aesthetic appeal. Depending on the model, the Super 27 might include a pedestal or leg assembly for support and proper elevation. A chimney connector ensures safe and efficient venting of exhaust gases. Air intake controls regulate the airflow for optimal burn rates and efficiency. Baffles within the firebox direct the flow of hot gases, maximizing heat transfer. Understanding these components is crucial for proper operation, maintenance, and troubleshooting. Consult the diagrams and descriptions within the manual for a more detailed understanding of their locations and functions. Regular inspection of these parts is essential for safe and efficient use. Remember that specific components may vary slightly depending on the Super 27 model and year of manufacture.

Operation and Maintenance Procedures

Operating your Pacific Energy Super 27 efficiently and safely requires understanding proper procedures. Begin by ensuring the stove is correctly installed and connected to a suitable chimney system. Use only dry, seasoned hardwood, avoiding softwoods or treated lumber. Start with kindling and gradually add larger pieces of wood. Never overload the firebox. Adjust the air intake controls to maintain a consistent burn, observing the flames and embers for optimal performance. Regular maintenance is critical for longevity and safety. Inspect the firebricks for cracks or damage, replacing any compromised bricks. Check the door gasket for wear and tear, ensuring a tight seal to prevent air leaks and maximize efficiency. Clean the ash pan regularly, removing accumulated ash to prevent build-up that can restrict airflow or damage the firebox. Inspect the chimney annually for creosote buildup, a flammable byproduct of incomplete combustion. Creosote removal is essential for fire safety. Always allow the stove to cool completely before cleaning. Never use water to extinguish a fire; allow it to burn out naturally. Refer to the troubleshooting section for addressing any operational issues. Following these guidelines will ensure the safe and efficient operation of your Pacific Energy Super 27, prolonging its lifespan and maximizing its heating capabilities.

Troubleshooting Common Issues

This section addresses common problems encountered with the Pacific Energy Super 27. If the glass is dirty, ensure you are using dry wood and avoid turning down the air control too soon. Insufficient heat output might stem from using wet wood, insufficient airflow, or a clogged chimney. Check the air intake controls and ensure proper chimney draft. A smoky firebox may indicate a problem with the chimney draft, insufficient airflow, or improper loading of wood. Address these issues by cleaning the chimney, adjusting the air controls, and ensuring correct wood loading techniques. If the stove produces excessive smoke, check for air leaks around the door or seals. Replace any damaged gaskets to maintain a proper seal. If the stove is difficult to light, make sure you are using sufficient kindling and following proper fire-starting procedures. Consult the manual for detailed instructions on air control adjustments. If problems persist despite these troubleshooting steps, contact a qualified service technician or Pacific Energy customer support. They can diagnose more complex issues and provide guidance for repairs or part replacements. Remember, always prioritize safety and consult the manual before attempting any repairs.

Understanding the Super 27’s Features

The Pacific Energy Super 27 boasts a range of features designed for efficient and clean burning. Its catalytic-free design offers lower costs and reduced maintenance compared to catalytic models. The Super 27 is renowned for its exceptional heating performance, capable of efficiently warming medium to large-sized rooms. A long burn time is a key advantage, minimizing the frequency of refueling. The stove’s construction incorporates durable materials, ensuring longevity and reliable performance. Porcelain enamel finishes on the door, legs, and trivet contribute to both aesthetics and durability. Ease of lighting, operation, and maintenance are also highlighted as key user-friendly features. The Super 27’s design incorporates features to maximize heat output and minimize creosote buildup, contributing to cleaner burning. Specific models, such as the Super 27 LE, may offer additional features like a larger firebox or enhanced efficiency. The Super 27’s design elements, including the firebrick layout and air control system, are optimized to promote efficient combustion and even heat distribution. Always refer to the specific model’s specifications for a complete list of features and capabilities. Consider the available options and choose the model that best meets your heating needs and preferences.

Specifications and Technical Data

Precise specifications for the Pacific Energy Super 27 can vary depending on the specific model and year of manufacture. Always consult the documentation that came with your particular stove for the most accurate and up-to-date information. However, some general specifications commonly associated with the Super 27 series include dimensions (height, width, depth), weight, firebox size, heating capacity (in square feet or cubic meters), and fuel type (wood). Efficiency ratings, expressed as a percentage, indicate how effectively the stove converts fuel into usable heat. Emission levels, measured in grams per hour, are crucial for compliance with environmental regulations. The type of chimney connection, whether single-wall or double-wall, and the required chimney diameter are essential installation details. Clearances to combustible materials, specified in inches or centimeters, are critical for fire safety. The minimum and maximum fuel loading capacity may be expressed in pounds or kilograms. Information on the type of glass used in the door, as well as the materials used in the stove’s construction (steel, cast iron, etc.), will be found in the specifications. The manual should also provide details on the air intake requirements for proper combustion. This data is essential for safe and efficient operation. Always prioritize safety by adhering strictly to all specified clearances and installation guidelines.

Replacement Parts and Ordering Information

This section details how to obtain replacement parts for your Pacific Energy Super 27 stove. The manual should include a comprehensive parts list with diagrams showing the location of each component. Each part will have a unique identification number, crucial for ordering. When ordering, always provide the part number and a description to ensure accuracy. Contact information for authorized dealers or the manufacturer’s customer service department should be clearly provided. Dealers may offer varying levels of service and parts availability, so it’s recommended to contact several to compare options. The manufacturer’s website may also offer an online parts catalog, facilitating the ordering process. Expect variations in lead times for part delivery, depending on the part and the supplier. In addition to individual parts, you might find complete kits available for common repairs or upgrades. Some parts may be available from third-party suppliers, but using the manufacturer’s recommended parts helps ensure proper fit and function, maintaining the safety and efficiency of your stove. Always keep a copy of your purchase records and the parts list for future reference. Regular inspection and timely replacement of worn components are key to extending the life and maintaining the performance of your Pacific Energy Super 27.

Warranty Information and Contact Details

Your Pacific Energy Super 27 stove comes with a warranty; details are crucial and should be clearly stated. The warranty period varies depending on the specific component and may cover defects in materials and workmanship. Understanding the terms and conditions of your warranty is vital. This includes knowing what is covered, what is excluded, and the procedures for making a warranty claim. The manual should clearly outline the duration of the warranty, any limitations, and any conditions that might void the warranty. For example, improper installation or use can often void the warranty. The manufacturer’s contact information is essential⁚ phone number, email address, and mailing address should be readily accessible. Keep your proof of purchase and any relevant documentation, such as the serial number of your stove, for warranty claims. If you encounter a problem with your stove, contact Pacific Energy’s customer support immediately. They can assist with troubleshooting and guide you through the warranty process. Remember to carefully document any issues experienced and follow their instructions. Efficient communication is key to resolving warranty claims promptly and effectively. Beyond the warranty period, Pacific Energy may still offer service and parts, although at a cost. The manual may provide further details on extended service plans or maintenance contracts.

Compliance and Certifications

The Pacific Energy Super 27 stove is designed and manufactured to meet stringent safety and environmental regulations. This section details the certifications and compliance standards the stove adheres to. Look for certifications such as EPA (Environmental Protection Agency) approval for emission standards in the United States. These certifications ensure that the stove meets specific criteria for emissions, preventing excessive pollutants from entering the atmosphere. Other certifications might relate to safety standards, like those from Underwriters Laboratories (UL) or similar organizations. These confirm the stove’s safe operation and construction. The manual should list all relevant certifications and their corresponding numbers for verification. Compliance with building codes and local regulations is also crucial. The installation instructions should mention necessary permits and inspections required in your area. Check with your local authorities to ensure compliance with any regional rules governing wood-burning appliances. Understanding these certifications and compliance standards offers peace of mind and ensures that your stove operates safely and environmentally responsibly. The model number and serial number of your Super 27 are important for verifying compliance and warranty purposes. Keep this information readily available. Reference the compliance plate on the stove for precise details about its certifications and standards.

mastering nlp from foundations to llms pdf

Mastering NLP⁚ From Foundations to LLMs

Unlock the power of natural language processing, from fundamental concepts to advanced large language models. Explore comprehensive resources and guides, including insightful PDFs, to master NLP and LLMs. Gain expertise in building real-world applications.

Natural Language Processing (NLP) bridges the gap between human language and computer understanding. This foundational area involves equipping computers with the ability to process and analyze large amounts of text data, extracting meaningful insights. Core tasks include tokenization (breaking text into individual words or units), stemming (reducing words to their root form), and lemmatization (finding the dictionary form of a word). Part-of-speech tagging identifies grammatical roles (nouns, verbs, etc.), while named entity recognition pinpoints people, places, and organizations. Understanding these fundamentals is crucial before delving into advanced techniques and large language models (LLMs).

Early NLP relied heavily on rule-based systems, defining explicit grammatical rules and patterns. However, the limitations of such approaches, particularly with complex language nuances, led to the rise of statistical and machine learning methods; These methods leverage large datasets to train models that can predict linguistic features and structures, significantly improving accuracy and adaptability to various language contexts. This transition represents a critical step toward the sophisticated LLMs used today.

Key Concepts in Natural Language Processing

Several key concepts underpin the field of NLP. Understanding these is essential for grasping the intricacies of language processing and the capabilities of LLMs. Word embeddings, such as Word2Vec and GloVe, represent words as dense vectors capturing semantic relationships. These vectors allow computers to understand contextual similarities between words, paving the way for more sophisticated analyses. Recurrent Neural Networks (RNNs), particularly LSTMs and GRUs, excel at processing sequential data like text, capturing long-range dependencies within sentences. However, their limitations in handling very long sequences led to the development of Transformers.

Transformers, with their attention mechanisms, revolutionized NLP. They process the entire input sequence simultaneously, enabling better capture of long-range dependencies and parallel processing. This architecture is fundamental to the success of modern LLMs. The concept of context is paramount; understanding the meaning of a word often requires considering its surrounding words and the overall sentence structure. Finally, the importance of large datasets cannot be overstated. LLMs are trained on massive text corpora, enabling them to learn complex patterns and nuances of language that smaller datasets cannot capture.

Evolution of NLP⁚ From Rule-Based to Deep Learning

Understanding Large Language Models (LLMs)

Dive into the world of LLMs, exploring their architecture, training processes, and capabilities. Discover how these powerful models process and generate human-like text, transforming NLP.

What are LLMs? Architecture and Mechanisms

Large Language Models (LLMs) are a type of artificial intelligence that excels at understanding and generating human-like text. Their architecture typically involves a complex neural network, often based on the transformer architecture, known for its ability to process sequential data efficiently. This architecture allows LLMs to capture long-range dependencies within text, leading to more coherent and contextually relevant outputs. The core mechanism involves a process called “attention,” where the model weighs the importance of different words in a sentence to understand their relationships and meaning. This allows LLMs to go beyond simple word-by-word processing and grasp the nuances of human language. LLMs are trained on massive datasets of text and code, learning patterns and relationships between words and phrases. This pre-training phase is crucial for their ability to generate coherent and contextually relevant text. During inference, the model takes an input (a prompt or a question) and uses its learned knowledge to generate a response. The process involves predicting the probability of the next word in a sequence, iteratively building a complete response. The scale and complexity of LLMs are constantly evolving, with newer models exhibiting increasingly sophisticated capabilities in language understanding and generation. Understanding these architectural details and mechanisms is key to effectively utilizing and developing LLMs for various applications.

Pre-training and Fine-tuning LLMs

The journey of an LLM begins with pre-training, a crucial phase where the model learns fundamental language understanding from massive text datasets. This process involves exposing the model to a vast amount of text data, allowing it to learn patterns in grammar, vocabulary, and contextual relationships between words. The objective is to create a general-purpose language model capable of understanding various aspects of language. Think of it as a broad education before specializing. Following pre-training comes fine-tuning, a process of adapting the pre-trained model to a specific task. This targeted training uses a smaller, curated dataset relevant to the desired application. For instance, if the goal is to build a chatbot, the fine-tuning dataset would consist of conversational exchanges. This step refines the model’s abilities, increasing accuracy and performance for the intended purpose. The pre-trained model acts as a strong foundation, while fine-tuning provides the specialized skills. The balance between pre-training’s broad knowledge and fine-tuning’s focused expertise is key to creating effective LLMs. Different fine-tuning techniques exist, offering flexibility in tailoring the model for specific applications and optimizing its performance.

Popular LLMs⁚ GPT, LaMDA, and Others

The landscape of large language models (LLMs) is populated by a diverse array of powerful models, each with its own strengths and characteristics. Among the most prominent are GPT (Generative Pre-trained Transformer) models developed by OpenAI. Known for their impressive text generation capabilities, GPT models have demonstrated remarkable fluency and coherence in various applications, from creative writing to code generation. Google’s LaMDA (Language Model for Dialogue Applications) stands out for its focus on conversational AI. Designed to engage in natural and engaging dialogues, LaMDA excels in interactive applications like chatbots and virtual assistants. Beyond these leading examples, a multitude of other LLMs are continuously being developed and refined. These models often incorporate different architectures, training datasets, and optimization techniques, leading to diverse performance profiles. Researchers and developers are actively exploring new approaches to improve LLM capabilities, focusing on areas such as efficiency, robustness, and ethical considerations; The rapid evolution of LLMs is driving innovation across various domains, opening new possibilities for natural language processing applications.

Building NLP Applications with LLMs

This section delves into the practical aspects of utilizing LLMs to construct real-world NLP applications. We’ll cover various domains and address inherent challenges and ethical considerations.

Practical Applications of LLMs in Various Domains

Large Language Models (LLMs) are transforming numerous sectors. In healthcare, LLMs analyze medical records for faster diagnosis and personalized treatment plans. Financial institutions leverage LLMs for fraud detection, risk assessment, and algorithmic trading, enhancing efficiency and accuracy. LLMs power chatbots and virtual assistants, providing seamless customer service experiences across various industries. The legal field benefits from LLMs’ ability to analyze legal documents, identify relevant precedents, and automate contract review. Education utilizes LLMs for personalized learning experiences, automated essay grading, and content creation. Marketing and advertising employ LLMs for targeted campaign creation, sentiment analysis, and brand monitoring. LLMs also contribute to scientific research through automated literature reviews, hypothesis generation, and data analysis. These are just a few examples showcasing the broad applicability of LLMs in diverse domains, highlighting their versatility and transformative potential. The continuous advancements in LLM technology promise further expansion into even more areas, revolutionizing how we interact with information and solve complex problems.

Challenges and Limitations of LLMs

Despite their remarkable capabilities, LLMs face significant challenges. One major limitation is their susceptibility to generating inaccurate or nonsensical outputs, often termed “hallucinations;” These inaccuracies can stem from biases present in their training data, leading to skewed or unfair results. The computational resources required for training and deploying LLMs are substantial, posing a barrier to widespread accessibility and affordability. Ethical concerns surrounding data privacy, potential misuse for malicious purposes, and the amplification of existing societal biases remain significant hurdles. Furthermore, LLMs’ reliance on vast amounts of text data raises environmental concerns regarding energy consumption and carbon emissions associated with their training. The lack of transparency and explainability in their decision-making processes makes it difficult to understand and debug their outputs, hindering trust and accountability. Addressing these challenges is crucial for responsible development and deployment of LLMs, ensuring their benefits outweigh potential risks and harms. Ongoing research strives to mitigate these limitations and make LLMs more robust, ethical, and accessible.

Ethical Considerations in LLM Development and Deployment

The development and deployment of Large Language Models (LLMs) raise significant ethical concerns. Bias in training data can lead to LLMs perpetuating and amplifying harmful stereotypes and prejudices in their outputs. The potential for misuse in generating misleading information, spam, or deepfakes necessitates careful consideration of responsible deployment strategies. Ensuring data privacy and protecting sensitive information used in training and operation is paramount. Transparency and explainability in LLM decision-making processes are crucial for building trust and accountability. Addressing the environmental impact of the substantial computational resources required for LLM training is also vital. Furthermore, the potential for LLMs to be used to automate malicious activities, such as generating convincing phishing emails or spreading misinformation, necessitates proactive measures to mitigate such risks. Establishing clear guidelines and regulations for the development, use, and deployment of LLMs is essential to ensure their responsible and beneficial integration into society. Continuous monitoring and evaluation of their impact are necessary to identify and address emerging ethical challenges.

Advanced Techniques and Future Trends

Explore cutting-edge NLP architectures and techniques, delving into the future of LLMs and their transformative potential across diverse fields. Discover innovative advancements shaping the next generation of NLP.

Advanced NLP Techniques and Architectures

This section delves into sophisticated NLP methods beyond the basics. We’ll explore advanced architectures like transformers, which power many LLMs, examining their intricate mechanisms and capabilities. The discussion will cover attention mechanisms, a core component of transformers, explaining how they allow models to weigh the importance of different words in a sentence when generating context. Furthermore, we will explore techniques for handling long-range dependencies in text, a persistent challenge in NLP. This involves examining methods like hierarchical attention networks and recurrent neural networks (RNNs) with long short-term memory (LSTM) units. The intricacies of fine-tuning pre-trained models for specific tasks will also be addressed, including techniques such as transfer learning and domain adaptation. We’ll investigate strategies for improving the efficiency and scalability of NLP models, focusing on techniques like model compression and quantization. Finally, we’ll look at handling noisy and incomplete data, common challenges in real-world NLP applications. These techniques are crucial for building robust and accurate NLP systems, highlighting their importance in achieving state-of-the-art performance.

The Future of NLP and LLMs

The trajectory of NLP and LLMs points towards increasingly sophisticated models capable of nuanced understanding and generation of human language. Expect advancements in multimodal learning, enabling models to process and integrate information from text, images, and audio simultaneously. This will lead to more natural and intuitive human-computer interactions. Research into explainable AI (XAI) will focus on making the decision-making processes of LLMs more transparent and understandable, addressing concerns about their “black box” nature. Ethical considerations will remain paramount, driving the development of techniques to mitigate biases and ensure responsible use of these powerful technologies. We anticipate breakthroughs in few-shot and zero-shot learning, allowing models to perform well on new tasks with minimal training data. Furthermore, research will continue to push the boundaries of model scalability, aiming for even larger and more powerful LLMs while addressing challenges related to computational cost and energy consumption. The integration of LLMs with other technologies, such as robotics and augmented reality, will unlock new possibilities in various fields. The future of NLP and LLMs promises a future where machines can genuinely understand and interact with humans in a more meaningful and impactful way.

pdf properties information import xml

PDF Metadata⁚ An Overview

PDF metadata encompasses crucial document information like author, title, keywords, and subject․ This data, often XML-based, enhances searchability and organization, streamlining workflows and data integration․

What is PDF Metadata?

PDF metadata is descriptive information embedded within a PDF file, separate from the document’s content․ It acts as a behind-the-scenes label, providing details crucial for organization and retrieval․ This data includes standard fields like title, author, subject, and keywords, but can also incorporate custom metadata through XML extensions․ Think of it as providing context and enriching the PDF’s discoverability․ Efficiently managing this metadata improves searchability, allowing for easy location of specific files within large collections․ Different tools and libraries enable both extraction and manipulation of this data, facilitating automation in various workflows․

Types of PDF Metadata

PDF metadata exists in two primary forms⁚ standard and extensible․ Standard metadata comprises basic descriptive fields readily accessible through PDF viewers, including title, author, subject, keywords, and creation date․ These are typically stored within the PDF’s document information dictionary․ Extensible metadata, however, leverages the Extensible Metadata Platform (XMP), an XML-based standard․ XMP allows for far richer and more flexible metadata, accommodating custom properties and schemas tailored to specific needs․ This XML-based structure enables sophisticated data modeling and facilitates interoperability between different applications and systems․ The choice between standard and extensible metadata depends on the level of detail and functionality required․

Accessing PDF Metadata

Accessing PDF metadata varies depending on the tools employed․ Many PDF viewers (like Adobe Acrobat Reader) provide built-in interfaces to view standard metadata through a “Properties” or “Document Information” dialog․ This typically displays basic fields such as author, title, and keywords․ For more extensive or customized metadata (often stored using XMP), dedicated software tools or programming libraries are necessary; Python libraries like PyMuPDF or command-line tools such as ExifTool can extract both standard and XMP metadata․ Programmatic access allows for automation and integration with other systems, empowering efficient metadata manipulation and analysis․ Direct manipulation of the underlying XML structure using specialized tools or libraries is often required for advanced XMP metadata handling․

Importing XML Metadata into PDFs

This section details methods for integrating XML metadata into PDF documents, enriching them with structured information for improved searchability and organization․

Using Adobe Acrobat

Adobe Acrobat provides a user-friendly interface for importing XML data into PDF forms․ Navigate to the “Modify” menu, then “Module Options,” followed by “Import Data․” This allows direct import of XML data, populating form fields efficiently․ However, the method’s limitations include potential issues with complex XML structures or large datasets․ Remember to save your work after importing․ Opening the file in Adobe Reader might hide the XML import option; saving as a standard PDF in Acrobat Pro can resolve this․ For metadata beyond form fields, explore the “Document Properties” section, allowing you to manually input or edit descriptive information such as author, subject, and keywords․ This offers a more flexible method for adding general metadata, but lacks the automated data population of the XML import function for forms․

Programmatic Import using Java APIs

Java APIs, such as those offered by Adobe’s XMP Utilities, enable programmatic XML metadata import into PDFs․ This approach offers automation and integration with other systems, ideal for large-scale operations․ Utilizing the XMPUtilityServiceClient or importXMP method allows the insertion of metadata from an XML file or a custom XMPUtilityMetadata object․ Necessary JAR files, like adobe-pdfutility-client․jar, must be included in your project’s classpath․ The process involves creating a service client, invoking the import operation, and handling the returned PDF document (containing the imported metadata)․ Error handling and appropriate exception management are crucial for robust application development in this context․ This method provides precise control over the metadata import process, surpassing the limitations of manual methods in terms of speed and scalability․

Programmatic Import using Web Services APIs

Web service APIs provide a flexible method for importing XML metadata into PDFs․ This approach allows for integration with diverse systems and avoids direct dependency on specific Java libraries․ Using a ․NET client assembly that consumes the XMP Utilities service WSDL file is a common approach․ The importMetadata or importXMP methods, accessible through the XMPUtilityServiceService object, are used to import metadata from either an XMPUtilityMetadata object or a BLOB representing an XML file․ The PDF file is also represented as a BLOB․ The returned BLOB represents the updated PDF; this can then be saved․ This approach offers scalability and platform independence, making it suitable for distributed systems and applications requiring remote metadata management․ Remember to handle potential errors and exceptions appropriately during the web service interaction․

Extracting PDF Metadata

Several methods exist for extracting PDF metadata, including Python libraries, command-line tools, and dedicated applications․ These tools efficiently retrieve valuable document information․

Using Python Libraries

Python offers powerful libraries for PDF metadata extraction․ Libraries like PyPDF2 and PyMuPDF provide functions to access and manipulate metadata embedded within PDF files․ These libraries allow developers to programmatically extract various metadata fields, including author, title, keywords, creation date, and more․ The extracted data can then be processed, analyzed, or used to populate other systems․ For instance, you might use this to build a metadata indexing system for a large archive of PDF documents․ Remember to install the necessary libraries using pip before using them in your scripts․ The ease of use and extensive documentation make Python a popular choice for PDF metadata handling․ Error handling is crucial; ensure your code gracefully handles cases where metadata might be missing or corrupted․ This approach facilitates automated metadata processing for large numbers of PDFs․

Using Command-Line Tools

Command-line tools provide a convenient way to extract PDF metadata without needing to write scripts․ Tools like exiftool are powerful and versatile, capable of extracting a wide range of metadata from various file types, including PDFs․ Using the command line, you can specify the PDF file as input and retrieve specific metadata fields, or even all available metadata․ The output is often formatted as text, making it easy to parse and process further․ This method is particularly useful for batch processing large numbers of PDFs, where automation is key․ The simplicity and speed of command-line tools make them ideal for quick metadata checks or extraction tasks․ However, handling errors and inconsistencies in metadata across different PDFs might require additional scripting to ensure robust processing․ Remember to consult the tool’s documentation for specific options and usage instructions․

Using Dedicated Metadata Extractors

Specialized PDF metadata extractors offer a user-friendly interface for extracting and viewing metadata․ Unlike command-line tools or programming libraries, these tools often provide a visual representation of the metadata, making it easier to understand and interpret․ Many dedicated extractors support various metadata standards and formats, simplifying the process of accessing information embedded within PDFs․ Some advanced extractors may offer features such as filtering, searching, and exporting metadata in various formats like XML or CSV, facilitating further analysis or integration with other systems․ While these tools often come with a cost, the ease of use and comprehensive features can be beneficial for users who lack programming expertise or prefer a visual approach to managing PDF metadata․ The choice of extractor will depend on your specific requirements and budget, considering factors like supported metadata standards, export options, and ease of use․

XML Metadata Standards

XMP (Extensible Metadata Platform), based on RDF, is a key standard for embedding metadata in various file formats, including PDFs, enabling efficient data exchange and interoperability․

XMP (Extensible Metadata Platform)

XMP, or Extensible Metadata Platform, is a crucial XML-based standard for embedding metadata within various file types, prominently including PDFs․ Modeled after the W3C’s Resource Description Framework (RDF), a cornerstone of the semantic web, XMP ensures metadata travels with the file, preserving crucial information throughout its lifecycle․ Standardized as ISO 16684-1 (revised in 2019), XMP provides a consistent framework for describing document properties․ Its hierarchical structure allows for rich metadata descriptions, encompassing details such as author, creation date, keywords, and copyright information․ The use of XML ensures broad compatibility across different software applications and platforms, facilitating efficient metadata exchange and interoperability in diverse digital workflows․ This robust standard ensures that important document information remains accessible and readily available․

Other Relevant XML Schemas

Beyond XMP, several other XML schemas play significant roles in managing PDF metadata․ These schemas often cater to specific industry needs or application requirements, providing structured frameworks for particular metadata elements․ For instance, schemas might define structures for describing image properties within a PDF, or for organizing metadata related to specific document types like invoices (e․g․, ZUGFeRD)․ These specialized schemas ensure that metadata is not only descriptive but also readily interpretable by applications designed for those specific purposes․ The choice of schema often depends on the intended use and the level of detail needed for accurate data representation․ A well-defined schema helps ensure data consistency and facilitates seamless integration with other systems and workflows that rely on structured metadata․

Practical Applications

XML metadata import streamlines PDF workflows, improves data integration across systems, and enhances document search and discovery capabilities․

Workflow Automation

Automating metadata import into PDFs significantly streamlines document processing․ Imagine a scenario where you receive numerous invoices as PDFs․ Manually entering all the relevant data – invoice number, date, vendor – into a database is time-consuming and error-prone․ By importing XML metadata containing this information, the process becomes automated․ The data is directly extracted from the XML and populated into your system․ This automation reduces manual intervention, minimizes human error, and boosts overall efficiency․ Consider the benefits for large-scale operations⁚ processing thousands of documents daily becomes significantly faster and more reliable․ The time saved can be redirected to higher-value tasks, ultimately increasing productivity and reducing operational costs․

Data Integration

Seamless data integration is a key advantage of leveraging XML metadata within PDFs․ Imagine a system where PDF documents, each containing rich metadata imported via XML, feed directly into a content management system or a business intelligence platform․ This eliminates the need for manual data entry and ensures consistency․ The metadata, including details like author, date, and keywords, becomes readily available for querying and analysis․ This integrated approach allows for efficient cross-referencing of information across multiple platforms․ For example, a legal firm could link case files (as PDFs with embedded metadata) to client records within their case management software․ This eliminates data silos and facilitates comprehensive reporting and analytics, improving decision-making and overall operational efficiency․

Search and Discovery

The strategic use of XML metadata significantly enhances the searchability and discoverability of PDF documents․ By embedding descriptive keywords and subject tags within the XML metadata, PDFs become easily retrievable through sophisticated search engines and content repositories․ This is particularly valuable for large collections of documents, where manual searching would be impractical․ Imagine a digital library containing thousands of research papers⁚ accurate XML metadata allows researchers to quickly locate relevant documents based on specific keywords or subject categories․ This metadata-driven search capability far surpasses simple keyword searches within the PDF text itself, enabling efficient and precise retrieval of information․ The structured nature of XML allows for more refined search queries, leading to improved search accuracy and reducing retrieval time considerably․

corsair h100i installation guide

Corsair H100i Installation⁚ A Comprehensive Guide

This guide provides a step-by-step walkthrough for installing your Corsair H100i liquid CPU cooler‚ covering everything from radiator placement to iCUE software setup. We’ll address common issues and ensure optimal cooling performance for your system. Consult the official Corsair resources for additional support and troubleshooting.

Choosing the Right Installation Orientation

Optimizing your Corsair H100i’s installation involves careful consideration of radiator placement. While flexibility exists‚ prioritizing optimal performance dictates a specific approach. For peak efficiency‚ position the radiator with its tubes at the case’s bottom (Figure 1‚ if available in your manual). This orientation naturally allows for efficient coolant flow‚ preventing air pockets and maximizing heat dissipation. However‚ alternative orientations are possible‚ including an inverted setup. Regardless of your chosen arrangement‚ a critical guideline remains⁚ the radiator’s highest point must always sit above the CPU pump’s level (Figure 2‚ if available in your manual). This prevents air from accumulating within the pump‚ which could impede performance and potentially damage the unit. Adhering to this principle ensures efficient heat transfer and consistent cooling‚ regardless of whether you opt for a standard or inverted configuration. Remember to consult your specific H100i model’s manual for detailed diagrams and further clarifications.

Understanding Backplate Installation and Potential Issues

Correctly installing the backplate is crucial for a secure and effective Corsair H100i setup. A common initial reaction is to perceive looseness after attaching the backplate to your motherboard. This is often perfectly normal. Once the cooler pump is mounted and tightened‚ it will firmly draw the backplate against the motherboard‚ applying the necessary pressure onto the CPU socket. However‚ never attempt to compensate for perceived looseness by adding extra washers or spacers. This seemingly minor adjustment significantly increases mounting pressure on the retention kit‚ risking damage to the kit itself‚ your motherboard‚ or even the CPU socket. The included instructions should provide detailed guidance for your specific motherboard type (Intel or AMD). Precise alignment is paramount; ensure the backplate’s standoffs accurately correspond to your CPU socket’s mounting holes before proceeding with the cooler’s installation. If you encounter unexpected resistance or misalignment‚ carefully double-check the backplate’s positioning and consult Corsair’s official installation guides or videos for visual assistance. Taking your time and paying close attention to detail during this phase will prevent potential complications later on.

Connecting Fans and Pump to Motherboard

Connecting the H100i’s components to your motherboard involves several steps requiring careful attention. The pump typically connects to a dedicated CPU_FAN header‚ providing power and allowing motherboard monitoring of pump speed. This header is usually clearly marked in your motherboard’s manual. Crucially‚ ensure the pump’s connector is securely seated; loose connections can lead to malfunction. The fans‚ similarly‚ usually connect to 4-pin PWM headers. Your motherboard may have multiple fan headers; choose ones that aren’t already in use by other case fans or components‚ to avoid conflicts and ensure sufficient power. Consult your motherboard’s documentation to identify suitable headers. If your H100i includes a fan and lighting controller‚ connect it according to the provided instructions. This may involve connecting to both a CPU_FAN header and a USB2.0 header. Some advanced motherboards offer specialized fan controllers; refer to your motherboard’s manual for optimal configuration and to ensure correct PWM control over fan speeds. For proper lighting functionality‚ check whether the controller also needs a connection to a SATA power connector‚ if such an option is available. Incorrectly connecting the fans‚ pump‚ or controller can result in reduced cooling efficiency‚ malfunctioning RGB effects‚ or even damage to the components; Always double-check all connections before powering on your system.

Installing the Radiator⁚ Optimal Placement

Correct radiator placement is crucial for efficient heat dissipation. Ideally‚ position the radiator in a location with ample airflow‚ allowing fans to draw cool air and exhaust warm air effectively. The most common and often recommended orientation places the radiator with its tubes positioned at the bottom of your case. This arrangement ensures that air bubbles within the coolant loop remain at the highest point‚ away from the pump‚ promoting optimal performance and preventing potential issues. However‚ various orientations might be possible depending on your case’s design and other components. Ensure sufficient clearance around the radiator for unobstructed airflow. Avoid placing it in areas with restricted airflow‚ such as behind other components that might impede the fans or block the radiator’s fins. Remember to check for adequate space between the radiator and other parts of your case to prevent interference. Improper placement can lead to reduced cooling performance‚ increased noise levels due to restricted airflow‚ and potential overheating. Before securing the radiator‚ double-check its position to ensure it’s correctly aligned and offers optimal airflow. Consult your case’s manual for recommendations on suitable radiator mounting locations to maximize cooling performance and ensure compatibility.

iCUE Software Setup and Customization

The Corsair iCUE software unlocks the full potential of your H100i‚ enabling comprehensive monitoring and customization. Download and install the latest version of iCUE from the official Corsair website. Once installed‚ launch the software and allow it to detect your connected devices. The software will automatically recognize your H100i‚ displaying real-time temperature readings and pump speed. iCUE provides granular control over your cooler’s performance. Adjust the fan curves to optimize cooling based on CPU temperature. You can set custom profiles for different usage scenarios‚ such as gaming or general use. For example‚ you can configure quieter operation during less demanding tasks and ramp up the fan speeds for more intensive workloads. Beyond performance adjustments‚ iCUE offers extensive RGB lighting customization. Choose from a vast selection of preset lighting effects or create your own custom patterns and color schemes. Sync your H100i’s lighting with other compatible Corsair peripherals for a cohesive aesthetic. Experiment with different lighting modes to personalize your PC’s look and feel. Regular updates to iCUE often introduce new features and enhancements‚ so check for updates periodically to ensure you have access to the latest capabilities. Utilize the software’s intuitive interface to explore all its options and tailor your H100i’s settings to match your preferences.

Troubleshooting Common Installation Problems

During the Corsair H100i installation‚ several issues might arise. One common problem is a loose backplate after initial motherboard installation. The cooler pump‚ once tightened‚ usually resolves this; however‚ never add extra washers or spacers‚ as this can damage components. If fans aren’t spinning‚ check connections to the motherboard’s CPU_FAN or OPT_FAN headers. Ensure the power supply is sufficient and the cables are securely connected. Poor cooling performance might indicate improper mounting. Double-check the cooler’s contact with the CPU; insufficient thermal paste can affect cooling efficiency. If the pump isn’t working‚ verify its connection and check for any obstructions. Incorrect software settings can also hinder performance. Consult the iCUE software for proper configuration and fan curve adjustments. Inconsistent lighting effects may stem from faulty RGB connections or software glitches. Check all cable connections and update the iCUE software to the latest version. If problems persist after these checks‚ refer to Corsair’s official support documentation or contact their customer service for assistance. They offer comprehensive troubleshooting guides and resources to resolve installation challenges. Remember to consult the manual provided with your specific H100i model‚ as variations exist across different versions.

Using the Included Washers and Spacers

The Corsair H100i package includes various washers and spacers crucial for proper installation and preventing damage to your CPU and motherboard. These components ensure the cooler mounts securely and evenly‚ distributing pressure correctly. The washers provide a smooth surface between the mounting hardware and the cooler‚ preventing scratches or damage to the components. The spacers maintain the correct distance between the cooler and the motherboard‚ preventing excessive pressure on the CPU socket and ensuring proper thermal contact. Incorrect use of these components can lead to improper mounting pressure‚ potentially bending pins on the CPU or causing damage to the motherboard. Always refer to the included installation guide for the precise placement and orientation of each washer and spacer. This guide provides diagrams illustrating the correct configuration for your specific motherboard socket type (Intel or AMD). Failure to use the washers and spacers correctly can result in suboptimal performance due to inadequate thermal contact between the cooler and the CPU. Never attempt to substitute these components with alternative hardware‚ as this may compromise the integrity of the mounting system and void your warranty. If you encounter any difficulties identifying or using the included components‚ consult Corsair’s online resources or contact their support team for assistance.

Connecting the iCUE LINK Cable (If Applicable)

The iCUE LINK cable‚ if included with your Corsair H100i model‚ is essential for enabling advanced features and control through the Corsair iCUE software. This cable connects the cooler’s integrated components‚ such as the pump and fans‚ to a compatible iCUE-enabled device‚ usually a Commander CORE or a motherboard with a dedicated iCUE LINK header. The connection process usually involves plugging one end of the cable into the designated port on your cooler and the other end into the corresponding port on your iCUE-enabled device. Ensure a secure connection; loose connections can result in intermittent functionality or failure to detect the cooler in the iCUE software. Incorrectly connecting the iCUE LINK cable might lead to malfunctioning RGB lighting‚ fan speed irregularities‚ or even prevent the pump from operating correctly. Before connecting‚ carefully examine both the cooler and the iCUE-enabled device to locate the correct ports for the iCUE LINK cable. Refer to your cooler’s manual and the iCUE software documentation for visual aids and detailed instructions. If you encounter difficulty‚ consult Corsair’s online resources or contact their support team for assistance in troubleshooting any connection problems. Proper installation of the iCUE LINK cable unlocks the full potential of your Corsair H100i‚ providing access to customizable lighting effects‚ performance monitoring‚ and fan curve adjustments within the iCUE software.

Installing the Controller (If Included)

Some Corsair H100i models include a fan and lighting controller‚ offering centralized management of your cooler’s components. If your kit includes a controller (often the Commander CORE)‚ installation is straightforward. Begin by identifying a suitable location within your PC case for mounting the controller. Many controllers utilize adhesive backing for easy installation to a convenient and accessible area inside your case. Before adhering the controller‚ ensure the chosen surface is clean and dry. Once mounted‚ carefully connect the necessary cables. This typically involves connecting the PWM and LED cables from your fans to the corresponding ports on the controller. The controller will also require a connection to your motherboard’s USB 2.0 header and a power connection (usually SATA). Refer to your controller’s included documentation for specific port identification. Improper connection of these cables could result in fan malfunctions or lighting issues. After connecting all cables‚ securely route them within your case to avoid obstructing airflow or other components. Once all connections are complete‚ power up your system. The iCUE software (if installed) should automatically detect the controller and the connected fans‚ allowing you to configure fan speeds‚ lighting profiles‚ and other settings. If the controller is not detected‚ check all connections and consult Corsair’s support resources for troubleshooting assistance. Proper installation and configuration of the controller will optimize your cooler’s performance and enhances its aesthetic appeal.

AMD Socket Installation

Installing the Corsair H100i on an AMD socket involves a few key steps. First‚ ensure your motherboard is properly grounded to prevent static electricity damage. Then‚ carefully remove the existing CPU cooler‚ paying attention to the retention mechanism specific to your AMD socket type (AM4‚ etc.). Locate the AMD mounting bracket included with your H100i kit. This bracket is specifically designed for AMD sockets and will secure the cooler to the motherboard. Align the bracket with the corresponding mounting points on your motherboard and gently press it into place. The bracket usually has a simple push-and-click mechanism. Next‚ apply the thermal paste to the top of your CPU. A small pea-sized amount is usually sufficient. Too much thermal paste can hinder performance. Carefully position the H100i pump assembly over the CPU‚ ensuring it aligns correctly with the mounting bracket. Once aligned‚ use the provided screws to secure the pump assembly. Tighten the screws evenly to avoid warping the motherboard or damaging the CPU. Over-tightening can also lead to CPU damage. Once the pump is securely fastened‚ connect the pump power cable to a suitable motherboard header. This is usually a CPU_FAN header‚ but consult your motherboard’s manual for the correct header. Finally‚ connect the radiator fans to the appropriate fan headers on your motherboard. If using a fan controller included with your cooler‚ connect the fans to that first‚ then the controller to the motherboard. Double-check all connections before powering on your system. Refer to the Corsair installation guide for detailed diagrams and instructions specific to your AMD socket type. Always consult your motherboard’s manual for additional guidance and compatibility information.

Intel Socket Installation

Installing the Corsair H100i on an Intel socket requires careful attention to detail. Begin by grounding yourself to prevent electrostatic discharge (ESD) damage to your components. Remove the existing CPU cooler‚ noting the retention mechanism for your specific Intel socket type (LGA 115x‚ LGA 1200‚ LGA 1700‚ etc.). Locate the Intel mounting bracket provided with your H100i kit; this bracket is crucial for securing the cooler to the motherboard. Align the bracket with the corresponding mounting holes on your motherboard‚ ensuring a snug and secure fit. Apply a small amount of thermal paste (pea-sized) to the top surface of your CPU; excessive thermal paste can impede performance. Gently place the H100i pump assembly onto the CPU‚ aligning it precisely with the mounting bracket. Use the included screws to firmly secure the pump assembly; tighten these screws evenly to avoid any warping or damage to the motherboard or CPU. Over-tightening can lead to irreversible damage. Connect the pump’s power cable to a suitable header on your motherboard; this is often a CPU_FAN header but consult your motherboard’s manual. Connect the radiator fans to appropriate fan headers. If using an included fan controller‚ connect fans to the controller first and then the controller to the motherboard. Before powering on‚ double-check all connections. Refer to the Corsair installation guide for detailed diagrams tailored to your Intel socket type. Your motherboard’s manual offers additional guidance and compatibility information. Remember to consult Corsair’s official resources for any further assistance or troubleshooting.

Utilizing Official Corsair Resources

For comprehensive support and detailed instructions beyond this guide‚ leverage Corsair’s official resources. Their website offers extensive documentation‚ including downloadable PDF manuals specific to your H100i model. These manuals provide detailed diagrams‚ step-by-step instructions‚ and troubleshooting tips tailored to various motherboard and CPU socket types. Videos are also often available‚ walking you through the installation process visually. These videos can be exceptionally helpful for clarifying steps or addressing specific concerns. Don’t hesitate to utilize Corsair’s online knowledge base; this searchable database contains answers to frequently asked questions (FAQs) and solutions to common installation problems. If you encounter difficulties not addressed in the documentation or videos‚ contact Corsair’s customer support directly. They offer various support channels‚ including email‚ phone‚ and live chat. Providing your model number and clear descriptions of the issue will expedite their response. Remember to include any relevant images or screenshots to aid their troubleshooting efforts. Proactive use of Corsair’s official resources can significantly enhance your installation experience and ensure optimal performance of your H100i cooler. Their support team is knowledgeable and readily available to assist you with any installation-related challenges.

air compressor 919.165310 manual

Craftsman 919.165310 Air Compressor Manual⁚ A Comprehensive Guide

This guide provides essential information for your Craftsman 919.165310 air compressor. Find setup instructions, troubleshooting tips for common issues like no compressed air, and details on sourcing replacement parts. Safety precautions and maintenance are also covered.

Safety Precautions and Operating Instructions

Before operating your Craftsman 919.165310 air compressor, carefully review the safety instructions in the owner’s manual. Always ensure the unit is placed in a clean, dry, and well-ventilated area, at least 12 inches away from walls or obstructions to allow for proper airflow. Keep the air filter clear of debris to maintain optimal performance. Never operate the compressor while fatigued or under the influence of alcohol or drugs. Maintain a safe distance from moving parts during operation. Keep children and pets away from the operating area at all times. Disconnect the power cord before performing any maintenance or repairs. Use caution when handling compressed air; it can cause serious injury if misused. Inspect the power cord and plug regularly for damage and replace if necessary. Always use a properly rated circuit breaker or fuse for the compressor’s power requirements. Regularly check the pressure gauge and ensure it does not exceed the maximum operating pressure. Follow the manufacturer’s instructions for proper shutdown procedures to prevent damage to the compressor. If you experience any unusual noises or vibrations during operation, immediately turn off the compressor and inspect for any potential problems before resuming use. Remember, safety is paramount; always prioritize safe operating practices to prevent accidents.

Location and Setup Requirements for Optimal Performance

Optimal performance of your Craftsman 919.165310 air compressor hinges on proper placement and setup. Select a location that’s clean, dry, and well-ventilated to prevent overheating and ensure efficient operation. Adequate ventilation is crucial for dissipating heat generated during use. The area should be free from flammable materials and away from sources of ignition. Ensure sufficient space around the compressor (at least 12 inches from walls and obstacles) to allow for unimpeded airflow. This prevents restriction and ensures the unit runs at peak efficiency. A level surface is essential for stable operation and to prevent vibrations. Before connecting the power cord, carefully inspect it for any signs of damage. Use a properly grounded electrical outlet that meets the compressor’s power requirements. Refer to the owner’s manual for detailed specifications regarding voltage and amperage. Avoid overloading the electrical circuit by running other high-demand appliances simultaneously. Once correctly positioned and connected, inspect the air filter to ensure it’s clean and free from obstructions. A clogged air filter will significantly reduce the compressor’s efficiency and performance. Proper setup is key for longevity and optimal performance of your Craftsman 919.165310 air compressor.

Troubleshooting Common Issues⁚ No Compressed Air

If your Craftsman 919.165310 air compressor fails to produce compressed air, systematic troubleshooting is crucial. Begin by checking the power supply⁚ ensure the unit is properly plugged into a functioning electrical outlet and the circuit breaker hasn’t tripped. Inspect the power cord for any visible damage or loose connections. Next, examine the air filter; a clogged filter restricts airflow, hindering compression. Clean or replace the filter as needed. Check the pressure switch⁚ a malfunctioning pressure switch may prevent the compressor from starting or cycling correctly. If the problem persists, inspect the air hose for leaks or blockages. A damaged or poorly connected hose can prevent air delivery. Carefully check all connections, ensuring they are securely fastened and airtight. Consider the possibility of internal issues. A faulty piston, worn rings, or a damaged valve plate can significantly impact performance. If you’re unfamiliar with internal components, consult the owner’s manual or seek professional assistance. Examine the pressure gauge; if it doesn’t register pressure, this indicates a critical problem within the compressor’s mechanism. Before attempting any internal repairs, disconnect the power supply to prevent electrical shock. If you are unable to resolve the issue after performing these checks, it’s advisable to contact a qualified repair technician or refer to the official Craftsman service network for assistance.

Finding and Downloading the Official Manual

Locating the official Craftsman 919.165310 air compressor manual might require a multifaceted approach. Start by checking the Sears Parts Direct website; this is a primary source for Craftsman manuals and parts diagrams. Enter the model number (919.165310) into their search engine, and hopefully, a downloadable PDF version of the manual will be available. If Sears Parts Direct doesn’t have the manual, consider exploring alternative online resources. Websites like ManualsOnline often host a vast library of user manuals for various appliances and power tools. Search their database using the model number; if the manual is available, you can download it as a PDF. Another avenue is contacting Craftsman customer support directly. Their customer service representatives can guide you toward obtaining a digital copy of the manual or possibly even provide a physical copy if available. Remember to specify the model number precisely (919.165310) to avoid confusion. Online forums dedicated to power tools and DIY projects might also be helpful. Users in these communities may have shared links to manuals or possess personal copies they’re willing to share. Finally, consider checking third-party retailer websites where the compressor was originally purchased. Some retailers provide online access to manuals for products they sell, often linked directly to the product page.

Accessing Parts Diagrams and Repair Information

Obtaining parts diagrams and repair information for your Craftsman 919.165310 air compressor is crucial for successful repairs and maintenance. The primary resource should be the official Craftsman website or Sears Parts Direct. These platforms often provide detailed exploded-view diagrams showcasing every component of the air compressor, allowing for easy identification of individual parts. These diagrams usually include part numbers, facilitating ordering replacements directly from the manufacturer or authorized dealers. Beyond the official sources, several third-party websites specialize in providing parts diagrams and repair information for various power tools and appliances. Many of these websites are searchable by model number, providing access to diagrams and potentially repair guides or troubleshooting advice. When using third-party sources, ensure the website’s legitimacy and reliability, as inaccurate information could hinder your repair efforts. In addition to online resources, consider consulting repair manuals specific to air compressors. These manuals often include detailed instructions and diagrams for common repairs, providing valuable guidance. Remember that attempting complex repairs without proper knowledge can lead to further damage or safety hazards. If uncertain, seeking professional assistance from a qualified technician is recommended. Always use genuine Craftsman parts to maintain the air compressor’s performance and warranty validity. Improperly fitted or low-quality parts can compromise functionality and safety.

Sourcing Replacement Parts⁚ Authorized Dealers and Online Resources

Locating replacement parts for your Craftsman 919.165310 air compressor can be accomplished through various channels. Authorized Craftsman dealers are a reliable starting point. These dealers carry genuine Craftsman parts, ensuring compatibility and quality. They often provide expert advice on part selection and can assist with troubleshooting issues. However, authorized dealers may not always be conveniently located or offer the most competitive pricing. Online retailers represent another avenue for sourcing parts. Websites like Sears Parts Direct, often associated with Craftsman, offer a wide selection of parts and detailed diagrams to aid in identification. Numerous other online retailers specialize in power tool and appliance parts, providing alternative sources and potentially better prices. When ordering online, carefully verify the part number to ensure compatibility with your specific Craftsman 919.165310 model. Read customer reviews and ratings to gauge the seller’s reliability and shipping practices. Consider factors such as shipping costs and return policies when making your decision. For less common or obsolete parts, contacting specialized repair shops or online forums dedicated to air compressors might yield results. These communities can offer advice on finding hard-to-source components. Always prioritize reputable sellers to avoid counterfeit or inferior parts that could compromise the air compressor’s performance and safety. Remember to keep a record of your purchases for warranty purposes;

Understanding Air Compressor Components and Their Functions

The Craftsman 919.165310 air compressor, like most, comprises several key components working in concert to deliver compressed air. The motor is the powerhouse, converting electrical energy into mechanical motion. This drives the pump, the heart of the system, responsible for drawing in and compressing air. The pump’s design (likely a piston or diaphragm type) dictates its efficiency and longevity. Compressed air then travels through a discharge valve, regulating its flow into the air tank. This tank stores compressed air, acting as a reservoir for consistent pressure and to lessen the motor’s workload by allowing it to cycle on and off less frequently. A pressure switch monitors the tank pressure, cycling the motor on when pressure drops below a set point and off when it reaches the maximum. A pressure regulator, if included, allows for the adjustment of the output air pressure. Safety features, such as a pressure relief valve (which releases excess pressure if it exceeds the safe limit), are crucial for preventing accidents. The air filter cleans incoming air, protecting the pump from dust and debris. Finally, the necessary fittings and hoses facilitate the connection to pneumatic tools or equipment. Understanding each component’s function helps in diagnosing problems, performing routine maintenance, and maximizing the lifespan of your Craftsman 919.165310 air compressor. Regular inspection of these parts is crucial for safe and efficient operation.

Maintenance and Regular Servicing Procedures

Regular maintenance is crucial for the longevity and optimal performance of your Craftsman 919.165310 air compressor. Begin by consulting your owner’s manual for specific recommendations tailored to your model. A key aspect is the air filter; replace it regularly, as a clogged filter restricts airflow and strains the pump. The frequency depends on usage and environmental conditions—check it monthly, and replace it as needed. Inspect the pressure switch and pressure relief valve; ensure they operate correctly and aren’t obstructed. Periodically drain any accumulated moisture from the air tank; water can cause corrosion and reduce efficiency. For oil-lubricated compressors, check and change the oil according to the manufacturer’s recommendations. Listen for unusual noises during operation—rattling or knocking can indicate internal problems requiring professional attention. Regularly inspect all hoses and fittings for wear and tear; replace any damaged components immediately. External cleaning is also vital; dust and debris can accumulate, hindering performance and potentially causing overheating. Ensure the compressor is properly grounded to prevent electrical hazards. Finally, never attempt repairs unless you possess the necessary skills and tools. For significant problems, consult a qualified technician. By adhering to these simple maintenance procedures, you’ll maximize the lifespan and reliability of your Craftsman 919.165310 air compressor, ensuring many years of trouble-free operation.

Warranty Information and Customer Support

Understanding your Craftsman 919.165310 air compressor’s warranty is crucial. The warranty period and coverage details are typically outlined in the owner’s manual, which should be readily accessible either physically or online through Sears Parts Direct or a similar retailer. This document will specify the length of the warranty (often a limited period, such as one or two years), what components are covered (typically excluding wear-and-tear items like belts or hoses), and any conditions that might void the warranty (like unauthorized repairs or misuse). Keep your proof of purchase readily available, as this is necessary to make a warranty claim. Should you encounter problems during the warranty period, contact Craftsman customer support immediately. They can guide you through the claims process, potentially offering repair or replacement services. After the warranty expires, you’re responsible for repairs, though authorized repair centers or parts suppliers can still assist. Always note model and serial numbers when contacting support for quicker processing of your request. Sears Parts Direct is a useful resource for locating authorized service centers near you, as well as ordering parts for post-warranty repairs. Maintaining thorough records of maintenance and any issues encountered will be beneficial if you need to pursue warranty claims or obtain assistance later. Proactive maintenance, as described in your manual, can help minimize the need for warranty claims and extend the life of your compressor.

Safety Features and Their Importance

Your Craftsman 919.165310 air compressor incorporates several safety features designed to protect both the user and the equipment. Understanding and utilizing these features is paramount to safe operation. The manual will detail these features, but some common elements include a thermal overload protector, which automatically shuts down the motor if it overheats, preventing damage and potential fire hazards. A pressure relief valve is another critical feature; it releases excess pressure should it build beyond a safe level within the tank, preventing dangerous ruptures. Proper grounding is essential for electrical safety, and the manual will guide you on correctly grounding the compressor to prevent electric shocks. Always ensure the air compressor is placed on a stable, level surface away from flammable materials, and never operate it in a poorly ventilated area. The air filter should be regularly inspected and cleaned, as obstructions can cause overheating. Never attempt to bypass or disable any safety mechanisms. The compressor should always be turned off and allowed to cool completely before undertaking any maintenance. Pay close attention to the warnings and instructions concerning the use of appropriate personal protective equipment (PPE), such as safety glasses and hearing protection, as these will minimize the risks associated with operating the equipment. Regularly review the safety guidelines in your owner’s manual to reinforce safe practices and prevent accidents. Remember, a well-maintained and carefully operated air compressor will provide years of reliable service.

Model-Specific Information and Variations

While the Craftsman 919.165310 air compressor shares similarities with other models in the Craftsman line, specific features and specifications may vary. This section highlights the unique characteristics of the 919.165310. Consult your owner’s manual for precise details on tank capacity, horsepower rating, maximum pressure, and duty cycle. These specifications are crucial for determining appropriate applications and avoiding overloading the compressor. The manual should clearly indicate the type of oil (if applicable) required for lubrication and the recommended maintenance schedule. Variations may exist in the placement or design of certain components, such as the pressure regulator or air filter. Understanding these variations is vital for correct operation and maintenance. The included parts diagram within your manual will be indispensable for identifying and referencing specific components of your 919.165310 model. Note that the model number might be slightly different on the machine itself than what is stated in the online documentation. If any discrepancies arise, always defer to the model number printed directly on the compressor itself. Understanding the model’s specific capabilities and limitations will ensure that it is used safely and effectively for its intended purposes. Do not attempt repairs or modifications beyond the scope of the user manual’s recommendations. Always seek professional assistance if you encounter unexpected issues or require specialized maintenance.

outlive pdf

Outlive PDF⁚ Accessibility and Formats

Numerous online platforms offer Outlive in PDF format. Access varies by subscription or purchase.

Download options include PDF, EPUB, and Kindle formats, providing flexibility for readers.

Some subscription services provide Outlive as a PDF download benefit to paid members.

Availability on Online Platforms

Determining the precise online availability of Outlive in PDF format requires a more focused search. While various sources mention PDF downloads, pinpointing specific websites offering legitimate access needs further investigation. Many mentions of PDFs are intertwined with paid subscriptions or ebook retailers, suggesting the book is not freely available as a PDF online. The prevalence of mentions regarding PDF downloads on unauthorized file-sharing sites necessitates caution to avoid copyright infringement. Always utilize official channels for acquiring the book’s digital versions to support the author and publisher. Remember to check reputable online bookstores and the author’s official website for authorized digital versions. Proceed with care and prioritize legitimate sources to avoid legal issues.

Download Options⁚ PDF, EPUB, and More

While the provided text mentions PDF downloads frequently, it doesn’t specify all officially supported formats. Besides PDF, the Kindle edition and EPUB are explicitly named. The availability of other formats like MOBI or TXT isn’t explicitly confirmed. Readers should check authorized retailers like Amazon or the publisher’s website for a comprehensive list of supported digital formats. The absence of a clear, centralized list of download options across all sources highlights the importance of checking directly with official sellers. Remember that unauthorized downloads carry the risk of malware and legal repercussions. Prioritizing official channels ensures a safe and legal acquisition of the book’s digital version in your preferred format.

Accessing Outlive through Subscription Services

The provided text snippets suggest that access to a PDF version of Outlive might be offered as a perk for subscribers to certain services. One example mentions paid subscribers receiving a PDF copy. However, the exact services offering this aren’t specified. It’s crucial to note that this is not a universally available method of accessing the book; it depends entirely on the specific subscription model. Readers interested in this option should research various online subscription services focusing on books, audiobooks, or wellness content. Be aware that terms and conditions for access will vary, including potential limitations on sharing or device compatibility with the downloaded PDF. Always check the terms of service before subscribing to any such platform for access to Outlive.

Content and Summary of Outlive

Outlive offers a comprehensive plan for a longer, healthier life, based on scientific research and actionable strategies. It challenges conventional medical thinking on aging and longevity.

Key Themes and Arguments

Central themes in Outlive revolve around proactive health management and extending lifespan. Attia challenges conventional wisdom, arguing against solely reactive healthcare. He emphasizes the importance of lifestyle choices, including diet, exercise, and stress management, in preventing chronic diseases. The book presents a data-driven approach, highlighting scientific research to support its claims. It encourages readers to take control of their health destiny, focusing on long-term well-being rather than simply treating immediate illnesses. A key argument is the need for a personalized approach to health, tailored to individual needs and circumstances, rather than a one-size-fits-all model. The science of longevity and the art of living a fulfilling life are intertwined throughout the book’s narrative.

Chapter Summaries and Key Takeaways

While specific chapter summaries aren’t readily available from the provided text, the overall takeaway emphasizes a comprehensive approach to health optimization. Outlive likely details actionable strategies in each chapter, building upon the key themes. Readers can expect detailed explanations of the science behind aging, offering insights into various health metrics. Each chapter probably focuses on a specific aspect of health, such as diet, exercise, or stress management. Key takeaways may include personalized action plans, emphasizing the importance of regular check-ups and proactive disease prevention. The book likely provides a framework for long-term health improvements, combining scientific evidence with practical advice to empower readers to take control of their well-being. The overarching message promotes a holistic approach, integrating lifestyle modifications with medical interventions.

Reviews and Expert Opinions

Outlive has garnered significant praise, achieving New York Times bestseller status. Positive feedback highlights its comprehensiveness and actionable advice. Expert endorsements, such as that from Steven D. Levitt (author of Freakonomics), lend credibility to the book’s scientific basis. Early reviews emphasize the detailed information and practical strategies presented. Descriptions of the book frequently cite its clear and thorough approach to health optimization, grounded in data and real-life applications. Commentators laud its ability to make complex information accessible and actionable, empowering readers to make informed decisions about their health. The book’s impact is described as a “groundbreaking manifesto” challenging conventional medical thinking on aging and longevity. Positive feedback consistently points to its potential to significantly improve readers’ long-term health outcomes.

Author and Background

Dr. Peter Attia, MD, is a physician and writer specializing in longevity and health optimization. His expertise underpins Outlive’s scientific rigor.

Peter Attia’s Credentials and Expertise

Dr. Peter Attia is a renowned physician with a unique background that blends medical expertise with a deep understanding of the science behind longevity. He’s not just a medical doctor; his approach is holistic and data-driven, drawing from years of research and experience. Attia’s credentials include a medical degree and extensive work in the field of preventative medicine. He’s known for his critical thinking and challenging conventional medical wisdom, which is evident in Outlive. His focus on data-driven approaches to health and longevity sets him apart, making his insights highly valuable for readers. The book’s success is partly attributed to his credible expertise and his ability to communicate complex scientific concepts in an accessible way. Attia’s dedication to improving long-term health is clearly reflected throughout Outlive. He’s not just presenting theories; he provides a practical framework for improving health outcomes based on substantial evidence.

The Book’s Reception and Impact

Outlive⁚ The Science & Art of Longevity has garnered significant praise since its release, achieving New York Times bestseller status. Leading experts in longevity, such as Steven D. Levitt (author of Freakonomics), have offered positive endorsements. Early reviews highlight the book’s comprehensive approach and actionable strategies for improving health and extending lifespan. The book’s impact extends beyond individual readers; it has spurred conversations about the limitations of conventional medical thinking regarding aging and disease prevention. Its success indicates a growing interest in proactive, data-driven health management. The detailed plan presented resonates with readers seeking tangible steps towards a healthier, longer life. Outlive’s influence is further seen in the increased discussion around its key themes within both medical and general interest circles, leading to a greater public awareness of the science of longevity.

Related Works and Further Reading

To delve deeper into the themes explored in Outlive, readers might explore other works by Peter Attia, MD. His extensive online presence, including his blog and podcast, offers additional insights into his perspectives on health and longevity. For those interested in the broader field of longevity research, exploring publications from the National Institutes of Health (NIH) and similar organizations is recommended. Books focusing on specific areas addressed in Outlive, such as nutrition, exercise physiology, and stress management, can provide further details. Additionally, exploring research on specific diseases mentioned within the context of longevity strategies could yield more in-depth understanding. Finally, seeking out reputable sources focusing on evidence-based approaches to health and wellness would complement the information presented in Outlive, providing a more holistic understanding of the subject matter.

Legal and Ethical Considerations

Respect copyright laws; obtain Outlive from legitimate sources only to avoid infringement.

Authorized retailers like Amazon and publishers’ websites are safe options for purchasing Outlive.

Downloading Outlive from unauthorized sources constitutes copyright infringement, a serious offense.

Copyright and Intellectual Property

The book “Outlive⁚ The Science & Art of Longevity” by Peter Attia, MD, is protected by copyright. Unauthorized reproduction, distribution, or sharing of the PDF version infringes upon this copyright. Copyright law grants the author and publisher exclusive rights to control how their work is used. This includes the right to create and distribute copies, which extends to digital formats like PDFs. Downloading or sharing a pirated PDF without authorization is illegal and unethical, potentially resulting in legal repercussions for those involved. Respect for intellectual property rights is crucial to supporting authors and fostering creativity. Always obtain “Outlive” from authorized sellers to ensure you’re legally accessing the content. This supports ethical practices within the publishing industry and ensures the author receives appropriate compensation for their work.

Legitimate Download Sources

To legally acquire a PDF of “Outlive,” explore reputable sources. Major online retailers like Amazon offer digital versions; check their Kindle store. Publishers’ websites often provide direct downloads or links to authorized sellers. Audible, known for audiobooks, may also offer a PDF version alongside its audio counterpart. Public libraries, increasingly offering e-books, could have “Outlive” in their digital collection. Check your local library’s online catalog. Be cautious of unofficial sites offering free downloads; these may distribute pirated copies, infringing copyright laws. Always prioritize trustworthy sources to avoid legal issues and support the author and publisher. Legitimate sellers ensure you receive an authentic copy and support ethical publishing practices. Verify the seller’s reputation before purchasing to avoid scams or illegal downloads.

Avoiding Copyright Infringement

Downloading “Outlive” PDFs from unauthorized sources constitutes copyright infringement, a serious legal offense. Respect intellectual property rights by obtaining the book through official channels. Downloading pirated copies not only violates copyright laws but also harms the author and publisher, depriving them of rightful compensation for their work. Remember that sharing or distributing illegally obtained copies is equally illegal and carries significant penalties. Always purchase from reputable online retailers or directly from the publisher’s website. Public libraries are another excellent resource, offering legitimate access to digital books. If unsure about a source’s legitimacy, err on the side of caution. Avoid websites or platforms that offer free downloads of copyrighted material, as these are likely to be illegal. By supporting ethical acquisition methods, you demonstrate respect for intellectual property and contribute to a sustainable publishing environment.

Practical Applications and Use

Outlive offers actionable health strategies; readers can personalize plans based on individual needs.

The book encourages readers to adapt the provided strategies to fit their specific circumstances.

By implementing Outlive’s advice, readers aim for improved health and longevity.

Implementing Outlive’s Strategies

Peter Attia’s “Outlive” provides a detailed, science-backed framework for improving health and extending lifespan. The book isn’t just theoretical; it’s packed with practical, actionable steps readers can integrate into their lives. These range from dietary adjustments and exercise recommendations to stress management techniques and sleep optimization. The PDF format allows for easy referencing and highlighting of key strategies. Readers can create personalized plans, focusing on areas needing the most attention. Successful implementation requires commitment and consistency. Regular review of the PDF can help maintain focus and track progress towards achieving long-term health goals. Remember, the information is a guide; individual needs vary. Consult with healthcare professionals for personalized advice before making significant lifestyle changes.

Personalizing the Outlive Plan

While “Outlive” offers a comprehensive roadmap, personalization is key. The PDF format facilitates this; readers can annotate, highlight, and create customized plans. Consider individual health conditions, genetic predispositions, and lifestyle factors. Dietary recommendations can be adapted to personal preferences and dietary restrictions. Exercise routines should be adjusted based on fitness levels and physical limitations. Stress management techniques may need tailoring to individual coping mechanisms. The book’s emphasis on data-driven decisions empowers readers to monitor their progress and adjust strategies as needed. Regular self-assessment and consultation with healthcare providers ensure the plan remains aligned with individual goals and health status. Remember, the journey towards longevity is unique; personalize your approach for optimal results.

Long-Term Health Benefits and Outcomes

Implementing the strategies outlined in Outlive‘s PDF can lead to significant long-term health improvements. Reduced risk of chronic diseases, such as heart disease, type 2 diabetes, and certain cancers, is a primary benefit. Improved cardiovascular health, including lower blood pressure and cholesterol levels, is often observed. Increased physical fitness and improved mental well-being are also common outcomes. Enhanced cognitive function and reduced age-related cognitive decline are potential long-term effects. Improved sleep quality and reduced stress levels contribute to overall health and longevity. The long-term effects are not solely physical; the book’s emphasis on mindful living and stress management promotes emotional and mental resilience. By consistently following the personalized plan, individuals can expect a higher quality of life and increased lifespan. The potential for these positive outcomes underscores the value of Outlive‘s comprehensive approach.