Welcome! This guide provides all necessary information to operate your Handy Heater Pure Warmth effectively. Please read all instructions before using your new personal space heater. This manual will help you with setup‚ operation‚ and safety guidelines‚ ensuring a safe and enjoyable experience.
The Handy Heater Pure Warmth is a compact‚ portable ceramic heater designed to provide efficient and localized heating. Utilizing advanced thermo-ceramic technology‚ this device quickly transforms cold‚ chilly areas into warm‚ cozy spaces‚ covering up to 250 square feet. It’s an ideal solution for personal heating needs‚ offering a convenient way to stay comfortable during colder months. This heater is engineered for simplicity and ease of use‚ making it a perfect addition to any home or office setting. Its portable design allows it to be moved to wherever it is needed‚ while its energy-efficient operation helps minimize electricity consumption. The Handy Heater Pure Warmth aims to be your personal heating solution‚ providing warmth whenever and wherever you need it. This guide will cover all aspects of using this heater effectively.
Key Features and Benefits
The Handy Heater Pure Warmth boasts several key features‚ making it a standout personal heating solution. Its advanced ceramic heating technology allows for rapid heating‚ quickly warming any space up to 250 square feet. The unit’s compact and portable design makes it easy to move from room to room. It features a built-in timer that can automatically shut off the unit after a set period‚ increasing safety and energy efficiency. The exterior remains cool to the touch‚ even at the highest setting‚ preventing accidental burns. The heater also promotes comfortable air quality by gently warming the air without drying it out‚ helping to avoid dry and irritated skin. This efficient heater provides an affordable and convenient way to keep warm during the cold winter months‚ and with its adjustable thermostat‚ you are always in control of your comfort.
Unboxing and Initial Setup
Upon receiving your Handy Heater Pure Warmth‚ carefully unpack the box and remove all packaging materials. Verify that all components are present‚ including the heater unit and instruction manual. Before plugging in the unit‚ ensure that the outlet voltage corresponds to the voltage stated on the heater’s rating label. Place the heater on a flat‚ dry‚ and stable surface. Do not place the heater on carpet or soft materials that could block airflow. Position the heater away from flammable materials‚ curtains‚ and furniture. Examine the power cord and plug for any damage. Once you have verified that everything is in good order‚ plug the power cord into the outlet. Now‚ you are ready to start using your Handy Heater Pure Warmth. Always read the instruction manual completely before using the heater for the first time.
Operating Procedures
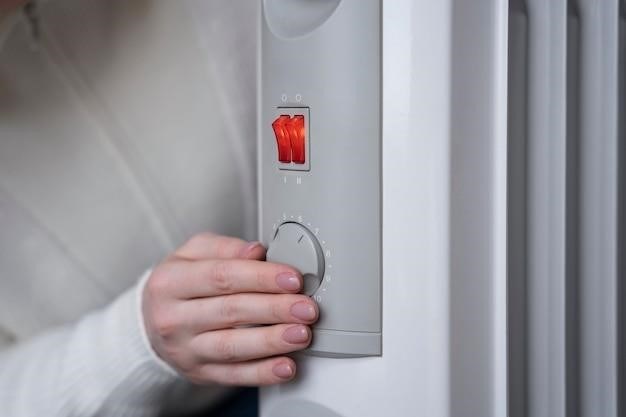
To begin using your Handy Heater Pure Warmth‚ first‚ locate the power switch at the back of the unit and turn it to the “on” position. The heater will default to the HIGH speed setting. To adjust the heat settings‚ use the control buttons to select your desired temperature level. The Handy Heater Pure Warmth is designed to provide concentrated heat quickly and efficiently. It also features a built-in timer function that allows you to automatically turn the unit off after a set amount of time. To use the timer‚ press the timer button and select the desired duration. The heater will continue to operate until the timer expires. Remember to always supervise the heater while it is in use. After use‚ turn the power switch to the “off” position and unplug the unit from the outlet.
Powering On and Off
To power on your Handy Heater Pure Warmth‚ first ensure that the unit is placed on a flat‚ dry‚ and even surface. Then‚ plug the power cord into a compatible electrical outlet. Locate the main power switch‚ typically found at the back of the unit. Flip this switch to the “on” position. Upon activation‚ the heater will default to its high-speed setting‚ immediately beginning to produce heat. To power off the Handy Heater‚ simply flip the main power switch to the “off” position. Once the unit is off‚ it is recommended to unplug the power cord from the outlet. This ensures the heater is completely disconnected from the power source. Always wait for the unit to cool down before moving or storing it.
Adjusting Heat Settings
The Handy Heater Pure Warmth is designed with adjustable heat settings to provide personalized comfort. By default‚ when the unit is powered on‚ it starts at the high-speed setting‚ delivering maximum heat output. To adjust the heat settings‚ you will typically find buttons or controls on the unit’s interface. These controls allow you to cycle through different heat levels‚ usually including options for high and low heat output. Some models may also include a medium setting‚ offering more flexibility in temperature regulation. Select the desired heat level based on your needs. It is important to note that the heating process uses ceramic technology‚ which helps maintain moisture in the air‚ preventing dryness. If you require less heat‚ switch to a lower setting to reduce energy consumption while maintaining comfort. Always monitor the heater and adjust settings as needed for optimal use.
Using the Timer Function
The Handy Heater Pure Warmth includes a convenient timer function that allows you to set the duration for which the heater will operate before automatically shutting off. This feature is particularly useful for energy saving and safety. To activate the timer‚ locate the timer button on the control panel of your heater. Pressing this button will generally allow you to select the desired run time‚ which could range from 1 to 12 hours depending on the model. Often‚ each press of the button increases the timer by an hour. Once the set time has elapsed‚ the heater will automatically turn off‚ providing peace of mind and conserving energy. The timer setting can be adjusted whenever needed. This timer function is designed for ease of use and helps prevent the heater from running unnecessarily‚ making it a user-friendly feature. Always ensure proper setting based on your needs.
Safety Guidelines
Prioritizing safety is crucial when using the Handy Heater Pure Warmth. Always ensure the heater is placed on a flat‚ stable‚ and dry surface to prevent it from tipping over‚ which could be a fire hazard. Never leave the heater unattended while in operation‚ especially around children and pets. The unit gets hot during use‚ so avoid touching the hot surfaces to prevent burns; always use the handle when moving it. Ensure the heater’s power cord is not damaged and is connected to an appropriate power outlet with the correct voltage. Avoid using extension cords‚ as they can cause overheating. Do not cover the heater or block its air vents‚ as this can lead to overheating and potential damage. Keep flammable materials away from the heater. Always unplug the heater before cleaning or maintenance. If any unusual sounds or malfunctions occur‚ stop using the heater immediately and consult the troubleshooting section. Following these guidelines will help ensure safe and reliable operation.

Avoiding Burns
The Handy Heater Pure Warmth is designed to provide efficient heating‚ but its surfaces can become hot during operation. It is essential to take precautions to avoid burns. Never touch the heater’s grille or any other hot surface with bare skin while it is in use or immediately after being turned off. Allow the unit to cool completely before handling or moving it. Always use the handle provided to move the heater. Keep children and pets at a safe distance from the heater to prevent accidental contact with hot surfaces. Do not place any objects on the heater that could become heated and cause burns. Be especially careful when adjusting the heater or its settings‚ ensuring your hands are not exposed to hot areas. Educate all household members about these safety precautions to prevent accidental burns. Remember‚ the ceramic heating element gets very hot‚ and proper handling is crucial to your safety. Always prioritize caution when operating the heater.

Proper Placement
To ensure the safe and effective operation of your Handy Heater Pure Warmth‚ proper placement is crucial. Always place the heater on a flat‚ dry‚ and stable surface. Avoid placing it on soft or uneven surfaces‚ such as carpets or bedding‚ which can obstruct airflow and cause overheating. Make sure there is adequate space around the heater‚ at least one foot in all directions‚ to allow for proper air circulation. Do not place the heater near flammable materials‚ such as curtains‚ furniture‚ or paper. Keep the heater away from water sources and avoid using it in bathrooms or other humid areas. Ensure that the power cord is not stretched or running under rugs or other objects‚ as this could pose a fire hazard. When selecting a location‚ consider the proximity to outlets and ensure the voltage corresponds to the heater’s rating. By placing the heater correctly‚ you can maximize its performance and minimize potential hazards.

General Safety Precautions
Always unplug the Handy Heater Pure Warmth when not in use and before cleaning. Never insert foreign objects into the heater’s openings‚ as this could cause damage or electric shock. Do not operate the heater with a damaged cord or plug. If the heater malfunctions‚ do not attempt to repair it yourself; contact a qualified technician. This heater is intended for indoor use only and is designed for personal space heating. Avoid using the heater in areas with high humidity or around water sources‚ such as bathrooms. When moving the heater‚ always use the handle‚ and avoid touching hot surfaces. Keep the heater away from children and pets. Ensure the heater is not covered or blocked by any items‚ as this may lead to overheating. Do not use this heater with an extension cord. Always use a grounded outlet. By following these general safety precautions‚ you can ensure the safe and reliable operation of your Handy Heater Pure Warmth. Remember‚ safety is paramount.
Cleaning and Maintenance
To keep your Handy Heater Pure Warmth functioning properly‚ regular cleaning and maintenance are essential. Before starting any cleaning process‚ ensure the heater is unplugged and completely cooled down. Use a soft‚ non-abrasive‚ damp cloth to wipe the exterior of the heater. If needed‚ you can use a mild soap‚ but ensure it is completely rinsed off. Avoid getting any water inside the heater. Do not use harsh chemicals or abrasive cleaners‚ as they may damage the surface. Regularly check the air vents to ensure they are free from dust and debris. You can use a vacuum cleaner with a brush attachment to remove dust from the vents. Do not attempt to open the heater casing for cleaning; this could damage the internal components. Store the heater in a dry place when not in use. Proper cleaning and maintenance will prolong the life of your Handy Heater and ensure safe and efficient operation. Always refer to the manual for detailed instructions and never use the heater if it is damaged. Remember to clean the unit frequently to ensure optimum performance.
Troubleshooting Common Issues
If your Handy Heater Pure Warmth is not functioning correctly‚ there are a few common issues you can check before seeking professional help. First‚ ensure the unit is properly plugged into a functioning power outlet. Verify that the power switch at the back of the unit is in the ‘ON’ position. If the heater is not producing heat‚ check that the thermostat is set to your desired level. If the heater turns off unexpectedly‚ it might be due to the built-in timer; check the timer settings. Also‚ ensure that the air vents are not blocked‚ as this can cause overheating and automatic shut-off. If the unit is making unusual noises‚ unplug it and check for any loose parts or obstructions inside the vents. If the issue persists after checking these points‚ consult the manual or contact customer support for further assistance. Do not attempt to repair the heater yourself‚ as this may void the warranty and create a safety hazard. Always unplug the heater before troubleshooting‚ and never use the heater if it is damaged or not functioning correctly. These steps will help you identify and resolve the most common issues.
Technical Specifications
The Handy Heater Pure Warmth is designed as a portable‚ personal space heater with specific technical attributes. This model operates on standard household voltage‚ ensuring compatibility with most electrical outlets. It features a ceramic heating element‚ which provides efficient and rapid heating. The heater has a power output of 1200W or 1500W‚ depending on the specific model‚ and is designed to heat spaces up to 250 square feet. The unit includes an adjustable thermostat allowing users to customize the heat output. A programmable timer is integrated‚ enabling automatic shut-off after a set period‚ ranging from 1 to 12 hours. The dimensions of the heater are approximately 16 x 17 x 17 cm and it weighs around 900 grams‚ making it easily portable. The heater also has built-in safety features‚ including overheat protection; The power cord is designed for safe operation‚ and the exterior of the heater remains cool to the touch‚ even at the highest setting. These specifications ensure efficient‚ safe‚ and convenient personal heating.

Warranty Information
The Handy Heater Pure Warmth comes with a limited warranty‚ typically covering manufacturing defects and malfunctions. This warranty usually extends for a period of one year from the date of purchase. It is essential to retain your purchase receipt or proof of purchase‚ as this is required to validate your warranty claim. The warranty covers the repair or replacement of defective parts‚ provided the unit has been used according to the instructions in the manual. Damages resulting from misuse‚ neglect‚ unauthorized repairs‚ or accidents are typically not covered under the warranty. For warranty service‚ you may need to contact the manufacturer’s customer service department or the retailer from whom you purchased the product. Before initiating a warranty claim‚ it is advisable to consult the troubleshooting section of this manual‚ as some issues can be resolved without requiring warranty service. Additionally‚ consider consulting the manufacturer’s website for specific warranty details‚ including the terms and conditions specific to your purchase. Proper handling and care of your Handy Heater Pure Warmth are crucial for maintaining warranty validity.