
Corsair H100i Installation⁚ A Comprehensive Guide
This guide provides a step-by-step walkthrough for installing your Corsair H100i liquid CPU cooler‚ covering everything from radiator placement to iCUE software setup. We’ll address common issues and ensure optimal cooling performance for your system. Consult the official Corsair resources for additional support and troubleshooting.
Choosing the Right Installation Orientation
Optimizing your Corsair H100i’s installation involves careful consideration of radiator placement. While flexibility exists‚ prioritizing optimal performance dictates a specific approach. For peak efficiency‚ position the radiator with its tubes at the case’s bottom (Figure 1‚ if available in your manual). This orientation naturally allows for efficient coolant flow‚ preventing air pockets and maximizing heat dissipation. However‚ alternative orientations are possible‚ including an inverted setup. Regardless of your chosen arrangement‚ a critical guideline remains⁚ the radiator’s highest point must always sit above the CPU pump’s level (Figure 2‚ if available in your manual). This prevents air from accumulating within the pump‚ which could impede performance and potentially damage the unit. Adhering to this principle ensures efficient heat transfer and consistent cooling‚ regardless of whether you opt for a standard or inverted configuration. Remember to consult your specific H100i model’s manual for detailed diagrams and further clarifications.
Understanding Backplate Installation and Potential Issues
Correctly installing the backplate is crucial for a secure and effective Corsair H100i setup. A common initial reaction is to perceive looseness after attaching the backplate to your motherboard. This is often perfectly normal. Once the cooler pump is mounted and tightened‚ it will firmly draw the backplate against the motherboard‚ applying the necessary pressure onto the CPU socket. However‚ never attempt to compensate for perceived looseness by adding extra washers or spacers. This seemingly minor adjustment significantly increases mounting pressure on the retention kit‚ risking damage to the kit itself‚ your motherboard‚ or even the CPU socket. The included instructions should provide detailed guidance for your specific motherboard type (Intel or AMD). Precise alignment is paramount; ensure the backplate’s standoffs accurately correspond to your CPU socket’s mounting holes before proceeding with the cooler’s installation. If you encounter unexpected resistance or misalignment‚ carefully double-check the backplate’s positioning and consult Corsair’s official installation guides or videos for visual assistance. Taking your time and paying close attention to detail during this phase will prevent potential complications later on.
Connecting Fans and Pump to Motherboard
Connecting the H100i’s components to your motherboard involves several steps requiring careful attention. The pump typically connects to a dedicated CPU_FAN header‚ providing power and allowing motherboard monitoring of pump speed. This header is usually clearly marked in your motherboard’s manual. Crucially‚ ensure the pump’s connector is securely seated; loose connections can lead to malfunction. The fans‚ similarly‚ usually connect to 4-pin PWM headers. Your motherboard may have multiple fan headers; choose ones that aren’t already in use by other case fans or components‚ to avoid conflicts and ensure sufficient power. Consult your motherboard’s documentation to identify suitable headers. If your H100i includes a fan and lighting controller‚ connect it according to the provided instructions. This may involve connecting to both a CPU_FAN header and a USB2.0 header. Some advanced motherboards offer specialized fan controllers; refer to your motherboard’s manual for optimal configuration and to ensure correct PWM control over fan speeds. For proper lighting functionality‚ check whether the controller also needs a connection to a SATA power connector‚ if such an option is available. Incorrectly connecting the fans‚ pump‚ or controller can result in reduced cooling efficiency‚ malfunctioning RGB effects‚ or even damage to the components; Always double-check all connections before powering on your system.

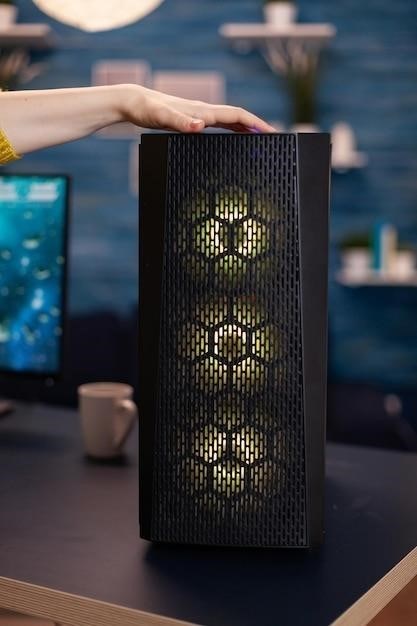
Installing the Radiator⁚ Optimal Placement
Correct radiator placement is crucial for efficient heat dissipation. Ideally‚ position the radiator in a location with ample airflow‚ allowing fans to draw cool air and exhaust warm air effectively. The most common and often recommended orientation places the radiator with its tubes positioned at the bottom of your case. This arrangement ensures that air bubbles within the coolant loop remain at the highest point‚ away from the pump‚ promoting optimal performance and preventing potential issues. However‚ various orientations might be possible depending on your case’s design and other components. Ensure sufficient clearance around the radiator for unobstructed airflow. Avoid placing it in areas with restricted airflow‚ such as behind other components that might impede the fans or block the radiator’s fins. Remember to check for adequate space between the radiator and other parts of your case to prevent interference. Improper placement can lead to reduced cooling performance‚ increased noise levels due to restricted airflow‚ and potential overheating. Before securing the radiator‚ double-check its position to ensure it’s correctly aligned and offers optimal airflow. Consult your case’s manual for recommendations on suitable radiator mounting locations to maximize cooling performance and ensure compatibility.
iCUE Software Setup and Customization
The Corsair iCUE software unlocks the full potential of your H100i‚ enabling comprehensive monitoring and customization. Download and install the latest version of iCUE from the official Corsair website. Once installed‚ launch the software and allow it to detect your connected devices. The software will automatically recognize your H100i‚ displaying real-time temperature readings and pump speed. iCUE provides granular control over your cooler’s performance. Adjust the fan curves to optimize cooling based on CPU temperature. You can set custom profiles for different usage scenarios‚ such as gaming or general use. For example‚ you can configure quieter operation during less demanding tasks and ramp up the fan speeds for more intensive workloads. Beyond performance adjustments‚ iCUE offers extensive RGB lighting customization. Choose from a vast selection of preset lighting effects or create your own custom patterns and color schemes. Sync your H100i’s lighting with other compatible Corsair peripherals for a cohesive aesthetic. Experiment with different lighting modes to personalize your PC’s look and feel. Regular updates to iCUE often introduce new features and enhancements‚ so check for updates periodically to ensure you have access to the latest capabilities. Utilize the software’s intuitive interface to explore all its options and tailor your H100i’s settings to match your preferences.
Troubleshooting Common Installation Problems
During the Corsair H100i installation‚ several issues might arise. One common problem is a loose backplate after initial motherboard installation. The cooler pump‚ once tightened‚ usually resolves this; however‚ never add extra washers or spacers‚ as this can damage components. If fans aren’t spinning‚ check connections to the motherboard’s CPU_FAN or OPT_FAN headers. Ensure the power supply is sufficient and the cables are securely connected. Poor cooling performance might indicate improper mounting. Double-check the cooler’s contact with the CPU; insufficient thermal paste can affect cooling efficiency. If the pump isn’t working‚ verify its connection and check for any obstructions. Incorrect software settings can also hinder performance. Consult the iCUE software for proper configuration and fan curve adjustments. Inconsistent lighting effects may stem from faulty RGB connections or software glitches. Check all cable connections and update the iCUE software to the latest version. If problems persist after these checks‚ refer to Corsair’s official support documentation or contact their customer service for assistance. They offer comprehensive troubleshooting guides and resources to resolve installation challenges. Remember to consult the manual provided with your specific H100i model‚ as variations exist across different versions.
Using the Included Washers and Spacers
The Corsair H100i package includes various washers and spacers crucial for proper installation and preventing damage to your CPU and motherboard. These components ensure the cooler mounts securely and evenly‚ distributing pressure correctly. The washers provide a smooth surface between the mounting hardware and the cooler‚ preventing scratches or damage to the components. The spacers maintain the correct distance between the cooler and the motherboard‚ preventing excessive pressure on the CPU socket and ensuring proper thermal contact. Incorrect use of these components can lead to improper mounting pressure‚ potentially bending pins on the CPU or causing damage to the motherboard. Always refer to the included installation guide for the precise placement and orientation of each washer and spacer. This guide provides diagrams illustrating the correct configuration for your specific motherboard socket type (Intel or AMD). Failure to use the washers and spacers correctly can result in suboptimal performance due to inadequate thermal contact between the cooler and the CPU. Never attempt to substitute these components with alternative hardware‚ as this may compromise the integrity of the mounting system and void your warranty. If you encounter any difficulties identifying or using the included components‚ consult Corsair’s online resources or contact their support team for assistance.
Connecting the iCUE LINK Cable (If Applicable)
The iCUE LINK cable‚ if included with your Corsair H100i model‚ is essential for enabling advanced features and control through the Corsair iCUE software. This cable connects the cooler’s integrated components‚ such as the pump and fans‚ to a compatible iCUE-enabled device‚ usually a Commander CORE or a motherboard with a dedicated iCUE LINK header. The connection process usually involves plugging one end of the cable into the designated port on your cooler and the other end into the corresponding port on your iCUE-enabled device. Ensure a secure connection; loose connections can result in intermittent functionality or failure to detect the cooler in the iCUE software. Incorrectly connecting the iCUE LINK cable might lead to malfunctioning RGB lighting‚ fan speed irregularities‚ or even prevent the pump from operating correctly. Before connecting‚ carefully examine both the cooler and the iCUE-enabled device to locate the correct ports for the iCUE LINK cable. Refer to your cooler’s manual and the iCUE software documentation for visual aids and detailed instructions. If you encounter difficulty‚ consult Corsair’s online resources or contact their support team for assistance in troubleshooting any connection problems. Proper installation of the iCUE LINK cable unlocks the full potential of your Corsair H100i‚ providing access to customizable lighting effects‚ performance monitoring‚ and fan curve adjustments within the iCUE software.
Installing the Controller (If Included)
Some Corsair H100i models include a fan and lighting controller‚ offering centralized management of your cooler’s components. If your kit includes a controller (often the Commander CORE)‚ installation is straightforward. Begin by identifying a suitable location within your PC case for mounting the controller. Many controllers utilize adhesive backing for easy installation to a convenient and accessible area inside your case. Before adhering the controller‚ ensure the chosen surface is clean and dry. Once mounted‚ carefully connect the necessary cables. This typically involves connecting the PWM and LED cables from your fans to the corresponding ports on the controller. The controller will also require a connection to your motherboard’s USB 2.0 header and a power connection (usually SATA). Refer to your controller’s included documentation for specific port identification. Improper connection of these cables could result in fan malfunctions or lighting issues. After connecting all cables‚ securely route them within your case to avoid obstructing airflow or other components. Once all connections are complete‚ power up your system. The iCUE software (if installed) should automatically detect the controller and the connected fans‚ allowing you to configure fan speeds‚ lighting profiles‚ and other settings. If the controller is not detected‚ check all connections and consult Corsair’s support resources for troubleshooting assistance. Proper installation and configuration of the controller will optimize your cooler’s performance and enhances its aesthetic appeal.
AMD Socket Installation
Installing the Corsair H100i on an AMD socket involves a few key steps. First‚ ensure your motherboard is properly grounded to prevent static electricity damage. Then‚ carefully remove the existing CPU cooler‚ paying attention to the retention mechanism specific to your AMD socket type (AM4‚ etc.). Locate the AMD mounting bracket included with your H100i kit. This bracket is specifically designed for AMD sockets and will secure the cooler to the motherboard. Align the bracket with the corresponding mounting points on your motherboard and gently press it into place. The bracket usually has a simple push-and-click mechanism. Next‚ apply the thermal paste to the top of your CPU. A small pea-sized amount is usually sufficient. Too much thermal paste can hinder performance. Carefully position the H100i pump assembly over the CPU‚ ensuring it aligns correctly with the mounting bracket. Once aligned‚ use the provided screws to secure the pump assembly. Tighten the screws evenly to avoid warping the motherboard or damaging the CPU. Over-tightening can also lead to CPU damage. Once the pump is securely fastened‚ connect the pump power cable to a suitable motherboard header. This is usually a CPU_FAN header‚ but consult your motherboard’s manual for the correct header. Finally‚ connect the radiator fans to the appropriate fan headers on your motherboard. If using a fan controller included with your cooler‚ connect the fans to that first‚ then the controller to the motherboard. Double-check all connections before powering on your system. Refer to the Corsair installation guide for detailed diagrams and instructions specific to your AMD socket type. Always consult your motherboard’s manual for additional guidance and compatibility information.
Intel Socket Installation
Installing the Corsair H100i on an Intel socket requires careful attention to detail. Begin by grounding yourself to prevent electrostatic discharge (ESD) damage to your components. Remove the existing CPU cooler‚ noting the retention mechanism for your specific Intel socket type (LGA 115x‚ LGA 1200‚ LGA 1700‚ etc.). Locate the Intel mounting bracket provided with your H100i kit; this bracket is crucial for securing the cooler to the motherboard. Align the bracket with the corresponding mounting holes on your motherboard‚ ensuring a snug and secure fit. Apply a small amount of thermal paste (pea-sized) to the top surface of your CPU; excessive thermal paste can impede performance. Gently place the H100i pump assembly onto the CPU‚ aligning it precisely with the mounting bracket. Use the included screws to firmly secure the pump assembly; tighten these screws evenly to avoid any warping or damage to the motherboard or CPU. Over-tightening can lead to irreversible damage. Connect the pump’s power cable to a suitable header on your motherboard; this is often a CPU_FAN header but consult your motherboard’s manual. Connect the radiator fans to appropriate fan headers. If using an included fan controller‚ connect fans to the controller first and then the controller to the motherboard. Before powering on‚ double-check all connections. Refer to the Corsair installation guide for detailed diagrams tailored to your Intel socket type. Your motherboard’s manual offers additional guidance and compatibility information. Remember to consult Corsair’s official resources for any further assistance or troubleshooting.
Utilizing Official Corsair Resources
For comprehensive support and detailed instructions beyond this guide‚ leverage Corsair’s official resources. Their website offers extensive documentation‚ including downloadable PDF manuals specific to your H100i model. These manuals provide detailed diagrams‚ step-by-step instructions‚ and troubleshooting tips tailored to various motherboard and CPU socket types. Videos are also often available‚ walking you through the installation process visually. These videos can be exceptionally helpful for clarifying steps or addressing specific concerns. Don’t hesitate to utilize Corsair’s online knowledge base; this searchable database contains answers to frequently asked questions (FAQs) and solutions to common installation problems. If you encounter difficulties not addressed in the documentation or videos‚ contact Corsair’s customer support directly. They offer various support channels‚ including email‚ phone‚ and live chat. Providing your model number and clear descriptions of the issue will expedite their response. Remember to include any relevant images or screenshots to aid their troubleshooting efforts. Proactive use of Corsair’s official resources can significantly enhance your installation experience and ensure optimal performance of your H100i cooler. Their support team is knowledgeable and readily available to assist you with any installation-related challenges.