
Choosing the Right Angle
Selecting the correct sharpening angle is crucial for a sharp‚ durable edge. Different knives require different angles; research your knife type for optimal results. A consistent angle throughout the sharpening process is essential for even bevel creation.
Understanding Knife Blade Angles
Knife blade angles significantly impact sharpness and durability. The angle‚ measured from the flat of the blade to the edge‚ determines the bevel’s geometry. Steeper angles (e.g.‚ 20-25 degrees) create stronger‚ more robust edges ideal for heavy-duty tasks‚ while shallower angles (e.g.‚ 15-20 degrees) result in sharper‚ more delicate edges suited for fine work. The choice depends on the knife’s intended use. Incorrect angles lead to uneven sharpening‚ dullness‚ or even damage to the blade. Using a sharpening jig helps maintain a consistent angle‚ crucial for achieving a superior edge. Proper angle selection is paramount for effective knife sharpening. Experimentation might be needed to determine optimal angles for specific knife types and materials. A consistent angle throughout the process ensures even wear and a lasting sharp edge.
Common Angles for Different Knife Types
The ideal sharpening angle varies depending on the knife type and its intended use. Chef’s knives generally benefit from a 20-degree angle‚ balancing sharpness and durability. Paring knives‚ used for delicate tasks‚ often perform best with a slightly shallower angle of 15 degrees‚ enhancing precision. Robust utility knives or hunting knives might use a steeper 25-degree angle for enhanced strength and resilience against heavy use. Japanese knives frequently employ angles as low as 10-15 degrees‚ prioritizing exceptional sharpness for slicing. The chosen angle significantly impacts the edge’s performance. Experimentation or research specific to your knife’s design and material will help optimize sharpening results. A well-chosen angle‚ consistently maintained during sharpening‚ is key to achieving peak performance. Remember to consider the material of the blade; harder steel may require slightly less aggressive angles.
Designing Your Angle Guide
Careful planning is key. Choose appropriate materials—wood is common‚ but consider sturdiness and ease of working. Design for adjustability to accommodate various blade angles and thicknesses.
Materials and Tools
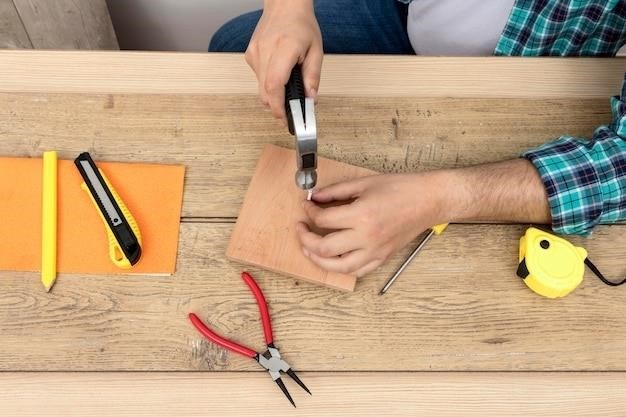
The materials you’ll need depend on your design‚ but common choices include various types of wood (hardwoods are preferable for durability)‚ plywood for strength and stability‚ and possibly metal for added rigidity in certain components. Consider using a metal rod or bolt for the angle adjustment mechanism. For the base‚ a sturdy piece of wood or a flat‚ stable surface like a piece of granite or glass could be employed. You’ll also need sandpaper for smoothing and finishing. Secure the chosen material with screws‚ bolts‚ or strong adhesive. Tools required include a saw (hand saw‚ jigsaw‚ or chop saw)‚ a drill‚ measuring tools (ruler‚ tape measure‚ possibly a protractor for precise angle marking)‚ clamps to hold pieces together during assembly‚ sandpaper of varying grits for smoothing surfaces and removing burrs‚ and potentially a file or rasp for shaping wood. If using metal components‚ you’ll need appropriate tools for working with metal‚ like a hacksaw and possibly a file or grinder.
Building the Base
The base of your knife sharpening angle guide needs to be sturdy and stable to prevent wobbling during sharpening. A solid piece of hardwood‚ at least ½ inch thick‚ is recommended. The dimensions will depend on the size of your sharpening stones or sandpaper and the overall design of your jig. Ensure the base is perfectly flat and level. You may need to use a planer or sandpaper to achieve this. If using wood‚ consider adding non-slip material‚ such as rubber feet or cork‚ to the bottom of the base to enhance stability and prevent it from sliding on your work surface. For added stability and durability‚ especially if using softer woods‚ consider laminating multiple layers of wood together. Precise measurements and careful cutting are vital; use a saw appropriate for the chosen material to ensure clean‚ accurate cuts. Before proceeding to the next stage‚ double-check that the base is square and free from any imperfections that could affect the accuracy of the angle guide.
Creating the Angle Adjustment Mechanism
The angle adjustment mechanism is the heart of your knife sharpening jig‚ allowing you to precisely set and maintain the sharpening angle. Several approaches exist. A simple yet effective method involves using a pivot point‚ such as a bolt or screw‚ allowing the blade-holding component to rotate. For precise angle settings‚ incorporate a protractor or angle finder directly into the design. This allows for accurate measurements and repeatability. Another option is a system of adjustable blocks or wedges that can be tightened to hold the blade at the desired angle. Consider using threaded rods or knobs for finer adjustments. For added stability‚ use strong‚ durable materials such as metal or high-quality hardwood for the moving parts. Ensure smooth‚ friction-free movement for consistent angle maintenance. Accurate angle adjustment is vital for consistent sharpening results‚ so meticulous construction of this mechanism is crucial.
Securing the Blade
Secure blade clamping is paramount. Clamps‚ screws‚ or magnets offer reliable solutions. Ensure a firm‚ yet adjustable‚ grip to prevent slippage during sharpening.
Using Clamps or Screws
For a robust and adjustable knife securing mechanism within your sharpening jig‚ consider employing clamps or screws. Clamps offer a quick and easy method for securing the blade‚ allowing for simple adjustments as needed throughout the sharpening process. This is particularly advantageous when working with knives of varying thicknesses or sizes. However‚ ensure the clamps are appropriately sized to firmly hold the knife without damaging its surface or applying excessive pressure. Alternatively‚ screws provide a more permanent solution. They allow for precise positioning of the knife within the jig‚ ensuring consistent angle maintenance during the entire sharpening operation. To ensure a secure fit‚ countersink the screw heads to prevent interference with the sharpening stone and maintain a smooth surface. The choice between clamps and screws depends on your preferences and the specific requirements of your jig design. Carefully consider the clamping force to prevent blade damage. Remember to always prioritize safety.
Magnetic Blade Holders
Integrating magnetic blade holders into your knife sharpening jig offers a compelling alternative to clamps or screws. This method provides a secure and convenient way to hold the blade at the desired angle while ensuring effortless placement and removal. Strong neodymium magnets are ideal for this application‚ offering exceptional holding power even for heavier blades. Strategically position the magnets within the jig to create a stable platform that securely holds the blade without excessive pressure. Consider using a soft material‚ such as rubber or silicone‚ between the magnets and the blade to prevent scratches or damage to the knife’s finish. This approach eliminates the need for complex fastening mechanisms‚ streamlining the sharpening process while minimizing the risk of marring the blade’s surface. The magnetic hold is particularly beneficial for quick adjustments during sharpening‚ making it a user-friendly option for both beginners and experienced sharpeners. Ensure the magnets are sufficiently strong to reliably hold various knife types.
Sharpening Techniques
Mastering consistent angle maintenance during sharpening is key. Utilize sharpening stones or sandpaper for effective blade honing. Practice makes perfect; refine your technique for optimal results.
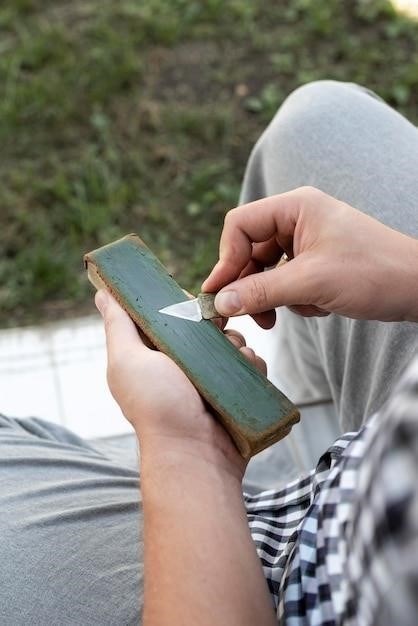
Using a Sharpening Stone
Sharpening stones offer a versatile approach to knife sharpening‚ allowing for precise control and edge refinement. The process involves maintaining a consistent angle against the stone’s surface‚ employing a smooth‚ controlled motion. Begin with coarser grit stones to remove significant imperfections and progress to finer grits for a polished edge. Proper lubrication with water or oil is crucial to prevent overheating and maintain a smooth sharpening experience. The angle of the knife relative to the stone is paramount; slight adjustments may be necessary based on the blade’s condition and desired sharpness. Remember to consistently monitor the angle to ensure even sharpening across the entire blade length‚ avoiding uneven wear or damage. A steady hand and patience are key for achieving optimal results when using a sharpening stone.
Using Sandpaper
Sandpaper‚ particularly wet-or-dry varieties‚ provides a cost-effective and accessible alternative for knife sharpening. Its abrasive nature effectively removes material‚ creating a sharp edge. Similar to using sharpening stones‚ maintaining a consistent angle is crucial for achieving even sharpening across the blade. Start with coarser grit sandpaper for initial shaping and gradually progress to finer grits for a refined edge. Secure the sandpaper to a flat‚ stable surface to prevent slippage during the sharpening process. Apply even pressure and use smooth‚ controlled strokes to avoid gouging or uneven sharpening. Remember that water lubrication can significantly improve the sharpening process by reducing friction and preventing overheating. Regularly inspect the blade for any unevenness and adjust the angle or pressure as needed. The key to success with sandpaper is patience and consistent angle maintenance.
Maintaining Consistent Angle During Sharpening
Maintaining a consistent angle is paramount for achieving a sharp‚ even edge. Inconsistent angles result in uneven sharpening‚ potentially weakening the blade. Using a sharpening jig or guide ensures a constant angle throughout the process‚ eliminating guesswork and promoting efficiency. Visual cues‚ like marking the bevel with a marker‚ can help maintain consistency during freehand sharpening. Practice and patience are key; focus on smooth‚ even strokes‚ avoiding jerky movements that disrupt the angle. Regularly check the blade’s edge during sharpening for any inconsistencies. A consistent sharpening angle ensures a symmetrical bevel‚ resulting in a stronger‚ more durable edge that lasts longer between sharpenings. Proper technique and the use of guiding tools are crucial for success.
Testing and Refinement
Test the guide’s effectiveness by sharpening a blade. Assess the sharpness and evenness of the edge. Adjust the angle or design as needed for optimal results. Repeat testing until satisfied.
Adjusting the Angle for Optimal Results
Achieving the perfect sharpening angle is key to a razor-sharp blade. The ideal angle varies depending on the knife type and intended use. Experiment with slight angle adjustments‚ perhaps in increments of 1-2 degrees‚ to find the sweet spot for your particular knife and sharpening technique. Observe the resulting edge after each adjustment – a well-honed blade will effortlessly slice through paper. Don’t be afraid to meticulously refine your angle. A slightly steeper angle can provide greater durability‚ while a shallower angle might result in a sharper but potentially more fragile edge. The goal is to strike a balance between sharpness and resilience. Remember to maintain consistent pressure and even strokes throughout the sharpening process to ensure an even bevel. Regularly inspect the blade during sharpening to monitor progress and identify any inconsistencies. Once you find the ideal angle‚ make a note of it for future reference. With practice‚ you’ll develop a keen sense for the optimal angle for various knife types.
Improving the Guide’s Design
After initial testing‚ evaluate your knife sharpening angle guide’s performance and identify areas for improvement. Consider the guide’s stability; a wobbly base will compromise accuracy. Reinforce weak points with additional supports or bracing. If the angle adjustment mechanism is difficult to use‚ explore alternative designs for smoother‚ more precise adjustments. Perhaps a fine-tuning mechanism‚ like a screw-based adjustment‚ would offer greater control. Assess the blade clamping mechanism; is it secure enough to prevent slippage during sharpening? If not‚ stronger clamps or magnets might be necessary. Think about material choices; using a harder‚ more durable material for the base could enhance longevity. Experiment with different abrasive attachment methods to ensure consistent contact and prevent premature wear. User feedback is invaluable; solicit opinions from others who use your guide to identify further improvements. Document your design modifications and their effects on sharpening performance to inform future iterations. The process of refinement is iterative; embrace continuous improvement through testing and feedback.