valve guide reamers

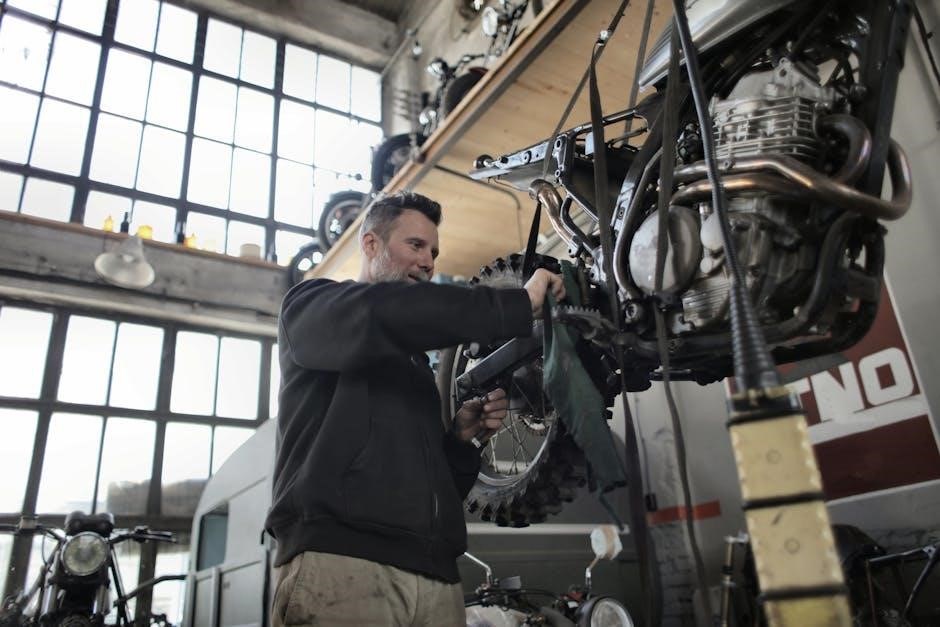
Valve guide reamers are specialized tools used to resize valve guides in engines, ensuring proper valve stem seals and optimal engine performance. They play a crucial role in maintaining engine health by enabling precise guide resizing, which prevents excessive oil consumption and potential engine damage. Regular use of reamers helps mechanics achieve professional results, making them an essential component in engine repair and maintenance routines.

1.1 Definition and Purpose

Valve guide reamers are precision tools designed to accurately resize valve guides in internal combustion engines. Their primary purpose is to restore worn or damaged valve guides to the correct diameter, ensuring proper clearance for the valve stem. This process is essential for maintaining optimal engine performance, as improper valve guide clearance can lead to oil consumption, smoke emissions, and potential engine damage. By using a valve guide reamer, mechanics can achieve precise resizing, ensuring the valve operates smoothly and efficiently. Regular maintenance with these tools helps extend engine lifespan and prevents costly repairs. The reamer’s design allows for controlled material removal, making it a critical component in engine overhaul and repair processes.

1.2 Importance in Engine Maintenance

Valve guide reamers are vital for maintaining engine health by ensuring proper valve guide clearance, which prevents excessive oil consumption and reduces emissions. Worn valve guides can lead to oil leakage into the combustion chamber, causing blue smoke from the exhaust and decreased engine performance. Reaming restores the guide to its original specification, ensuring the valve stem seals properly and maintains efficient combustion. This process is crucial for preventing premature engine wear and improving overall engine efficiency. Regular use of valve guide reamers helps extend the lifespan of the engine and avoids costly repairs associated with damaged valves or guides. Properly maintained valve guides contribute to smoother engine operation, reduced oil consumption, and enhanced reliability.

Design and Construction of Valve Guide Reamers

Valve guide reamers are precision tools made from high-carbon steel or tungsten, designed for durability and accuracy. Their construction features ergonomic handles and cutting edges.

2.1 Materials Used

Valve guide reamers are typically constructed from high-carbon steel or tungsten carbide, materials known for their durability and ability to maintain sharp cutting edges. These materials ensure precision and longevity, allowing the reamers to withstand the rigors of frequent use in engine maintenance. The use of tungsten carbide, in particular, enhances the tool’s resistance to wear and tear, making it ideal for reaming operations. Proper material selection is crucial to ensure the reamer performs effectively, avoiding damage to the valve guide and maintaining engine performance. The choice of material directly impacts the tool’s efficiency and the quality of the reaming process.

2.2 Types of Reamers Available

Valve guide reamers come in various types to cater to different engine requirements and maintenance scenarios. The most common types include piloted reamers, which use a pilot to guide the tool through the valve guide, ensuring precise alignment. Fluted reamers are another popular option, featuring multiple cutting edges for efficient material removal. Additionally, adjustable reamers allow mechanics to fine-tune the diameter, offering flexibility for different valve guide sizes. Each type is designed to address specific challenges, such as repairing worn guides or achieving tighter tolerances. The choice of reamer depends on the engine’s specifications and the extent of the repair needed. Using the correct type ensures optimal results and extends engine lifespan. Proper selection is vital for effective valve guide maintenance.

How to Choose the Right Valve Guide Reamer

Selecting the right valve guide reamer involves understanding valve guide sizes and matching them to your engine’s specifications. Consider the type of reamer, such as piloted or fluted, to ensure proper alignment and efficient material removal. Additionally, think about the valve guide material, as different reamers are suited for specific materials like bronze. Always refer to your engine’s manual for exact measurements and compatibility to avoid misalignment or damage. Proper selection ensures optimal performance and extends engine lifespan.

3.1 Understanding Valve Guide Sizes

Valve guide sizes are critical for proper engine function, as they must align precisely with valve stems. Improper sizing leads to excessive wear, oil leakage, and reduced performance. Guides come in various diameters, typically measured in inches or millimeters, and must match the valve stem’s dimensions. For instance, a 0.5-inch guide is common in small engines, while larger engines may require 0.7-inch or more. Material thickness also varies, with bronze guides often being thicker for durability. Mechanics should use precision tools to measure existing guides accurately before selecting a reamer, ensuring a snug fit to prevent wobbling. Correct sizing ensures smooth operation and longevity of engine components.

3.2 Selecting the Correct Type for Your Engine

Choosing the right valve guide reamer depends on your engine’s specific needs. Reamers come in various types, including manual, piloted, and electric models, each suited for different scenarios. Manual reamers are cost-effective and ideal for small engines or occasional use, while piloted reamers offer greater precision, especially for worn or misaligned guides. Electric reamers are best for professionals or high-volume repairs due to their efficiency and speed. Consider the valve guide material (e.g., bronze or steel) and the engine’s specifications when selecting. Proper fitment ensures accurate resizing and prevents damage. Always consult your engine’s manual or a mechanic for guidance to avoid costly mistakes. This step is crucial for maintaining engine performance and longevity.

Installation and Usage Guidelines

Proper installation involves aligning the reamer correctly and using cutting oil. Rotate clockwise for precise resizing. Follow safety guidelines to avoid engine damage.

4.1 Step-by-Step Installation Process

The installation of a valve guide reamer requires careful preparation and execution. Begin by ensuring the engine is cool to avoid accidental start-ups. Remove the valves to access the guides fully. Apply cutting oil to the reamer and guide to reduce friction and prevent damage. Align the reamer with the valve guide, ensuring it is straight and properly seated. Slowly rotate the reamer clockwise while applying gentle pressure, maintaining steady control throughout the process. Continue until the guide reaches the desired size. After reaming, inspect the area for debris and clean thoroughly. Reinstall the valves and test the engine to ensure proper function. Always follow manufacturer instructions for specific tools and techniques.

4.2 Safety Precautions and Best Practices

When using a valve guide reamer, prioritize safety to avoid accidents and ensure effective results. Always wear protective gear, including gloves and safety goggles, to prevent injury from debris. Apply cutting oil to the reamer and guide to reduce friction and prevent overheating. Avoid using high-speed tools, as this can damage the guide or cause the reamer to slip. Keep the work area clean and well-lit to maintain visibility. Never force the reamer through the guide, as this can lead to misalignment or breakage. After reaming, inspect the area for debris and clean thoroughly before reassembling the engine. Follow the manufacturer’s instructions and consider consulting a professional if unsure. Proper technique prevents damage and ensures long-term engine performance. Ignoring safety protocols can result in costly repairs or personal injury.

Maintenance and Care of Valve Guide Reamers

Regularly clean and store valve guide reamers in a dry place to prevent rust. Apply cutting oil to maintain sharpness and extend tool life. Proper care ensures precision and durability.

5.1 Cleaning and Storage Tips

Proper cleaning and storage of valve guide reamers are essential to maintain their effectiveness. After use, coat the reamer with cutting oil to prevent rust and store it in a dry place. Avoid exposing the tool to harsh chemicals or extreme temperatures, as this can damage the material. Regularly inspect the reamer for signs of wear or damage and replace it if necessary. Store the reamer in a protective case or pouch to avoid accidental damage. Following these tips ensures the tool remains sharp and functional for future use, extending its lifespan and maintaining precision.

5.2 Troubleshooting Common Issues

When using valve guide reamers, common issues include improper sizing, excessive wear, or damage to the tool. If the reamer binds or stalls, it may indicate incorrect alignment or insufficient lubrication. To address this, ensure the reamer is properly seated and apply cutting oil generously. If the guide becomes oversized, it may require replacement. Dull reamers can be sharpened or replaced to maintain precision. Always check for debris or contamination in the valve guide before reaming. For damaged or worn reamers, consult the manufacturer for repair or replacement options. Regular maintenance and inspection can prevent many of these issues, ensuring optimal performance and longevity of both the tool and the engine. Proper handling and storage also play a key role in avoiding common problems.

Benefits and Drawbacks of Using Valve Guide Reamers

Valve guide reamers ensure precise sizing and improved engine performance but require skill and caution. Misuse can lead to engine damage, highlighting the need for expertise.

6.1 Advantages in Engine Performance

Valve guide reamers significantly enhance engine performance by ensuring precise resizing of valve guides, which improves valve stem sealing and reduces oil consumption. Properly reamed guides prevent excessive wear, minimizing the risk of engine damage. This process also ensures smoother engine operation by maintaining optimal valve alignment and reducing friction. Additionally, reaming helps restore original specifications, which is crucial for high-performance engines. By addressing worn or oversized guides, reamers contribute to better combustion efficiency and reduced emissions. Overall, using valve guide reamers is a cost-effective way to maintain engine health and ensure longevity, making them a vital tool for mechanics and engine enthusiasts alike. Regular use can prevent costly repairs and keep engines running at peak performance.

6.2 Potential Risks and Limitations

While valve guide reamers are essential for engine maintenance, their misuse can lead to significant risks. Improper reaming techniques may result in oversizing the guides, causing irreversible damage. This can lead to costly repairs, as replacing valve guides and stems may be necessary. Additionally, using low-quality reamers can introduce scratches or uneven surfaces, affecting valve performance. Over-reaming can weaken the guide’s structural integrity, potentially leading to engine failure. Furthermore, reaming without proper lubrication can generate excessive heat, damaging both the tool and the engine component. It is crucial to follow precise guidelines and use high-quality tools to mitigate these risks and ensure successful engine maintenance. Proper training and experience are recommended to avoid such complications.

Related Tools and Equipment

Pilot reamers ensure proper alignment, while honing tools refine valve guide surfaces for precise fitting. Additional equipment like hand drills and stabilizers aid in accurate reaming processes.

7.1 Pilot Reamers and Their Role

Pilot reamers are essential in valve guide maintenance, ensuring accurate alignment before reaming. They create a precise pilot hole, guiding the reamer for optimal results. This prevents misalignment, which could damage the engine. By stabilizing the reaming process, pilot reamers reduce the risk of uneven surfaces, ensuring smoother valve operation. Their role is critical for maintaining engine performance and longevity; Regular use of pilot reamers contributes to proper valve guide resizing, preventing issues like oil leakage and poor compression. They are a vital tool in any engine repair kit, offering reliability and precision in valve guide maintenance procedures.

7.2 Honing Tools for Valve Guides

Honing tools are used to finish and refine the surface of valve guides after reaming, ensuring a smooth and precise fit for the valve stem. These tools remove minor imperfections and create a polished surface, which improves lubrication and reduces wear on moving parts. Honing is typically done after reaming to achieve the final dimensions and surface finish. The process involves using an abrasive stone or diamond-coated tool to gently remove material, resulting in a high-quality finish. Proper honing ensures optimal valve guide performance, preventing issues like excessive oil consumption and poor engine compression. Honing tools are essential for maintaining engine efficiency and extending the lifespan of valve train components. Regular use of these tools helps mechanics achieve professional-grade results in engine repairs.

Frequently Asked Questions

  • Do I really need a valve guide reamer? Yes, it ensures proper valve alignment and prevents engine damage.
  • What should I replace while reaming? Typically, valve seals and guides may need replacement depending on wear;

8.1 Do I Really Need a Valve Guide Reamer?

Whether you need a valve guide reamer depends on the condition of your engine’s valve guides. If guides are worn or damaged, a reamer is essential for resizing them to ensure proper valve alignment and sealing. Without resizing, worn guides can lead to oil leakage, increased emissions, and reduced engine performance. Mechanics often recommend reaming during valve repairs to maintain precise tolerances. However, if guides are in excellent condition, reaming may not be necessary. Always consult a professional or service manual to determine the best course of action for your specific engine needs.

8.2 What Should I Replace While Reaming?

While reaming valve guides, it is often necessary to replace several components to ensure optimal engine performance. Valve stem seals are typically replaced to prevent oil leakage and wear. If the guides are severely damaged, new valve guides should be installed after reaming. Additionally, inspect and replace any worn or damaged valve guide seals, as they are critical for maintaining proper engine operation. In some cases, the valves themselves may need replacement if they are no longer seating properly. Always check for wear on the valve seats and guides, and consult a service manual for specific recommendations tailored to your engine. Replacing these components during reaming helps ensure a proper seal and prevents future issues.

Valve guide reamers are essential tools for maintaining engine health by ensuring proper valve function and preventing wear. Regular use enhances performance and longevity, making them a vital asset in engine repair and maintenance.

9.1 Summary of Key Points

Valve guide reamers are crucial for maintaining precise valve guide dimensions, ensuring optimal engine performance and preventing wear. They are designed to restore or resize valve guides, addressing issues like excessive oil consumption and valve train noise. Proper selection and use of reamers are vital, as they directly impact engine longevity. Regular maintenance and care of these tools, including cleaning and storage, ensure their effectiveness. While reamers offer significant benefits, they also carry risks if misused, such as guide damage. Related tools like pilot reamers and honing tools complement their function, aiding in precise guide repair. Addressing common questions, reamers are essential for maintaining engine health, and understanding their use ensures successful repairs.

9.2 Final Thoughts on Valve Guide Reamers

Valve guide reamers are indispensable tools in engine maintenance, offering precise solutions for valve guide restoration. Their ability to ensure proper fitment and prevent wear makes them a cornerstone of engine repair. While they require careful selection and use, the benefits they provide in maintaining engine performance and longevity are significant. As with any specialized tool, understanding their proper application and limitations is key to successful outcomes. By adhering to best practices and maintaining these tools, mechanics can achieve professional-grade results. Ultimately, valve guide reamers are a vital investment for anyone serious about engine health and performance, ensuring reliability and efficiency for years to come.

tv guide vancouver canada

Vancouver’s TV Guide offers a comprehensive listing of local and national channels, ensuring viewers stay updated on their favorite shows, sports, and news․ With diverse programming options, it caters to multicultural audiences, providing easy access to both traditional and streaming content․

Overview of TV Viewing in Vancouver

Vancouver’s TV viewing landscape is vibrant and diverse, offering a wide range of local and national channels․ Residents enjoy access to multicultural programming, sports, and news, catering to diverse interests․ The city’s TV guide provides a detailed schedule, helping viewers discover popular shows, live events, and niche content․ With both English and multilingual options available, Vancouver’s TV offerings reflect its cosmopolitan culture, ensuring there’s something for everyone to enjoy․

Importance of a TV Guide

A TV guide is essential for navigating Vancouver’s diverse television offerings, helping viewers find shows, movies, and live events․ It provides a structured schedule, making it easier to plan viewing․ With features like search and filter options, users can quickly locate favorite programs․ A TV guide enhances the viewing experience by offering personalized recommendations and reminders, ensuring audiences never miss their preferred content․ It serves as a valuable tool for both traditional and streaming platforms in today’s digital age․

Evolution of TV Guides in the Digital Age

Evolution of TV Guides in the Digital Age

TV guides have transformed from printed schedules to interactive digital platforms․ Online TV guides now offer real-time updates, search filters, and customizable notifications․ Streaming services integrate seamlessly, allowing users to access both live TV and on-demand content․ Smart TVs and voice controls further enhance accessibility․ The shift to digital has made TV guides more user-friendly, personalized, and adaptable to modern viewing habits․ This evolution ensures viewers stay connected to their favorite shows effortlessly․

Popular Local TV Channels in Vancouver

CBC Vancouver, CTV News, and Global BC are top local channels, offering news, sports, and community-focused programming tailored to Vancouver’s diverse audience and regional interests․

Major Networks: CBC, CTV, Global

CBC, CTV, and Global are Vancouver’s leading broadcasters, offering a wide range of programming․ CBC provides public broadcasting with a focus on Canadian content, while CTV and Global deliver diverse shows, including dramas, news, and sports․ These networks are essential for local viewers, ensuring access to high-quality entertainment and information tailored to Canadian audiences and regional interests․

Specialty Channels: Sportsnet, TSN, Food Network

Sportsnet and TSN are Vancouver’s go-to channels for sports enthusiasts, broadcasting live events, highlights, and in-depth analysis․ Food Network caters to culinary fans with cooking shows and competitions․ These specialty channels provide niche content, ensuring viewers can enjoy their specific interests, from hockey games to gourmet recipes, all within a tailored viewing experience designed to meet diverse audience preferences and passions․

Cultural and Community Channels

Vancouver’s cultural and community channels reflect its diverse population, offering programming tailored to various ethnic and linguistic groups․ Channels like OMNI TV provide Chinese, Punjabi, and South Asian content, while Univision caters to Spanish-speaking audiences․ These platforms celebrate local cultures, showcasing traditional festivals, community events, and original programming․ They serve as vital resources for preserving heritage and fostering cultural understanding, ensuring all communities in Vancouver have a voice and representation on television․

National TV Channels Available in Vancouver

National TV channels in Vancouver offer diverse programming, including entertainment, news, and sports, catering to a wide audience with both English and multicultural content options․

English-Language National Channels

English-language national channels in Vancouver include major networks like CBC, CTV, and Global, offering a wide range of programming․ These channels feature national news, dramas, comedies, and sports, ensuring diverse entertainment for viewers․ Popular shows like The National, Coronation Street, and Survivor are staples․ Sports enthusiasts can catch hockey games on Sportsnet, while foodies enjoy Top Chef Canada on Food Network․ These channels are accessible via cable, satellite, or streaming platforms, making them a cornerstone of Canadian television․

French-Language National Channels

French-language national channels in Vancouver include ICI Radio-Canada Télé and Unis, catering to Francophone audiences․ These channels offer a mix of news, dramas, and cultural programs, including popular shows like Daily News and Les Coulisses․ They are accessible through cable, satellite, or streaming platforms, ensuring French-speaking viewers in Vancouver can stay connected to national and cultural content, reflecting Canada’s bilingual heritage and diverse media landscape;

Multicultural and Specialty Channels

Vancouver’s TV Guide features multicultural and specialty channels catering to diverse linguistic and cultural communities․ Channels like OMNI TV offer Chinese, Punjabi, and South Asian content, while Univision provides Spanish-language programming․ These platforms ensure inclusive access to news, entertainment, and cultural shows, reflecting Vancouver’s multicultural identity․ They are available through cable, satellite, and streaming services, making it easy for residents to connect with content that resonates with their heritage and interests․

How to Access the TV Guide

Vancouver’s TV Guide can be conveniently accessed through newspapers, magazines, online platforms, and smart TV apps, allowing viewers to explore schedules and customize their preferences easily․

Traditional TV Listings: Newspapers and Magazines

Traditional TV listings in Vancouver are widely available in local newspapers like The Vancouver Sun and The Province, offering comprehensive schedules․ Magazines such as TV Guide Canada provide detailed programming information․ These printed resources are user-friendly, allowing viewers to plan their watching habits without digital devices․ While digital platforms have grown popular, many residents still prefer the tactile experience of flipping through physical guides․ This traditional method remains a reliable source for TV schedule information․

Online TV Guides: Websites and Apps

Online TV guides for Vancouver offer convenient access to schedules through websites and apps․ Popular platforms like TVGuide․com and MyTV provide real-time listings, search filters, and reminders․ Users can customize their viewing experience by setting notifications for favorite shows․ These tools also offer personalized recommendations, enhancing viewer convenience․ Mobile apps further allow on-the-go access, ensuring viewers never miss their preferred programs․ Online guides have become indispensable for modern audiences seeking flexibility and ease in planning their TV watching;

Smart TV and Streaming Platforms

Smart TVs and streaming platforms in Vancouver integrate seamlessly with TV guides, offering on-demand content and live TV․ Services like Netflix, Crave, and Disney+ provide personalized recommendations․ Users can search for shows, set reminders, and access multicultural programming directly through these platforms․ Streaming apps on Smart TVs also support multilingual content, catering to Vancouver’s diverse population․ This integration enhances convenience, allowing viewers to plan and enjoy their favorite programs effortlessly across various devices and platforms․

Popular TV Shows in Vancouver

Vancouver viewers enjoy a mix of local and international shows, including dramas like “The Good Doctor” and “Stranger Things”․ Canadian productions such as “Schitt’s Creek” are also highly popular, catering to diverse tastes and preferences․

Dramas and Series

Vancouver viewers avidly follow popular dramas like “The Good Doctor” and “Stranger Things”․ Local productions, such as “Schitt’s Creek”, also captivate audiences․ These series often feature compelling storylines and strong character development, making them favorites among viewers․ Many of these shows are filmed in Vancouver, adding a local connection․ Fans can catch these series on major networks like CBC and CTV or stream them via platforms like Netflix and Crave, ensuring easy access to their favorite dramas․

Comedies and Reality TV

Vancouver audiences enjoy a wide range of comedies and reality TV shows․ Popular comedies like “The Office” and “Parks and Recreation” remain fan favorites, while reality shows such as “The Great Canadian Baking Show” and “Survivor” captivate viewers․ These programs often feature light-hearted humor or competitive drama, appealing to diverse audiences․ Local networks like CBC and Global TV, as well as streaming platforms, ensure easy access to these entertaining options, making them a staple in many households․

Canadian Productions

Canadian productions play a significant role in Vancouver’s TV programming, showcasing local talent and stories․ Popular series like “The X-Files” and “Supernatural”, filmed in Vancouver, highlight the city’s prominence in global television production․ These shows often blend drama, mystery, and humor, appealing to diverse audiences․ Canadian productions also emphasize cultural authenticity, featuring homegrown writers, directors, and actors․ With a mix of genres, from comedy to drama, Canadian content offers viewers a unique perspective on local and national narratives, making it a staple in Vancouver’s TV guide․

Multicultural Programming in Vancouver

Vancouver’s TV guide features multicultural programming, including OMNI TV and Univision, offering Chinese, Punjabi, South Asian, and Spanish content, ensuring diverse news, entertainment, and cultural shows․

Channels Catering to Diverse Communities

Vancouver’s TV guide includes OMNI TV, offering Chinese, Punjabi, and South Asian content․ Univision provides Spanish-language programming, while other channels serve diverse cultural needs, ensuring inclusive entertainment and news․

OMNI TV: Chinese, Punjabi, South Asian Content

OMNI TV is a vital part of Vancouver’s multicultural media landscape, offering a wide range of programming tailored to Chinese, Punjabi, and South Asian communities․ From news broadcasts to cultural dramas and entertainment shows, OMNI TV provides diverse content in multiple languages․ It serves as a platform to connect viewers with their cultural heritage while fostering inclusivity and diversity in Canadian media․

Univision: Spanish-Language Programming

Univision is a leading Spanish-language network offering a diverse range of programming for Vancouver’s Hispanic community․ It features popular TV series, news broadcasts, sports events, and cultural shows․ Univision connects viewers to their heritage through engaging content while catering to the growing Spanish-speaking population in Canada․ Its programming fosters cultural understanding and provides essential information tailored to the community’s needs․

Sports on Vancouver TV

Vancouver TV offers comprehensive sports coverage, featuring local teams like the Canucks, Lions, and Whitecaps, plus national and international events, with expert analysis and updates․

Local Sports Teams: Canucks, Lions, Whitecaps

Vancouver TV provides extensive coverage of local sports teams, including the Vancouver Canucks (NHL hockey), BC Lions (CFL football), and Vancouver Whitecaps (MLS soccer); These teams captivate fans with thrilling performances and fierce rivalries․ The Canucks, based at Rogers Arena, are a staple of winter sports, while the Lions and Whitecaps bring excitement to football and soccer enthusiasts․ Catch their games, highlights, and analysis on local channels, ensuring sports fans never miss a moment of their favorite teams in action․

National and International Sports Events

Vancouver TV Guide features extensive coverage of national and international sports events, ensuring fans stay connected to global competitions․ From the Olympics to FIFA World Cup, and major tournaments like the Stanley Cup and Wimbledon, viewers can access live broadcasts and highlights․ Popular networks like TSN, Sportsnet, and CBC provide detailed coverage, while international events bring diverse audiences together․ This comprehensive coverage makes Vancouver’s TV Guide a hub for sports enthusiasts, offering unparalleled access to both local and global sporting events year-round․

Sports News and Analysis

Vancouver’s TV Guide highlights sports news and analysis programs, offering in-depth coverage of local and international events․ Channels like CBC, CTV, and Sportsnet provide pre-game and post-game analysis, while TSN’s SportsCentre delivers daily updates․ Viewers can stay informed about the Canucks, Lions, and Whitecaps through expert commentary and highlights․ These programs cater to diverse sports enthusiasts, ensuring comprehensive coverage of national and international sports events, making Vancouver’s TV Guide a go-to source for sports fans seeking detailed insights and updates․

News and Current Affairs

Vancouver’s TV Guide features comprehensive news coverage, including local updates from CBC Vancouver and CTV News, along with national and international news from trusted sources like The Globe and Mail․

Local News Channels: CBC Vancouver, CTV News

CBC Vancouver and CTV News are leading local news channels, providing comprehensive coverage of community stories, regional issues, and breaking news․ CBC Vancouver focuses on in-depth reporting, while CTV News offers up-to-the-minute updates․ Both channels are trusted sources for weather, traffic, and current affairs, ensuring viewers stay informed about local events․ Their programming is easily accessible through the TV guide, making them indispensable for staying connected to Vancouver’s community and daily life․

National News Networks: CBC News Network, CTV News Channel

CBC News Network and CTV News Channel are premier national news networks available in Vancouver, offering 24/7 coverage of breaking news, in-depth analysis, and current affairs․ These channels provide viewers with live updates on politics, business, and events across Canada․ Their programming is accessible through the TV guide, ensuring Vancouver residents stay informed about national issues and developments․ Both networks are trusted sources for comprehensive and up-to-date news coverage, catering to a wide audience;

International News Access

Vancouver’s TV guide also features international news networks like BBC World News, CNN, and Al Jazeera, offering global perspectives and coverage of worldwide events․ These channels provide in-depth reporting on international politics, business, and cultural stories․ Access to these networks allows viewers to stay informed about global developments, making the TV guide a valuable resource for those interested in international affairs and diverse viewpoints․

Streaming Services in Canada

Canada offers diverse streaming platforms like Netflix, Crave, Amazon Prime Video, Disney+, and Apple TV+, providing a wide range of on-demand content for all audiences․

Netflix, Crave, Amazon Prime Video

Netflix, Crave, and Amazon Prime Video are leading streaming services in Canada, offering a vast library of on-demand content․ Netflix features original series and movies, while Crave includes Canadian productions and HBO content․ Amazon Prime Video provides exclusive originals and additional benefits for Prime members․ These platforms cater to diverse audiences, ensuring access to trending shows, films, and documentaries․ Their popularity in Vancouver reflects the growing shift toward streaming over traditional TV viewing․

Disney+, Apple TV+, and Other Platforms

Disney+, Apple TV+, and other streaming platforms have gained immense popularity in Vancouver, offering exclusive content tailored to diverse audiences․ Disney+ features beloved franchises like Marvel, Star Wars, and Pixar, while Apple TV+ focuses on original, high-quality productions․ Other platforms like Hulu and Peacock provide a mix of TV shows, movies, and original series․ These services allow viewers to enjoy personalized entertainment, enhancing their streaming experience with user-friendly interfaces and on-demand access․

Canadian Streaming Services: CBC Gem, CTV Throwback

CBC Gem and CTV Throwback are prominent Canadian streaming services available in Vancouver․ CBC Gem offers a wide range of free, ad-supported content, including Canadian dramas, comedies, and documentaries․ CTV Throwback focuses on classic TV shows and retro programming, appealing to nostalgia-driven audiences․ Both platforms provide a unique viewing experience, showcasing Canadian talent and cultural content, while also offering on-demand access to popular series and movies, making them essential for local viewers seeking homegrown entertainment․

How to Use the TV Guide Effectively

Use the TV guide’s search and filter functions to find shows quickly․ Set reminders for upcoming programs and customize your viewing schedule for a seamless experience․

Search and Filter Functions

The TV guide’s advanced search and filter features allow users to quickly find their favorite shows․ By entering specific keywords or genres, viewers can narrow down options efficiently․ Filters for time, channel, and program type further enhance navigation․ This functionality ensures users can easily discover new content or locate scheduled broadcasts, making the viewing experience more convenient and personalized․ These tools are essential for managing the vast array of available programming in Vancouver․

Setting Reminders and Notifications

Setting reminders and notifications on the TV guide ensures you never miss your favorite shows or live events․ Users can easily schedule alerts for upcoming broadcasts, allowing them to plan their viewing experience in advance․ This feature is particularly useful for tracking new episodes, sports games, or special programming․ By enabling notifications, viewers stay informed and can adjust their schedules accordingly, enhancing their overall TV watching experience in Vancouver․

Customizing Your Viewing Experience

Customizing your viewing experience with the TV guide allows you to tailor your entertainment preferences․ Users can create personalized watchlists, filter content by genre or language, and prioritize favorite channels․ This feature ensures that viewers only see relevant programming, making it easier to discover new shows or movies that align with their interests․ By adjusting settings to suit individual tastes, the TV guide enhances the overall entertainment experience in Vancouver․

Future of TV Guides

The future of TV guides in Vancouver involves enhanced interactivity, voice search, and advanced personalization, ensuring a seamless and immersive viewing experience for all audiences․

On-Demand Viewing and Streaming Integration

On-demand viewing and streaming integration are revolutionizing TV guides in Vancouver․ Users can now seamlessly access live TV, streaming platforms, and on-demand content through a single interface․ Popular services like Netflix, Hulu, and Disney+ are being directly incorporated into TV guides, allowing viewers to search and discover content across all platforms․ This integration enhances convenience, enabling audiences to browse and watch their favorite shows without switching apps, making entertainment more accessible and personalized than ever before․

AI-Driven Recommendations

AI-driven recommendations are transforming TV guides in Vancouver by personalizing content suggestions․ Machine learning algorithms analyze viewer preferences and watch history to offer tailored show recommendations․ This feature enhances user experience by highlighting relevant programs, ensuring audiences discover new content aligned with their interests․ Advanced systems also adapt in real-time, evolving with viewer habits to provide even better suggestions over time, making TV guides smarter and more user-centric than ever before;

Interactive and Personalized Guides

Interactive and personalized TV guides in Vancouver allow users to customize their viewing experience․ Viewers can create profiles, set preferences, and filter content based on genres, ratings, or airing times․ These guides also offer real-time updates, ensuring users never miss their favorite shows․ By integrating viewer feedback, they continuously improve, providing a seamless and tailored experience that enhances entertainment discovery and satisfaction for audiences in Vancouver․

accu-chek inform ii manual

The Accu-Chek Inform II System is a blood glucose monitoring solution designed for healthcare professionals to measure glucose levels accurately and efficiently in clinical settings.

Purpose of the Accu-Chek Inform II Manual

The Accu-Chek Inform II Manual is designed to provide comprehensive guidance for healthcare professionals and users to ensure safe and accurate blood glucose monitoring. It outlines the system’s features, operation, and maintenance, while emphasizing regulatory compliance and safety standards. The manual serves as a reference for troubleshooting common issues, performing quality control checks, and understanding technical specifications. It also includes detailed instructions for setting up the device, calibrating the meter, and using test strips effectively. By following the manual, users can optimize the system’s performance and adhere to in vitro diagnostic guidelines. Additionally, it provides resources for accessing updates, online support, and training materials to enhance user proficiency. The manual is a crucial tool for anyone involved in blood glucose monitoring, ensuring reliable and precise results in clinical settings.

Target Audience for the Manual

The Accu-Chek Inform II Manual is primarily intended for healthcare professionals and clinical staff responsible for blood glucose monitoring in healthcare settings. It is also designed for operators and trainers who need to understand the system’s operation, safety, and compliance with regulatory standards. Additionally, the manual serves as a resource for technical support personnel and anyone involved in patient training or system maintenance. The document provides clear instructions to ensure users can operate the device accurately and safely, adhering to in vitro diagnostic guidelines. By addressing the needs of these groups, the manual supports effective blood glucose monitoring and helps users achieve reliable results in clinical environments. Its comprehensive guidance ensures that all stakeholders can utilize the Accu-Chek Inform II system proficiently, aligning with its intended use for multiple patient testing in professional healthcare settings.

Overview of the Accu-Chek Inform II System

The Accu-Chek Inform II System is a blood glucose monitoring solution designed for healthcare professionals, offering accurate and efficient glucose testing in clinical environments.

Key Components of the System

The Accu-Chek Inform II System consists of a blood glucose meter, test strips, and a base unit. The meter is designed for in vitro diagnostic use, ensuring accurate glucose measurement. The test strips are specifically formulated for use with the meter, providing reliable results. The base unit supports multiple patient testing, making it ideal for clinical environments. Additional components include a lancet device for blood sampling and a carrying case for portability. The system also offers data storage capabilities, allowing healthcare professionals to track patient results efficiently. These components work together to provide a comprehensive solution for blood glucose monitoring in healthcare settings.

Technical Specifications of the Meter

The Accu-Chek Inform II meter boasts advanced technical features, including a compact design and user-friendly interface. It requires a small blood sample of 0.6 µL, ensuring minimal patient discomfort. The meter operates at a temperature range of 18°C to 30°C and a humidity range of 20% to 80%, non-condensing. It measures glucose levels in 5 seconds, providing quick results. The meter’s memory can store up to 1,000 test results with timestamps, facilitating effective patient monitoring. It also includes a built-in barcode reader for easy test strip identification and calibration. The meter complies with EU regulations for in vitro diagnostic devices, ensuring reliability and accuracy. These specifications make the Accu-Chek Inform II a robust and efficient tool for blood glucose monitoring in clinical settings.

Setting Up the Accu-Chek Inform II

Installation involves unpacking, connecting, and powering on the meter. Initial configuration includes setting the date, time, and unit of measure. Ensure the meter meets operating conditions of 18°C to 30°C and 20% to 80% humidity. Downloading the manual provides detailed setup instructions for proper functionality and compliance with EU regulations.

Installation and Initial Configuration

Installation of the Accu-Chek Inform II involves carefully unpacking the system and connecting it to a power source. Ensure all components, such as the base unit, test strips, and accessories, are accounted for. Power on the meter and allow it to complete its start-up process. For initial configuration, navigate through the menu to set the date, time, and unit of measurement (mmol/L or mg/dL). Refer to the manual for step-by-step guidance. Environmental conditions for operation include a temperature range of 18°C to 30°C and humidity levels between 20% and 80%. Proper configuration ensures accurate blood glucose monitoring and compliance with EU regulations. Additional setup may include downloading the manual as a PDF from Roche’s website for detailed instructions. Always follow safety precautions for in vitro diagnostic use during installation and configuration.

Downloading and Viewing the Manual

The Accu-Chek Inform II manual can be downloaded as a PDF file from Roche’s official website or accessed directly through the provided link: http://www.accu-chekinformii.com/pdf/05234646001-. Ensure you select the correct version based on your system’s serial number and hardware configuration. The manual is available in multiple languages, including English and Dutch, catering to a diverse user base. For convenience, the manual is also stored on the Accu-Chek Inform II Base Unit as a PDF file, accessible via the device’s menu. This document provides comprehensive instructions for safe and accurate blood glucose monitoring, covering installation, operation, and troubleshooting. It is essential to refer to the manual for detailed guidance on system setup and maintenance. Regularly check for updates to ensure you have the most current version of the manual, as revisions may include new features or compliance updates.

Operating the Accu-Chek Inform II

The Accu-Chek Inform II system ensures accurate blood glucose monitoring with automatic meter, test strip, and sample checks, providing reliable results for healthcare professionals and patients alike.

Performing a Blood Glucose Test

Performing a blood glucose test with the Accu-Chek Inform II involves a few simple steps. First, ensure the meter is turned on and a test strip is inserted. Next, obtain a blood sample by pricking the fingertip with a lancet. Gently apply the blood drop to the test strip, ensuring proper placement. The meter will automatically detect the sample and begin analysis. Results are displayed within seconds, providing accurate glucose readings. After the test, apply gentle pressure to the puncture site to stop bleeding. Regularly check the site to ensure proper healing. This process ensures accurate and reliable blood glucose monitoring, essential for diabetes management. Always follow the manual’s guidelines for best results.

Calibrating the Meter

Calibrating the Accu-Chek Inform II meter is essential for ensuring accurate blood glucose readings. Calibration is typically required when using a new batch of test strips. To begin, insert the calibration strip into the meter’s test strip port. The meter will automatically detect the strip and prompt you to confirm the calibration process. Once confirmed, the meter will adjust its settings to align with the new test strips. This process ensures that all subsequent blood glucose readings are precise and reliable. Important: Calibration should only be performed with the test strips provided by Roche, as third-party strips may not be compatible. After calibration, the meter is ready for use. Always follow the manual’s instructions for calibration to maintain the accuracy of your blood glucose monitoring system.

Using the Test Strips

Using the test strips with the Accu-Chek Inform II system is straightforward and designed to ensure accurate blood glucose measurements. Always use test strips specifically designed for the Accu-Chek Inform II meter, as other strips may not be compatible. Handle the test strips with care to avoid contamination or damage. Remove a test strip from the vial just before use and ensure the vial is closed tightly afterward to maintain humidity control. Properly insert the test strip into the meter’s test strip port, following the arrows indicated on the strip and meter. Once the strip is inserted, the meter will automatically prepare for a blood sample. Gently apply a small blood sample to the designated area on the test strip. The meter will detect the sample and begin the analysis process. Ensure the sample size is adequate to avoid errors. After applying the sample, wait for the meter to display the results. Always follow the manual’s guidelines for using test strips to ensure accurate and reliable blood glucose monitoring. This process helps maintain the integrity of the system and provides precise measurements for effective diabetes management.

Quality Control and Accuracy

The Accu-Chek Inform II system ensures high accuracy through automatic meter, test strip, and sample checks, providing reliable blood glucose results for precise diabetes management.

Running Meter, Test Strip, and Sample Checks

The Accu-Chek Inform II system performs automatic meter, test strip, and sample checks during each test to ensure accuracy and reliability. These checks verify the meter’s functionality, test strip expiration, and sample adequacy. The system also conducts internal quality control to maintain precision. If any issue is detected, an error message is displayed, guiding the user to resolve the problem. Regular checks help prevent inaccurate results and ensure compliance with EU IVD standards. This feature is essential for maintaining the integrity of blood glucose monitoring in clinical settings. By running these checks, the system ensures accurate and reliable results, supporting effective diabetes management. These automated processes streamline testing and reduce the risk of human error, providing healthcare professionals with confidence in the results.

Ensuring Accuracy in Blood Glucose Monitoring

Ensuring accuracy in blood glucose monitoring with the Accu-Chek Inform II involves proper calibration, correct test strip handling, and adherence to testing guidelines. The system is designed to minimize errors through automated checks and precise measurement technology. Regular calibration ensures the meter operates within specified limits, while the use of approved test strips guarantees consistent results. Proper sample collection, such as obtaining a sufficient blood sample and avoiding contaminated or expired strips, is critical for accurate readings. The system also provides clear error messages to guide users in resolving issues promptly. By following the manual’s instructions and maintaining the meter, healthcare professionals can rely on the Accu-Chek Inform II for precise and dependable blood glucose monitoring, which is essential for effective diabetes management and patient care. Accuracy is further enhanced by the system’s compliance with EU IVD standards, ensuring reliable performance in clinical settings.

Troubleshooting Common Issues

The Accu-Chek Inform II system provides clear error messages and automated checks to help users identify and resolve common issues, ensuring accurate and reliable blood glucose monitoring.

Identifying and Resolving Errors

The Accu-Chek Inform II system is designed to provide clear error messages, enabling users to quickly identify and address issues. Common errors include invalid test strips, insufficient blood samples, or meter malfunctions. For most issues, the meter displays specific codes or messages, guiding the user to resolve the problem. For example, an “E-1” error may indicate a strip malfunction, requiring the user to reinsert the test strip or use a new one. If the meter detects an invalid blood sample, it will prompt the user to retake the test. In cases of persistent errors, restarting the meter or performing a calibration may resolve the issue. Referencing the operator’s manual or contacting Roche customer support can provide additional troubleshooting steps for less common errors. Proper error resolution ensures accurate blood glucose monitoring and maintains the reliability of the system. Always follow the manual’s guidelines for resolving errors to avoid inaccurate results.

Handling Puncture Site Care

Proper care of the puncture site is essential to ensure patient comfort and prevent complications. After performing a blood glucose test, apply gentle, direct pressure to the puncture site for several minutes to stop bleeding. Elevate the hand above heart level to reduce blood flow to the fingertip. Avoid squeezing the finger excessively, as this can cause injury or affect the accuracy of future tests. If bleeding persists beyond a few minutes, seek medical advice. Keep the puncture site clean and dry to promote healing. Avoid using alcohol or harsh cleaners, as they may irritate the skin. Rotate puncture sites to avoid overuse and potential tissue damage. For additional guidance, refer to the Accu-Chek Inform II manual, which provides detailed instructions for proper puncture site care and wound healing. Following these steps ensures safe and effective blood glucose monitoring. Proper site care is crucial for accurate test results and patient safety.

Regulatory Compliance and Safety

The Accu-Chek Inform II System complies with EU regulations for in vitro diagnostic medical devices, ensuring safe and accurate blood glucose monitoring in clinical settings.

Compliance with EU Regulations

The Accu-Chek Inform II System adheres to the requirements of Regulation (EU) 2017/746, ensuring compliance with European standards for in vitro diagnostic medical devices. This regulation emphasizes the safety, performance, and reliability of medical devices used in healthcare settings. The system is designed to meet stringent EU guidelines, providing accurate and reliable blood glucose monitoring for multiple patients; Compliance is verified through rigorous testing and certification processes, guaranteeing that the device operates within specified parameters. The system’s design and functionality align with EU directives, making it suitable for professional use in clinics, hospitals, and other healthcare environments. By meeting these regulations, the Accu-Chek Inform II System ensures the highest level of safety and accuracy for healthcare professionals and patients alike.

  • Meets EU Regulation 2017/746 for in vitro diagnostic devices.
  • Ensures traceability and documentation compliance.
  • Designed for multiple patient use in professional settings.
  • Manufactured with adherence to EU safety standards.

Safety Precautions for In Vitro Diagnostic Use

The Accu-Chek Inform II System is designed for safe and reliable in vitro diagnostic use, requiring adherence to specific precautions to ensure accurate results and prevent hazards. Always handle the meter, test strips, and biosamples with care, avoiding contamination. Use only fresh capillary whole blood samples and avoid touching the test strip window to prevent interference. Store the meter and test strips in a cool, dry place, away from direct sunlight and extreme temperatures. Dispose of used test strips and lancets as biohazardous waste. Regularly clean and disinfect the meter according to the manual to prevent cross-contamination. Never share the meter or accessories between patients to maintain hygiene standards. Follow all safety guidelines to ensure the system operates correctly and provides accurate blood glucose readings for safe patient care.

  • Handle test strips and biosamples with care to avoid contamination.
  • Store the meter and strips in a dry, cool environment.
  • Dispose of used materials as biohazardous waste.
  • Clean and disinfect the meter regularly.
  • Avoid sharing the meter or accessories between patients.

Maintenance and Updates

Regularly clean and disinfect the Accu-Chek Inform II meter to maintain performance. Check for software updates to ensure the system is current and functioning optimally. Refer to the manual for specific maintenance procedures.

Caring for the Meter and Accessories

Regular maintenance of the Accu-Chek Inform II meter and its accessories ensures optimal performance and longevity. Clean the meter with a soft, dry cloth, avoiding harsh chemicals or abrasive materials that could damage the surface. Store the meter in a cool, dry place, away from direct sunlight. For the test strips, keep them in their original vial with the cap tightly closed to maintain humidity control. Do not expose strips to extreme temperatures or moisture. The lance device should be cleaned and disinfected regularly, and the lancets should be replaced as needed to ensure proper function. Properly dispose of used lancets and test strips according to local regulations. Refer to the manual for detailed instructions on cleaning and maintaining all components. Regular maintenance helps prevent contamination and ensures accurate blood glucose readings. By following these care routines, you can extend the life of your Accu-Chek Inform II system and maintain its reliability for precise monitoring.

Updating Software and Firmware

Keeping the Accu-Chek Inform II system up-to-date ensures optimal performance and access to new features. Software and firmware updates are periodically released by Roche Diagnostics to enhance functionality, improve accuracy, and address any technical issues. To update, connect the meter to a computer using the provided USB cable and follow the instructions in the manual. Ensure the device is properly recognized and the update process is not interrupted. After installation, verify the new version by checking the meter’s settings or the base unit’s documentation. If updates fail or errors occur, restart the process or contact Roche Customer Support for assistance. Regularly checking for updates helps maintain the system’s reliability and ensures compliance with the latest regulatory requirements. Always refer to the manual or online support for detailed step-by-step guidance on updating software and firmware.

Additional Resources

Access the Accu-Chek Inform II Operator’s Manual, Quick Reference Guide, and online support materials for comprehensive instructions, troubleshooting, and training resources to maximize system functionality.

Accessing the Operators Manual and Quick Reference Guide

The Accu-Chek Inform II Operators Manual and Quick Reference Guide are essential resources for understanding and using the system effectively. These documents are available online in PDF format and can be downloaded directly from the Roche website or accessed through the product page. The Operators Manual provides detailed instructions for setup, operation, and troubleshooting, while the Quick Reference Guide offers a concise overview of key steps for performing blood glucose tests. Additional resources, such as technical notes and software updates, are also available for download. Users can refer to the manual for information on system components, technical specifications, and regulatory compliance. The manual is updated periodically, so it is important to ensure you are using the most recent version; For further assistance, contact Roche Customer Support or visit the official Accu-Chek website.

Online Support and Training Materials

Roche provides comprehensive online support and training materials for the Accu-Chek Inform II system, ensuring healthcare professionals can maximize its functionality. These resources include downloadable PDF manuals, quick reference guides, and interactive training modules. The official Roche website offers detailed documentation, such as the Operators Manual and Technical Notes, which cover system operation, troubleshooting, and compliance. Additionally, video tutorials and webinars are available to guide users through setup, testing procedures, and software updates. For further learning, Roche offers training programs tailored for healthcare providers, focusing on accurate blood glucose monitoring and system maintenance. Users can also access FAQs and user forums for peer-to-peer support. Regular updates and new features are announced on the Roche website, ensuring users stay informed. These resources collectively enhance the user experience, providing a robust support ecosystem for the Accu-Chek Inform II system.

2 post lift installation instructions

Two-post lifts are essential for vehicle maintenance, offering durability and efficiency. Proper installation ensures safety, stability, and optimal performance, making it crucial to follow guidelines carefully.

1.1 Overview of 2 Post Lifts

Two-post lifts are versatile and widely used for vehicle maintenance, offering efficient lifting solutions. Typically designed for indoor use, they consist of two vertical columns, a crossbeam, and lifting arms. These lifts are ideal for garages and workshops due to their space-saving design and high weight capacity. Most models feature a clear-floor design, allowing easy access under vehicles. Hydraulic systems power the lifting mechanism, ensuring smooth operation. Asymmetric arms provide flexibility for various vehicle types, while safety features like automatic locks enhance reliability. Proper installation and maintenance are essential for optimal performance and longevity.

1.2 Importance of Proper Installation

Proper installation of a two-post lift is critical to ensure safety, functionality, and durability. Incorrect installation can lead to structural instability, posing risks to personnel and vehicles. A well-executed setup guarantees the lift operates within its weight capacity and meets safety standards. It also prevents premature wear and tear, reducing maintenance costs. Following manufacturer instructions closely minimizes potential hazards and ensures compliance with industry regulations. A correctly installed lift enhances workshop efficiency, providing reliable service for years. Always prioritize adherence to guidelines for optimal performance and safety.

Safety Precautions and Guidelines

Adhering to safety protocols is vital during installation to prevent accidents and ensure a secure setup. Always follow manufacturer guidelines and use proper protective equipment.

2.1 General Safety Tips

Always review the manual before starting the installation to ensure understanding of all safety measures. Wear personal protective equipment, including gloves and safety glasses. Ensure the area is clear of obstacles and well-ventilated. Verify the floor strength meets the lift’s requirements. Never exceed the lift’s weight capacity. Keep loose clothing and long hair tied back. Avoid working under the lift until it is securely anchored. Follow proper sequencing for assembly to maintain stability. Ensure all bolts and connections are tightened properly. Regularly inspect components for wear or damage. Maintain a clean workspace to prevent slips and trips. Stay alert and focused throughout the process.

2.2 Personal Protective Equipment (PPE)

Wearing appropriate PPE is critical during the installation of a 2-post lift to minimize risks and prevent injuries. Essential items include safety glasses with impact-resistant lenses to protect eyes from debris. Heavy-duty gloves provide grip and safeguard hands from cuts or abrasions. Steel-toe boots are mandatory to prevent foot injuries from falling tools or components. Hearing protection, such as earplugs, should be used when operating power tools. A dust mask may also be necessary when drilling or sawing concrete. Lastly, high-visibility clothing can enhance awareness in busy work environments. Always ensure PPE is worn correctly and consistently throughout the installation process.

2.3 Pre-Installation Safety Checks

Before starting the installation, ensure the area is clear of obstacles and tripping hazards. Verify that the floor meets the required specifications, including thickness and compressive strength, to support the lift’s weight. Inspect all components for damage or defects and ensure they are free from debris. Review the manufacturer’s manual to understand all safety features and requirements. Conduct a final check to ensure all safety devices are functioning properly. Ensure proper ventilation in the workspace and confirm that all power tools are in good working condition. This step is crucial for a safe and successful installation process.

Tools and Materials Required

Essential tools include a drill, wrench, and socket set. Materials needed are concrete, anchor bolts, and hydraulic fluid. Ensure all items are readily available for installation.

3.1 Essential Tools for Installation

The installation process requires specific tools to ensure accuracy and safety. A cordless drill with various drill bits is necessary for concrete drilling. Adjustable wrenches and socket sets are essential for tightening bolts and fittings. A torque wrench is needed to apply the correct tension to bolts, preventing over-tightening. Additionally, a level tool ensures proper alignment of lift columns. Hydraulic fluid and a pump are required for the lift’s operation. Having these tools organized and within reach streamlines the installation, reducing the risk of errors and saving time. Proper tool usage is critical for a successful setup.

3.2 Additional Materials Needed

Beyond the essential tools, several materials are necessary for a successful installation. Concrete anchors and bolts are required to securely fasten the lift to the floor, ensuring stability. Hydraulic fluid is needed to power the lift’s system, and a hydraulic pump may be required depending on the model. Grease or lubricant is essential for moving parts to ensure smooth operation. Additionally, safety materials like jack stands and wheel chocks should be on hand for added security during the process. Having all these materials prepared in advance ensures a smooth and efficient installation. Proper preparation is key to avoiding delays.

Site Preparation and Planning

Ensure the installation area is clear, with proper space for the lift and vehicles. Verify the floor strength and layout to accommodate the lift’s specifications.

4.1 Evaluating the Installation Location

Choosing the right location for your 2-post lift is crucial. Ensure the area is spacious, with at least 13 feet of clearance from doors and obstacles. The floor must be level, made of 4-inch thick concrete with a minimum strength of 3000 psi. Avoid installing near water sources or in areas prone to moisture. Check for proper drainage and ensure the space is well-ventilated. Electrical outlets should be nearby for power supply. Additionally, verify that the location complies with local building codes and regulations. Proper planning ensures safe and efficient lift operation.

4.2 Floor Requirements and Specifications

The floor must be constructed of minimum 4-inch thick concrete with a compressive strength of at least 3000 psi. It should be reinforced with steel for added durability. Ensure the surface is level and free from cracks or unevenness, as this can compromise the lift’s stability. Avoid installing the lift in pits or depressions, and ensure the area is not prone to water accumulation. The floor should also be able to support the combined weight of the lift and the heaviest vehicle it will handle. Proper floor preparation is essential for safe and reliable operation. Always verify these specifications before proceeding.

4.3 Positioning the Lift Correctly

Correct positioning ensures safe operation and optimal use of space. Place the lift at least 13 feet away from any door to allow easy vehicle access. Center the lift in the bay, ensuring equal clearance on both sides. Align the lift columns with the floor anchors, maintaining the manufacturer’s specified distance between them. Use a laser level to ensure the columns are plumb and aligned properly. Proper positioning prevents uneven load distribution and enhances stability. Double-check measurements and alignment before securing the lift to the floor. This step is critical for both functionality and safety. Always refer to the installation manual for specific positioning guidelines.

Step-by-Step Installation Process

The process involves unpacking components, assembling lift columns, attaching arms and accessories, installing the hydraulic system, and anchoring the lift to the floor securely.

5.1 Unpacking and Organizing Components

Begin by carefully unpacking all components from the shipping packages. Ensure no damage occurred during transit. Organize parts according to the inventory list provided in the manual. Separate structural components, hydraulic systems, and accessories into labeled categories. Place smaller parts in designated containers to prevent misplacement. Heavy items, like columns and arms, should be securely positioned for easy access. Refer to the manual for component identification and assembly order; Proper organization ensures a smooth and efficient installation process, minimizing delays and potential errors. Safety and efficiency rely on careful preparation.

5.2 Assembling the Lift Columns

Begin by assembling the lift columns according to the manufacturer’s instructions. Attach the base plates to the floor brackets, ensuring they are level and properly aligned. Secure the columns to the base plates using the provided hardware. Tighten all bolts firmly to maintain structural integrity. Next, install the lift’s upper beam and cross members, ensuring they are securely fastened. Double-check the alignment and levelness of the columns before proceeding. Proper assembly of the lift columns is critical for safety and functionality, so follow the manual carefully to avoid errors.

5.3 Attaching the Arms and Accessories

Attach the lifting arms to the columns, ensuring they are securely fastened with the provided bolts. Connect the hydraulic hoses between the columns, making sure they are properly seated and not twisted. Install any additional accessories, such as arm locks or cable systems, according to the manufacturer’s instructions. Double-check all connections for tightness and alignment. Finally, test the arms and accessories to ensure they function smoothly and safely. Refer to the manual for specific configurations and torque specifications to complete this step accurately. Proper installation of these components is essential for the lift’s performance and reliability.

5.4 Installing the Hydraulic System

Begin by positioning the hydraulic cylinders on each column, ensuring they are aligned correctly. Connect the hydraulic hoses to the cylinders, making sure they are securely fastened with the provided fittings. Route the hoses across the overhead beam and down to the opposite column, avoiding any twists or kinks. Once connected, bleed the hydraulic system to remove air bubbles, which can cause malfunctions. Refer to the manual for specific bleeding procedures and pressure settings. Finally, test the hydraulic system by raising and lowering the lift to ensure smooth operation and proper fluid flow. This step is critical for the lift’s functionality and safety.

5.5 Anchoring the Lift to the Floor

Once the lift columns are assembled and positioned, anchor them securely to the floor using the provided anchor bolts. Locate the pre-drilled holes in the base plates and align them with the floor markings. Drill pilot holes into the concrete floor, then insert the anchor bolts, ensuring they are tightened to the specified torque. Proper anchoring prevents movement and ensures stability during operation. Double-check that all bolts are tightened evenly and meet the manufacturer’s torque specifications. This step is critical for safety and prevents potential shifting or tipping of the lift. Ensure the floor meets the required thickness and strength for secure anchorage.

Testing and Inspection

After installation, perform a thorough safety check, test the hydraulic system, and ensure all arms are aligned properly. Conduct a load test to verify smooth operation.

6.1 Initial Testing of the Lift

After installation, conduct an initial test without a vehicle. Raise and lower the lift several times to ensure smooth operation. Check for any unusual noises or fluid leaks. Verify that all safety mechanisms, such as automatic arm locks, engage properly. Test the lift at various heights to ensure stability and alignment. Refer to the manufacturer’s guidelines for specific testing procedures. If any issues arise, address them before proceeding to load testing with a vehicle. This step ensures the lift functions safely and efficiently.

6.2 Checking Hydraulic and Safety Features

After initial testing, inspect the hydraulic system for leaks or damage. Ensure all hoses and connections are secure and properly routed. Test the safety mechanisms, such as load-holding valves and emergency stops, to confirm they function correctly. Check the hydraulic fluid level and top it off if necessary. Verify that the safety arms lock securely at each designated height. Test the lift under load to ensure smooth operation and reliable safety features. Refer to the manufacturer’s specifications for hydraulic pressure and safety standards. Properly functioning hydraulic and safety systems are critical for safe and efficient lift operation; Always follow the manual’s guidelines.

6.3 Final Inspection and Adjustments

Conduct a thorough inspection of all components, ensuring everything is secure and aligned. Check for any loose bolts or connections and tighten as needed. Verify proper operation of all safety features and hydraulic functions. Make adjustments to leveling pads or arm assemblies for optimal balance. Ensure the lift operates smoothly across its full range of motion. Review the manufacturer’s checklist to confirm all steps are completed. Document any final adjustments and update maintenance records. A meticulous final inspection guarantees reliability and safety, ensuring the lift performs as intended for years to come. Always refer to the manual for specific adjustments.

Maintenance and Upkeep

Regular lubrication of moving parts and thorough cleaning prevent wear and tear. Schedule routine checks to ensure all components function properly, maintaining safety and efficiency.

7.1 Regular Maintenance Schedule

A well-planned maintenance schedule is crucial for extending the life of your 2-post lift. Start by inspecting all hydraulic lines and cylinders monthly for leaks or damage. Lubricate pivot points and moving parts every 1,000 hours of use to ensure smooth operation. Additionally, check the wire ropes for frays or wear and replace them immediately if damage is detected. Schedule a professional inspection annually to identify and address potential issues before they escalate. Regular cleaning of the lift and its components also prevents dust and debris buildup, ensuring optimal performance and safety. Consistency is key to maintaining reliability.

7.2 Lubrication and Cleaning

Proper lubrication and cleaning are vital for maintaining the functionality of your 2-post lift. Apply high-grade lubricant to all moving parts, such as hydraulic cylinders and pivot pins, every 500 hours of use. Regularly wipe down surfaces to remove grease, oil, and debris, which can interfere with smooth operation. Use a mild solvent for tough stains, but avoid harsh chemicals that might damage components. Inspect for wear during cleaning and address any issues promptly. A clean and well-lubricated lift ensures longevity, safety, and optimal performance, preventing premature wear and potential malfunctions. Consistent attention to these details is essential.

7.3 Replacing Wearable Parts

Regularly inspect and replace wearable parts, such as hydraulic hoses, cylinders, and safety latches, to ensure optimal performance and safety. Refer to the manufacturer’s manual for specific part numbers and torque specifications. Replace hydraulic hoses if cracks or leaks are detected, and check cylinders for damage or corrosion. Safety latches should be replaced immediately if they show signs of wear. Always use genuine replacement parts to maintain the lift’s integrity. Proper installation of new parts is crucial to prevent future malfunctions. Neglecting to replace worn components can lead to operational failures, emphasizing the importance of routine inspections and timely replacements.

Troubleshooting Common Issues

Common issues include hydraulic leaks, uneven lifting, and arm misalignment. Address these by inspecting hoses, checking balance, and adjusting arms. Always refer to the manual.

8.1 Identifying and Diagnosing Problems

Identifying issues early ensures safety and prevents further damage. Start by inspecting hydraulic systems for leaks or blockages. Check for uneven lifting, which may indicate imbalance or misaligned arms. Listen for unusual noises, as they often signal worn parts or improper installation. Use diagnostic tools to test hydraulic pressure and electrical connections. Always consult the manual for specific troubleshooting steps. Regular maintenance can help detect potential issues before they escalate. Addressing problems promptly ensures the lift operates safely and efficiently, adhering to manufacturer guidelines.

8.2 Resolving Hydraulic Malfunctions

Hydraulic issues are common but must be addressed promptly to prevent damage. Start by inspecting hoses and cylinders for leaks or blockages. Replace worn seals or O-rings, and ensure fluid levels are adequate. Air in the system can cause malfunctions; bleed the lines carefully. If the lift doesn’t rise smoothly, check for obstructions or incorrect fluid viscosity. Always refer to the manufacturer’s manual for specific repair steps. Testing the system after repairs is crucial to ensure proper function. Regular maintenance can help prevent future hydraulic problems, ensuring safe and reliable operation.

8.3 Addressing Alignment and Balance Issues

Alignment and balance issues can affect the lift’s performance and safety. Start by ensuring the columns are level and securely anchored. Check the arm alignment and adjust if necessary to prevent uneven lifting. If the lift tilts or wobbles, inspect the floor for unevenness and re-anchor the columns if needed. Use a spirit level to verify proper alignment. Lubricate pivot points to ensure smooth operation. If issues persist, consult a professional to avoid safety risks. Proper alignment and balance are critical for safe and efficient vehicle lifting. Regular checks can prevent these issues from arising.

Proper installation of a 2-post lift ensures safety, efficiency, and durability. Always follow manufacturer instructions and perform regular maintenance for optimal performance and longevity of the equipment.

9.1 Summary of Key Installation Steps

Successful installation of a 2-post lift requires careful planning and adherence to manufacturer instructions. Begin by evaluating the installation location and ensuring the floor meets specifications. Assemble the lift columns and attach the arms securely. Install the hydraulic system, making sure all connections are tight and properly routed. Anchor the lift to the floor for stability and safety. Conduct thorough testing to verify smooth operation and inspect all safety features. Regular maintenance, including lubrication and part inspections, is essential for long-term functionality and reliability. Always follow safety guidelines to ensure a safe working environment.

9;2 Importance of Following Manufacturer Instructions

Adhering to manufacturer instructions is crucial for ensuring the safe and proper installation of a 2-post lift. These guidelines are designed to meet safety standards and optimize performance. Deviating from instructions can lead to malfunctions, safety risks, or equipment damage. Manufacturer manuals provide detailed steps tailored to the specific lift model, ensuring compliance with industry regulations. By following these instructions, users can avoid potential hazards and guarantee the lift operates efficiently and reliably for years to come. Proper installation is essential for maintaining warranty validity and ensuring user safety. Always prioritize manufacturer recommendations for optimal results.

browning auto 5 manual

Browning Auto 5 Manual: A Comprehensive Guide

This comprehensive guide provides detailed instructions for the Browning Auto 5, the first successful semi-auto shotgun․
It covers disassembly, cleaning, reassembly, and troubleshooting, drawing from manuals, diagrams, and expert gunsmith insights to help owners maintain their firearms․

The Browning Auto 5, often shortened to A5, stands as a monumental achievement in firearm design, particularly renowned as the first successful semi-automatic shotgun․
Its innovative recoil-operated mechanism distinguished it from contemporaries, establishing a new benchmark in shotgun technology․
This guide aims to provide owners and enthusiasts with a thorough understanding of this iconic firearm․
Covering everything from its historical context to detailed disassembly and reassembly procedures․
Whether you’re a seasoned gunsmith or a new owner․
This manual offers valuable insights into maintaining and troubleshooting your Browning A5․
We will explore its unique features, step-by-step instructions, and essential maintenance practices, ensuring its continued reliability and performance․

Brief History and Significance

The Browning Auto 5 boasts a rich history dating back to its design by John Browning, a prolific inventor in firearm technology․
Introduced in the early 20th century, the Auto 5 revolutionized shotgun design with its recoil-operated mechanism․
This innovation allowed for faster follow-up shots and increased overall efficiency compared to traditional pump-action shotguns․
The Auto 5’s impact extended beyond its technical achievements, becoming a favorite among hunters, sport shooters, and even military personnel․
Its reliability and robust construction contributed to its enduring legacy․
The Browning Auto 5’s significance lies not only in its historical context but also in its lasting influence on subsequent firearm designs․
Its innovative features paved the way for future advancements in semi-automatic shotguns․

Overview of the Browning Auto 5 Design

The Browning Auto 5 features a distinctive recoil-operated system, setting it apart from other shotgun designs․
Upon firing, the barrel and bolt recoil together, cycling the action and ejecting the spent shell․
This mechanism allows for rapid follow-up shots, enhancing the shooter’s efficiency․
The Auto 5 also incorporates a unique long-recoil system, contributing to its smooth and reliable operation․
Its design includes adjustable friction rings, allowing users to tailor the shotgun’s performance to different loads․
The receiver is typically made of steel, providing durability and strength․
The Auto 5’s design prioritizes ease of use and maintenance, with relatively simple disassembly and reassembly procedures․
Its robust construction and carefully engineered components contribute to its long-lasting reputation․
The Auto 5’s design has influenced numerous other firearms, solidifying its place in shotgun history․

Safety First: Before You Begin

Prioritize safety when handling any firearm․
Before disassembly, ensure the Browning Auto 5 is unloaded․
Familiarize yourself with safe gun handling practices and wear appropriate safety gear throughout the process․

Importance of Safe Gun Handling

Safe gun handling is paramount when working with any firearm, including the Browning Auto 5․
Negligence can lead to accidental injury or even death, making adherence to safety rules crucial․
Always treat every firearm as if it is loaded, even after you’ve checked it․
Keep your finger off the trigger until you are ready to fire and be certain of your target and what is beyond it․
Never point the muzzle at anything you do not intend to shoot․
Store firearms unloaded and secured, away from children and unauthorized individuals․
Familiarize yourself with the specific safety mechanisms of the Browning Auto 5 and ensure they are functioning correctly․

Checking the Firearm is Unloaded

Before you begin any disassembly, cleaning, or maintenance on your Browning Auto 5, it is crucial to ensure that the firearm is completely unloaded․
This is the most important safety step to prevent accidental discharge․
First, point the muzzle in a safe direction․
Then, engage the safety mechanism․
Next, carefully open the action of the shotgun․
Visually inspect the chamber and magazine to confirm that no shells are present․
If a shell is present, carefully remove it․
Double-check both the chamber and magazine to ensure they are empty․
After visually confirming that the firearm is unloaded, it is advisable to perform a physical check by running your finger along the chamber to ensure no rounds remain․

Necessary Tools and Equipment

To properly disassemble, clean, and maintain your Browning Auto 5, you’ll need to gather the necessary tools and equipment․
A well-equipped workspace will make the process safer and more efficient․
Essential tools include a set of screwdrivers (both flathead and Phillips head) that fit the screws on your firearm․
You’ll also need a suitable cleaning rod, small picks for removing debris, and a wrench if required for your specific model․
Additionally, gather cleaning supplies, such as gun cleaning solvent, lubricant, and patches․
A soft-bristled brush is useful for scrubbing hard-to-reach areas․
Finally, a gun mat or workbench will protect your firearm and provide a stable surface․
Having these tools on hand will ensure a smooth and effective cleaning and maintenance process․

Complete Disassembly Guide

This section provides step-by-step instructions for the complete disassembly of your Browning Auto 5․
Follow these instructions carefully to safely and effectively take apart your firearm for cleaning and maintenance․

Step-by-Step Disassembly Instructions

Before beginning, ensure the firearm is unloaded and safe․
Start by removing the forearm, often held by a screw or latch․
Next, with the action open, carefully slide the barrel forward and off the receiver․
After the barrel is removed, focus on the bolt assembly․
Retract the bolt and locate the bolt handle; remove it by pulling rearward while using the link to push the bolt forward․
The bolt assembly should now slide out․
Finally, proceed to the trigger group, typically secured by pins that must be carefully punched out from left to right․
Remember to keep parts organized!

Removing the Barrel

Before attempting to remove the barrel, always ensure the Browning Auto 5 is completely unloaded and that the chamber is empty․
With the firearm confirmed safe, begin by field stripping the shotgun to its basic components․
This generally involves removing the forearm first․
Once the forearm is detached, locate the barrel retaining mechanism, which may vary slightly depending on the model․
Typically, the barrel is held in place by a friction fit or a simple locking system․
Carefully grasp the barrel near the receiver end and, while applying gentle pressure, slide it forward, away from the receiver․
Avoid using excessive force, as this could damage the barrel or receiver․

Disassembling the Forearm

Disassembling the forearm of a Browning Auto 5 requires careful attention․
First, ensure the shotgun is unloaded․

The forearm is typically held in place by a combination of friction and a retaining mechanism․
Begin by gently pushing the forearm forward, towards the muzzle, to relieve any pressure․
Next, locate the forearm retaining latch or button, often found on the underside of the forearm․
Depress or manipulate this latch to release the forearm from the magazine tube․
Once the latch is disengaged, carefully slide the forearm forward and off the magazine tube․
Be mindful of any small parts, such as friction rings or springs, that may be housed within the forearm assembly․

Removing the Bolt Assembly

Removing the bolt assembly from a Browning Auto 5 is a crucial step in the disassembly process․
Begin by ensuring the firearm is completely unloaded․
With the action open, locate the bolt handle;
While pulling rearward on the bolt handle, use the link to push the bolt forward․
This maneuver will help to disengage the bolt handle from its locking position․
Once the bolt handle is disengaged, carefully slide the entire bolt assembly forward and out of the receiver․
Pay close attention to the orientation of the bolt and any associated parts, such as the locking block or rollers․
These components may become dislodged during removal, so it is important to keep track of their positions for reassembly․

Trigger Group Disassembly

Disassembling the trigger group of a Browning Auto 5 requires careful attention․
Before starting, ensure the firearm is unloaded and the bolt assembly has been removed․
Locate the pins that secure the trigger group to the receiver․
Using appropriate punches, carefully drive out these pins from left to right, as this is the standard direction for pin removal in this firearm․
Once the pins are removed, the trigger group should be able to be carefully detached from the receiver․
Be mindful of any small parts or springs that may be under tension․
Disassemble the trigger group in a clean and organized workspace, keeping track of each component․
Take photos or make notes to assist with reassembly․

Detailed Instructions for Each Component

Once the trigger group is disassembled, focus on each component individually․
For the hammer, inspect for wear or damage on the contact surfaces․
The sear should be examined for any rounding or chipping that could affect its engagement with the hammer․
Carefully clean each spring, ensuring there is no rust or debris hindering its function․
The safety mechanism should be inspected to confirm it moves freely and engages securely․
Each pin must be checked for bending or damage․
Note the orientation of each part as it is removed to aid in reassembly․
Lubricate lightly with a quality gun oil before reassembling the components․
Pay close attention to the relationship between the various parts, ensuring proper function before moving on․

Cleaning and Maintenance

Proper cleaning and maintenance are vital for the Browning Auto 5․ Regular cleaning, lubrication, and inspection prevent issues․ This ensures reliable performance and prolongs the firearm’s life․

Proper Cleaning Techniques

Effective cleaning begins with a disassembled firearm, ensuring access to all components․ Utilize a suitable cleaning rod, small picks, and possibly a wrench, based on your Auto 5 model․ Remove powder residue and fouling from the barrel using appropriate solvents․

Pay special attention to the action, bolt face, and trigger mechanism․ Employ brushes and patches to eliminate debris․ Wipe down all surfaces with a clean cloth․ Inspect for lead or copper buildup, addressing it with specialized cleaners․ Ensure all solvent residue is removed before proceeding to lubrication․ This meticulous process guarantees optimal firearm functionality and longevity․

Lubrication Guidelines

Proper lubrication is crucial for smooth operation and preventing wear within your Browning Auto 5․ Apply a thin coat of high-quality gun oil to all moving parts, including the bolt, receiver rails, and trigger components․ Avoid over-lubrication, as excess oil can attract dirt and grime, hindering performance․

Focus on areas experiencing friction during cycling․ Lightly grease the action spring and any parts showing signs of wear․ Consult your specific model’s manual for recommended lubrication points․ After lubrication, wipe off any excess oil to prevent buildup․ Regular, mindful lubrication will ensure reliable function and extend the life of your Auto 5․

Inspection for Wear and Damage

Regularly inspect your Browning Auto 5 for signs of wear and potential damage to ensure safe and reliable operation․ Carefully examine the barrel for any bulges, dents, or pitting․ Check the bolt face and locking lugs for excessive wear or cracks, which could compromise the firearm’s integrity․

Inspect the action spring for signs of fatigue or breakage․ Pay close attention to the trigger mechanism, looking for worn sears or pins․ Also, examine the stock and forearm for cracks or looseness․ Replace any worn or damaged parts immediately to maintain optimal performance and prevent malfunctions․ A thorough inspection can identify potential issues before they lead to serious problems․

Reassembly Guide

This section provides step-by-step instructions for reassembling your Browning Auto 5 shotgun․ Follow these directions carefully to ensure proper function and safety after cleaning and maintenance․

Step-by-Step Reassembly Instructions

Begin reassembly by ensuring all parts are clean and lightly lubricated according to the lubrication guidelines․ Work in a well-lit area with ample space․ Start with the trigger group, carefully aligning components and securing them with the correct pins, noting the direction of insertion․ Next, reinstall the bolt assembly, ensuring the locking rollers are correctly positioned within the bolt head․ Gently insert the reassembled bolt into the receiver․ Then, reattach the forearm, making sure it is properly aligned and secured․ Finally, reattach the barrel, ensuring it is firmly in place and correctly aligned with the receiver․ After each step, test the functionality of the assembled components before moving on to the next․

Reassembling the Trigger Group

Reassembling the trigger group requires careful attention to detail․ Begin by positioning the hammer and sear, ensuring they engage correctly․ Insert the necessary pins from left to right, as is typical for this firearm, securing these components․ Make sure all springs are correctly seated and functioning․ The trigger must move freely without binding․ Double-check that the safety mechanism engages and disengages smoothly․ Ensure all screws are tightened properly, taking care not to overtighten and strip the threads․ After reassembly, manually test the trigger group’s functionality by dry-firing, verifying that the hammer falls correctly and the safety functions as intended․ If any issues are observed, disassemble and re-examine each component․

Reinstalling the Bolt Assembly

Reinstalling the bolt assembly requires precision․ Begin by ensuring the locking rollers are correctly positioned within the bolt head․ Carefully insert the bolt assembly into the receiver, guiding it along the rails․ While pulling rearward on the bolt handle, use the link to help push the bolt forward, allowing the bolt handle to engage correctly․ Ensure the bolt moves smoothly within the receiver without any binding․ Check the proper assembly by pulling back the operating handle to its locked open position․ Verify that the bolt locks securely․ The locking rollers must withdraw correctly when the bolt is in battery․ If any resistance is felt, remove the bolt and re-examine for proper alignment․ Test the action several times to confirm smooth operation before proceeding․

Reattaching the Forearm and Barrel

Reattaching the forearm and barrel requires careful alignment․ First, ensure the recoil spring and friction rings are correctly positioned on the magazine tube․ Slide the forearm over the magazine tube, aligning it with the receiver․ Next, carefully slide the barrel into the receiver, ensuring it seats properly against the recoil spring assembly․ Secure the barrel by tightening the barrel retaining nut or screw, depending on the model; Ensure the forearm is snug against the receiver and that the barrel is firmly attached․ Check for any gaps or misalignment․ Cycle the action to confirm the barrel and forearm move freely without binding․ Verify the barrel is securely locked in place and that the action operates smoothly before proceeding further․

Troubleshooting and Common Issues

Addressing malfunctions in your Browning Auto 5 requires systematic diagnostics; Identifying common problems, from cycling issues to worn parts, can be simplified with the right knowledge and resources for effective repairs and maintenance․

Addressing Common Problems

When troubleshooting a Browning Auto 5, start by identifying the specific issue․ Common problems include failures to feed, extract, or eject cartridges․

Examine the recoil spring, friction rings, and magazine tube for wear, damage, or incorrect assembly․ Ensure the gas ports are clean and unobstructed․
Check the condition of the firing pin and extractor․

If experiencing light strikes, inspect the firing pin spring․
For cycling issues, verify the correct load for your shotgun․

Consulting the owner’s manual aids in understanding the firearm’s operation and resolving common malfunctions․
Seeking advice from experienced gunsmiths can provide valuable insights for complex issues․

Identifying and Replacing Worn Parts

Regular inspection of your Browning Auto 5 is crucial for identifying worn parts․
Key areas to check include the recoil spring, friction pieces, and the extractor․
Look for signs of wear such as cracks, excessive play, or deformation․
The firing pin should be inspected for damage or breakage․
The magazine spring should be checked for proper tension․

Replacing worn parts ensures reliable firearm operation․
Consult the parts diagram to identify and order the correct replacements․
When replacing parts, ensure proper fitting and function․

Consider seeking assistance from a qualified gunsmith․
Prioritize safety․

Additional Resources

Find Browning Auto 5 manuals and diagrams online․
Consult gunsmith forums for expert advice and troubleshooting tips․
Explore video tutorials demonstrating disassembly and reassembly procedures for visual guidance and clarity․

Where to Find Manuals and Diagrams

Locating the correct manual and diagrams for your Browning Auto 5 is crucial for proper maintenance and repair․ Start by checking the Browning website for digital versions of owner’s manuals․ Many online gun forums and enthusiast sites also host scanned copies of older manuals․

Gun parts retailers often provide exploded diagrams that are incredibly helpful for disassembly and reassembly․ Look for reputable sources to ensure the accuracy and completeness of the information․ Always cross-reference information from multiple sources, and when in doubt, consult a qualified gunsmith․ These resources will ensure you understand your firearm․

nfs-320 programming manual

NFS-320 Programming Manual Overview

The NFS-320 programming manual serves as a comprehensive guide for understanding the fire alarm control panel’s functionalities․ It provides detailed information about fire alarm control and system programming․

Purpose and Scope of the Manual

The primary purpose of the NFS-320 Programming Manual is to offer a detailed guide for installing, operating, and programming the NFS-320 fire alarm control panel․ This manual is designed for technicians, installers, and system administrators who are responsible for setting up and maintaining the fire alarm system․ It encompasses instructions for basic operations, sensitivity settings, and advanced programming features․

The scope of the manual includes comprehensive coverage of the system’s functionalities, wiring configurations, and programming steps․ It references related documents such as the NFS-320 Installation Manual, NFS-320SYS Installation Manual, and SLC Wiring Manual․ Furthermore, it covers aspects like detector sensitivity programming, day/night sensitivity settings, and the integration of ACS series annunciators for Canadian applications․ The manual ensures users can effectively configure and manage the NFS-320 system for optimal performance and safety․

Installation and Wiring

Proper installation and wiring are critical for the NFS-320 system․ Refer to the NFS-320SYS/E/C Installation Manual and the SLC Wiring Manual for detailed instructions and guidelines for optimal system functionality․

NFS-320SYS/E/C Installation Manual

The NFS-320SYS/E/C Installation Manual is your primary resource for correctly setting up the fire alarm system․ It provides step-by-step instructions, diagrams, and safety guidelines to ensure a smooth and compliant installation process․ This manual covers mounting procedures, power supply connections, and proper grounding techniques, all essential for reliable operation․

Furthermore, the manual details the specific requirements for different models within the NFS-320 series, including the E and C variants․ This ensures that installers have the correct information for their specific system configuration․ Accurate adherence to the instructions outlined within the manual is crucial for preventing system malfunctions and ensuring optimal performance․ It also ensures the system is within regulatory standards․

SLC Wiring Manual Details

The SLC (Signaling Line Circuit) Wiring Manual provides essential information for correctly wiring the communication pathways between the NFS-320 panel and its connected devices․ This manual details the proper wiring techniques, cable specifications, and termination methods to ensure reliable communication and optimal system performance․ It covers topics such as loop resistance, wire gauge requirements, and troubleshooting common wiring issues․

Understanding the SLC wiring is crucial for preventing communication faults and ensuring that all connected detectors, modules, and other devices function correctly․ The manual outlines the importance of proper shielding, grounding, and avoiding sources of interference․ It also includes diagrams and illustrations to guide technicians through the wiring process and ensure compliance with relevant safety standards․

Programming Features and Instructions

This section explores the programming capabilities of the NFS-320, detailing how to configure detector sensitivity, set day/night parameters, and utilize the keypad for system adjustments and configurations;

Keypad Programming Guide

The NFS-320 keypad programming guide offers comprehensive instructions on utilizing the keypad interface for various system configurations․ It details step-by-step procedures for programming modules connected to keyed switches․ This guide facilitates disabling NAC signals, adding new detectors at specific SLC addresses, and managing existing detector programs․

Furthermore, it provides insights into setting soak timers, crucial for circuit supervision against opens and shorts․ Users will find information on configuring detector sensitivity, including day/night settings, through the keypad; This manual also assists in programming special function zones and initiating walk tests․ It ensures users can effectively manage and customize their fire alarm system․

Detector Sensitivity Programming

The detector sensitivity programming section within the NFS-320 manual focuses on configuring optimal response levels for fire detectors․ This involves adjusting sensitivity settings to ensure accurate and timely fire detection while minimizing false alarms․ The manual provides detailed instructions on how to program detector sensitivity using the NFS-320 keypad interface․

It explains how to access and modify sensitivity parameters for individual detectors or zones․ This includes setting different sensitivity levels for various times of the day, utilizing the day/night sensitivity settings․ The guide also addresses troubleshooting and best practices for maintaining consistent and reliable detector performance․ Properly programmed sensitivity is essential for effective fire protection․

Day/Night Sensitivity Settings

The NFS-320 programming manual details the procedure for configuring day/night sensitivity settings, allowing for automatic adjustments to detector sensitivity based on the time of day․ This feature is crucial for environments where activity levels and potential for false alarms vary between day and night․ During daytime hours, sensitivity can be increased to detect fires quickly, while nighttime sensitivity can be lowered to reduce false alarms caused by dust or other environmental factors․

The manual provides step-by-step instructions on how to program these settings using the keypad․ Proper calibration ensures reliable fire detection․

Advanced Programming Concepts

This section explores advanced NFS-320 programming, including CBE programming and special function zones․ Understanding these concepts allows for customized system behavior and enhanced functionality for specific applications․

CBE Programming and Special Function Zones

CBE (Control By Event) programming in the NFS-320 system allows for the customization of system responses based on specific events․ During a local or network Walk Test, activating a Mass Notification device will activate associated special function zones according to CBE programming․ This feature enables tailored responses to different situations, enhancing the system’s adaptability․ Special function zones can be programmed to activate or deactivate based on various triggers, providing flexibility in system operation․ For example, a keyed switch can be programmed to disable the NAC signal via a module․ These advanced programming options enable the creation of sophisticated fire alarm and notification systems that meet unique requirements and improve overall safety․ The NFS-320 programming manual provides detailed instructions on configuring CBE programming and defining special function zones․ Understanding these concepts is crucial for maximizing the system’s capabilities and tailoring its behavior to specific needs․

Canadian Applications (NFS-320C)

The NFS-320C is designed with specific considerations for Canadian applications․ It allows for mounting an ACS series annunciator within the enclosure, providing primary display and annunciation features required in Canada․

ACS Series Annunciator Mounting

The NFS-320C fire alarm control panel specifically accommodates the mounting of one ACS series annunciator directly within its enclosure․ This feature is particularly relevant for Canadian applications, where a primary display and annunciation are often mandated to meet regulatory requirements․

This integrated mounting capability simplifies installation and ensures that essential annunciation features are readily available․ By housing the ACS series annunciator within the NFS-320C enclosure, space is optimized, and wiring complexities are minimized․ This design consideration streamlines the overall system setup and enhances its reliability․

Proper mounting of the ACS series annunciator is crucial for effective system operation, ensuring clear and immediate communication of alarm events and system status․ Refer to the specific installation guidelines for the ACS series annunciator and the NFS-320C panel to guarantee correct and secure installation․

Canadian Applications Addendum

The Canadian Applications Addendum provides supplementary information specific to the NFS-320C, addressing the unique requirements and regulations within Canada․ This document outlines adaptations and configurations necessary for compliance with Canadian standards for fire alarm systems․

The addendum includes guidelines on mounting ACS series annunciators within the NFS-320C enclosure, ensuring the required primary display and annunciation are correctly implemented․ It also covers any variations in programming or operational procedures mandated by Canadian authorities․ This addendum is essential for installers and programmers working with the NFS-320C in Canada to ensure full adherence to local codes and regulations․

Consult this addendum alongside the main NFS-320 programming manual for comprehensive guidance․ Staying informed about Canadian-specific requirements is crucial for proper system functionality and regulatory compliance․

practical strategies for technical communication 4th edition pdf free

Practical Strategies for Technical Communication 4th Edition: A Comprehensive Guide

This edition serves as a detailed resource designed to refine workplace
communication skills. It offers clear advice, and real examples, and helps
readers master writing processes. The guide provides practical approaches
suitable for various professional settings and communication contexts.

Overview of “Practical Strategies for Technical Communication” 4th Edition

The fourth edition of “Practical Strategies for Technical Communication” provides
a comprehensive guide for students and professionals seeking to enhance their
technical writing skills. Authored by Mike Markel and Stuart A. Selber, this
edition builds upon previous versions with updated content and a focus on
real-world applications. The book aims to equip readers with the necessary
tools to communicate effectively in various workplace settings. It covers a
wide array of topics, including audience analysis, document design, research
methods, and style conventions.

The textbook also emphasizes the importance of clarity, conciseness, and
accuracy in technical writing. This edition incorporates practical exercises
and examples to reinforce learning and promote skill development.
Furthermore, it addresses the evolving landscape of technical communication,
considering digital platforms and multimedia formats. “Practical Strategies
for Technical Communication” is available in both print and digital formats,
offering flexibility for students and professionals alike. The book also
integrates supplementary materials and resources, such as online tools and
case studies, to further enhance the learning experience.

Authors: Mike Markel and Stuart A. Selber

“Practical Strategies for Technical Communication,” in its fourth edition,
is expertly crafted by Mike Markel and Stuart A. Selber. These authors
bring a wealth of knowledge and experience to the field of technical
communication. Mike Markel, known for his contributions to technical writing
education, has a proven track record of producing resources that are both
accessible and comprehensive. His insights into the nuances of effective
communication are evident throughout the book. Stuart A. Selber complements
Markel’s expertise with his own deep understanding of rhetoric and technical
communication theory.

Together, Markel and Selber have created a textbook that not only teaches
the fundamentals of technical writing but also encourages students to think
critically about their communication strategies. Their collaborative approach
ensures that the material is both theoretically sound and practically
relevant. By combining their unique perspectives, Markel and Selber have
established themselves as leading voices in the field, shaping the way
technical communication is taught and practiced. The authors’ dedication to
providing clear, concise guidance makes this edition an invaluable resource
for aspiring and experienced technical communicators alike.

Key Topics Covered in the Book

“Practical Strategies for Technical Communication,” fourth edition, thoroughly
covers essential areas. It delves into audience analysis, emphasizing
understanding reader needs. Document design principles are explored, ensuring
clear presentation. Research methods are detailed, promoting informed
content creation. Style and clarity receive focus, enhancing communication
effectiveness. Ethical considerations are addressed, fostering responsible
practices. Collaboration strategies are presented, promoting teamwork skills.
The book examines various document types, including reports, proposals, and
instructions. Visual communication is covered, integrating graphics
effectively.

Furthermore, the text addresses creating accessible documents, ensuring
inclusivity. It incorporates strategies for managing projects, enhancing
efficiency. Techniques for effective presentations are also included,
improving delivery skills. Revision and editing processes are emphasized,
ensuring polished final products. The book also integrates digital
communication aspects, reflecting modern practices. International and
intercultural communication is explored, promoting global awareness. Each
topic is supported by real-world examples and practical exercises. These
components combine to equip readers with comprehensive technical
communication skills, essential for success.

Emphasis on Practical Application and Real-World Examples

The fourth edition of “Practical Strategies for Technical Communication”
prioritizes practical application, ensuring concepts are readily applicable.
The text integrates numerous real-world examples, illustrating effective
strategies. These examples span diverse industries and communication
scenarios, enhancing relevance. Students gain insights into how professionals
address communication challenges daily. The book presents case studies,
promoting analytical thinking and problem-solving skills. Each chapter
incorporates exercises, allowing readers to apply learned principles
actively. These exercises simulate workplace tasks, reinforcing practical
understanding.

The emphasis on real-world scenarios bridges the gap between theory and
practice. Readers learn to adapt strategies to specific contexts, enhancing
their versatility. The book encourages critical thinking, enabling readers to
evaluate and improve communication effectiveness. By focusing on practical
application, the text prepares students for immediate success in technical
fields. The integration of examples makes learning engaging and memorable.
This approach ensures that readers develop competence in various communication
tasks. Ultimately, the book equips individuals with skills sought after in
today’s professional environment. The combination of theory and practice
makes this edition an invaluable resource.

Availability in Print and Digital Formats

The fourth edition of “Practical Strategies for Technical Communication” is
accessible in both print and digital formats, catering to diverse learning
preferences. The print version offers a traditional reading experience, ideal
for those who prefer physical books. This format is beneficial for note-taking
and highlighting directly on the pages, facilitating active engagement with
the material. The robust physical copy ensures durability and ease of use in
various settings, from classrooms to personal study spaces.

Alternatively, the digital format provides flexibility and convenience,
allowing access on multiple devices such as laptops, tablets, and smartphones.
Digital versions often include interactive features like searchable text,
embedded multimedia, and direct links to supplementary resources. This
format is perfect for students on the go, offering portability and immediate
access to course materials. Furthermore, the digital edition helps reduce
paper consumption, aligning with sustainable practices. Whether you prefer
the tactile feel of a physical book or the convenience of digital access,
this edition accommodates various learning styles and technological
preferences.

ISBN Information for Different Formats

The print version’s ISBNs are 9781319245023 and 1319245021. For the digital
edition, the ISBNs are 9781319382704 and 1319382703. These numbers ensure
you find the correct format, whether physical or electronic, for your needs.

Print ISBN: 9781319245023, 1319245021

The print edition of “Practical Strategies for Technical Communication,” 4th
Edition, is identified by the ISBNs 9781319245023 and 1319245021. These
ISBNs are crucial for accurately locating the physical copy of the textbook
across various bookstores, both online and in physical locations. When
ordering or searching for the book, ensure you use these numbers to avoid any
confusion with other editions or similar titles. This edition, authored by
Mike Markel and Stuart A. Selber, provides comprehensive guidance on
technical writing. These ISBNs specifically point to the paperback version
published by Bedford/St. Martins. Always verify the ISBN when purchasing to
guarantee you are acquiring the correct 4th edition. Using these ISBNs will
streamline the process of finding the exact book you need for your studies or
professional development, confirming that it is indeed the Markel and Selber
edition.

Digital ISBN: 9781319382704, 1319382703

The digital version of “Practical Strategies for Technical Communication,” 4th
Edition, is identifiable through the ISBNs 9781319382704 and 1319382703.
These digital ISBNs are essential for locating the correct electronic version
of the textbook across various online platforms, e-book retailers, and
digital libraries. When purchasing or accessing the e-book, make sure to use
these numbers to ensure you are downloading the accurate 4th edition,
authored by Mike Markel and Stuart A. Selber. These ISBNs specifically
correspond to the digital or eTextbook format, allowing you to access the
book on devices like computers, tablets, and smartphones. Verifying the ISBN
is crucial to avoid confusion with other editions. This ensures you receive
the complete and correct material. Remember, the digital version offers
convenience. This allows for easy searching, highlighting, and note-taking.
Always double-check these ISBNs when acquiring the digital version. This
guarantees a seamless and accurate match to the intended textbook.

Where to Find the Book

“Practical Strategies for Technical Communication,” 4th Edition, is available
through various channels. This includes both print and digital formats. You
can find physical copies at major online retailers. Amazon is a key source,
as well as Textbooks.com, and directly from Macmillan Learning. University
bookstores often stock the textbook. This is particularly true if it is
required for a course. Digital versions are accessible via platforms like
Google Play Books. VitalSource also provides e-book options. To ensure
accuracy, always check the ISBN. Use either the print (9781319245023,
1319245021) or digital (9781319382704, 1319382703) ISBN. This will confirm
you are purchasing the correct edition by Mike Markel and Stuart A. Selber.
Renting options are available through sites like Textbooks.com. This provides
a cost-effective alternative. Some libraries may also offer access. Consider
checking your local or university library. When buying online, verify the
seller’s reputation to avoid counterfeit copies. Comparing prices across
different platforms can help you find the best deal. Always confirm the
edition. Make sure it matches your course requirements.

Benefits of Using the 4th Edition

The 4th edition of “Practical Strategies for Technical Communication” offers
numerous advantages for students and professionals. Firstly, it provides
up-to-date insights into contemporary workplace communication practices. The
textbook offers practical advice applicable across various settings. The
real-world examples enhance understanding. This makes complex concepts more
accessible. The emphasis on practical application prepares readers for
real-world challenges. The book covers essential aspects of technical
writing. This includes audience analysis, document design, and effective
research methods. The inclusion of digital resources, like Achieve, supports
interactive learning. These tools facilitate feedback, peer review, and
revision. The 4th edition helps in developing clear and concise writing
skills. This is crucial for success in technical fields. The book’s
structure supports both individual and collaborative projects; This builds
teamwork and communication skills. The updated content reflects current
industry standards. This ensures relevance in today’s job market. The
availability in both print and digital formats offers flexibility. This caters
to different learning preferences. Ultimately, this edition enhances
employability. It equips readers with valuable communication skills. These
skills are highly sought after by employers.

Supplementary Materials and Resources

The fourth edition of “Practical Strategies for Technical Communication” comes
with a wealth of supplementary materials. These resources enhance the learning
experience. Achieve, an interactive e-book platform, offers writing tools.
These tools support feedback, peer review, revision, and reflection.
Multimedia content promotes student engagement. Document-based cases for each
chapter provide real-world context. Instructors have access to ready-made
assessment options. These simplify grading and provide valuable insights. The
textbook also includes access to online resources. These resources offer
additional examples, templates, and checklists. Students can benefit from
sample documents. These samples demonstrate effective technical communication.
The inclusion of case studies allows for critical thinking. This helps in
problem-solving. The supplementary materials aim to reinforce key concepts.
They provide opportunities for practical application. The writing tools help
students improve clarity and conciseness. Access to subject matter experts
provides additional support. Math solvers assist with quantitative tasks.
Premium writing tools improve overall writing quality. The resources are
designed to support both students and instructors. They enhance the teaching
and learning process. These supplemental tools ensure a comprehensive
understanding of technical communication principles. They prepare students
for professional success.

Target Audience: Students and Professionals

“Practical Strategies for Technical Communication,” fourth edition, is
designed for a broad audience. It primarily targets students in technical
communication courses. These courses are often part of engineering, science,
and technology programs. The book equips students with essential skills. They
learn to write effectively in various workplace settings. The practical advice
and real-world examples make it accessible. It is also extremely relevant for
students. Moreover, the book serves professionals in technical fields.
Engineers, scientists, and technical writers can benefit. The book offers
strategies to improve their communication skills. Clear, concise writing is
crucial for career advancement. Professionals in project management can also
utilize this resource. Effective communication ensures project success.
Professionals seeking to refine their writing will find value. The book
provides guidance on audience analysis. It also offers document design
principles. Furthermore, it covers research methodologies. Style and grammar
are also addressed. The book is a valuable resource for anyone needing clear,
precise communication. Both students and professionals will find practical
tools. They can improve their writing skills. It’s an essential guide for
technical and professional communication success. It bridges the gap between
academic learning and practical application.

handy heater pure warmth instructions

Welcome! This guide provides all necessary information to operate your Handy Heater Pure Warmth effectively. Please read all instructions before using your new personal space heater. This manual will help you with setup‚ operation‚ and safety guidelines‚ ensuring a safe and enjoyable experience.

The Handy Heater Pure Warmth is a compact‚ portable ceramic heater designed to provide efficient and localized heating. Utilizing advanced thermo-ceramic technology‚ this device quickly transforms cold‚ chilly areas into warm‚ cozy spaces‚ covering up to 250 square feet. It’s an ideal solution for personal heating needs‚ offering a convenient way to stay comfortable during colder months. This heater is engineered for simplicity and ease of use‚ making it a perfect addition to any home or office setting. Its portable design allows it to be moved to wherever it is needed‚ while its energy-efficient operation helps minimize electricity consumption. The Handy Heater Pure Warmth aims to be your personal heating solution‚ providing warmth whenever and wherever you need it. This guide will cover all aspects of using this heater effectively.

Key Features and Benefits

The Handy Heater Pure Warmth boasts several key features‚ making it a standout personal heating solution. Its advanced ceramic heating technology allows for rapid heating‚ quickly warming any space up to 250 square feet. The unit’s compact and portable design makes it easy to move from room to room. It features a built-in timer that can automatically shut off the unit after a set period‚ increasing safety and energy efficiency. The exterior remains cool to the touch‚ even at the highest setting‚ preventing accidental burns. The heater also promotes comfortable air quality by gently warming the air without drying it out‚ helping to avoid dry and irritated skin. This efficient heater provides an affordable and convenient way to keep warm during the cold winter months‚ and with its adjustable thermostat‚ you are always in control of your comfort.

Unboxing and Initial Setup

Upon receiving your Handy Heater Pure Warmth‚ carefully unpack the box and remove all packaging materials. Verify that all components are present‚ including the heater unit and instruction manual. Before plugging in the unit‚ ensure that the outlet voltage corresponds to the voltage stated on the heater’s rating label. Place the heater on a flat‚ dry‚ and stable surface. Do not place the heater on carpet or soft materials that could block airflow. Position the heater away from flammable materials‚ curtains‚ and furniture. Examine the power cord and plug for any damage. Once you have verified that everything is in good order‚ plug the power cord into the outlet. Now‚ you are ready to start using your Handy Heater Pure Warmth. Always read the instruction manual completely before using the heater for the first time.

Operating Procedures

To begin using your Handy Heater Pure Warmth‚ first‚ locate the power switch at the back of the unit and turn it to the “on” position. The heater will default to the HIGH speed setting. To adjust the heat settings‚ use the control buttons to select your desired temperature level. The Handy Heater Pure Warmth is designed to provide concentrated heat quickly and efficiently. It also features a built-in timer function that allows you to automatically turn the unit off after a set amount of time. To use the timer‚ press the timer button and select the desired duration. The heater will continue to operate until the timer expires. Remember to always supervise the heater while it is in use. After use‚ turn the power switch to the “off” position and unplug the unit from the outlet.

Powering On and Off

To power on your Handy Heater Pure Warmth‚ first ensure that the unit is placed on a flat‚ dry‚ and even surface. Then‚ plug the power cord into a compatible electrical outlet. Locate the main power switch‚ typically found at the back of the unit. Flip this switch to the “on” position. Upon activation‚ the heater will default to its high-speed setting‚ immediately beginning to produce heat. To power off the Handy Heater‚ simply flip the main power switch to the “off” position. Once the unit is off‚ it is recommended to unplug the power cord from the outlet. This ensures the heater is completely disconnected from the power source. Always wait for the unit to cool down before moving or storing it.

Adjusting Heat Settings

The Handy Heater Pure Warmth is designed with adjustable heat settings to provide personalized comfort. By default‚ when the unit is powered on‚ it starts at the high-speed setting‚ delivering maximum heat output. To adjust the heat settings‚ you will typically find buttons or controls on the unit’s interface. These controls allow you to cycle through different heat levels‚ usually including options for high and low heat output. Some models may also include a medium setting‚ offering more flexibility in temperature regulation. Select the desired heat level based on your needs. It is important to note that the heating process uses ceramic technology‚ which helps maintain moisture in the air‚ preventing dryness. If you require less heat‚ switch to a lower setting to reduce energy consumption while maintaining comfort. Always monitor the heater and adjust settings as needed for optimal use.

Using the Timer Function

The Handy Heater Pure Warmth includes a convenient timer function that allows you to set the duration for which the heater will operate before automatically shutting off. This feature is particularly useful for energy saving and safety. To activate the timer‚ locate the timer button on the control panel of your heater. Pressing this button will generally allow you to select the desired run time‚ which could range from 1 to 12 hours depending on the model. Often‚ each press of the button increases the timer by an hour. Once the set time has elapsed‚ the heater will automatically turn off‚ providing peace of mind and conserving energy. The timer setting can be adjusted whenever needed. This timer function is designed for ease of use and helps prevent the heater from running unnecessarily‚ making it a user-friendly feature. Always ensure proper setting based on your needs.

Safety Guidelines

Prioritizing safety is crucial when using the Handy Heater Pure Warmth. Always ensure the heater is placed on a flat‚ stable‚ and dry surface to prevent it from tipping over‚ which could be a fire hazard. Never leave the heater unattended while in operation‚ especially around children and pets. The unit gets hot during use‚ so avoid touching the hot surfaces to prevent burns; always use the handle when moving it. Ensure the heater’s power cord is not damaged and is connected to an appropriate power outlet with the correct voltage. Avoid using extension cords‚ as they can cause overheating. Do not cover the heater or block its air vents‚ as this can lead to overheating and potential damage. Keep flammable materials away from the heater. Always unplug the heater before cleaning or maintenance. If any unusual sounds or malfunctions occur‚ stop using the heater immediately and consult the troubleshooting section. Following these guidelines will help ensure safe and reliable operation.

Avoiding Burns

The Handy Heater Pure Warmth is designed to provide efficient heating‚ but its surfaces can become hot during operation. It is essential to take precautions to avoid burns. Never touch the heater’s grille or any other hot surface with bare skin while it is in use or immediately after being turned off. Allow the unit to cool completely before handling or moving it. Always use the handle provided to move the heater. Keep children and pets at a safe distance from the heater to prevent accidental contact with hot surfaces. Do not place any objects on the heater that could become heated and cause burns. Be especially careful when adjusting the heater or its settings‚ ensuring your hands are not exposed to hot areas. Educate all household members about these safety precautions to prevent accidental burns. Remember‚ the ceramic heating element gets very hot‚ and proper handling is crucial to your safety. Always prioritize caution when operating the heater.

Proper Placement

To ensure the safe and effective operation of your Handy Heater Pure Warmth‚ proper placement is crucial. Always place the heater on a flat‚ dry‚ and stable surface. Avoid placing it on soft or uneven surfaces‚ such as carpets or bedding‚ which can obstruct airflow and cause overheating. Make sure there is adequate space around the heater‚ at least one foot in all directions‚ to allow for proper air circulation. Do not place the heater near flammable materials‚ such as curtains‚ furniture‚ or paper. Keep the heater away from water sources and avoid using it in bathrooms or other humid areas. Ensure that the power cord is not stretched or running under rugs or other objects‚ as this could pose a fire hazard. When selecting a location‚ consider the proximity to outlets and ensure the voltage corresponds to the heater’s rating. By placing the heater correctly‚ you can maximize its performance and minimize potential hazards.

General Safety Precautions

Always unplug the Handy Heater Pure Warmth when not in use and before cleaning. Never insert foreign objects into the heater’s openings‚ as this could cause damage or electric shock. Do not operate the heater with a damaged cord or plug. If the heater malfunctions‚ do not attempt to repair it yourself; contact a qualified technician. This heater is intended for indoor use only and is designed for personal space heating. Avoid using the heater in areas with high humidity or around water sources‚ such as bathrooms. When moving the heater‚ always use the handle‚ and avoid touching hot surfaces. Keep the heater away from children and pets. Ensure the heater is not covered or blocked by any items‚ as this may lead to overheating. Do not use this heater with an extension cord. Always use a grounded outlet. By following these general safety precautions‚ you can ensure the safe and reliable operation of your Handy Heater Pure Warmth. Remember‚ safety is paramount.

Cleaning and Maintenance

To keep your Handy Heater Pure Warmth functioning properly‚ regular cleaning and maintenance are essential. Before starting any cleaning process‚ ensure the heater is unplugged and completely cooled down. Use a soft‚ non-abrasive‚ damp cloth to wipe the exterior of the heater. If needed‚ you can use a mild soap‚ but ensure it is completely rinsed off. Avoid getting any water inside the heater. Do not use harsh chemicals or abrasive cleaners‚ as they may damage the surface. Regularly check the air vents to ensure they are free from dust and debris. You can use a vacuum cleaner with a brush attachment to remove dust from the vents. Do not attempt to open the heater casing for cleaning; this could damage the internal components. Store the heater in a dry place when not in use. Proper cleaning and maintenance will prolong the life of your Handy Heater and ensure safe and efficient operation. Always refer to the manual for detailed instructions and never use the heater if it is damaged. Remember to clean the unit frequently to ensure optimum performance.

Troubleshooting Common Issues

If your Handy Heater Pure Warmth is not functioning correctly‚ there are a few common issues you can check before seeking professional help. First‚ ensure the unit is properly plugged into a functioning power outlet. Verify that the power switch at the back of the unit is in the ‘ON’ position. If the heater is not producing heat‚ check that the thermostat is set to your desired level. If the heater turns off unexpectedly‚ it might be due to the built-in timer; check the timer settings. Also‚ ensure that the air vents are not blocked‚ as this can cause overheating and automatic shut-off. If the unit is making unusual noises‚ unplug it and check for any loose parts or obstructions inside the vents. If the issue persists after checking these points‚ consult the manual or contact customer support for further assistance. Do not attempt to repair the heater yourself‚ as this may void the warranty and create a safety hazard. Always unplug the heater before troubleshooting‚ and never use the heater if it is damaged or not functioning correctly. These steps will help you identify and resolve the most common issues.

Technical Specifications

The Handy Heater Pure Warmth is designed as a portable‚ personal space heater with specific technical attributes. This model operates on standard household voltage‚ ensuring compatibility with most electrical outlets. It features a ceramic heating element‚ which provides efficient and rapid heating. The heater has a power output of 1200W or 1500W‚ depending on the specific model‚ and is designed to heat spaces up to 250 square feet. The unit includes an adjustable thermostat allowing users to customize the heat output. A programmable timer is integrated‚ enabling automatic shut-off after a set period‚ ranging from 1 to 12 hours. The dimensions of the heater are approximately 16 x 17 x 17 cm and it weighs around 900 grams‚ making it easily portable. The heater also has built-in safety features‚ including overheat protection; The power cord is designed for safe operation‚ and the exterior of the heater remains cool to the touch‚ even at the highest setting. These specifications ensure efficient‚ safe‚ and convenient personal heating.

Warranty Information

The Handy Heater Pure Warmth comes with a limited warranty‚ typically covering manufacturing defects and malfunctions. This warranty usually extends for a period of one year from the date of purchase. It is essential to retain your purchase receipt or proof of purchase‚ as this is required to validate your warranty claim. The warranty covers the repair or replacement of defective parts‚ provided the unit has been used according to the instructions in the manual. Damages resulting from misuse‚ neglect‚ unauthorized repairs‚ or accidents are typically not covered under the warranty. For warranty service‚ you may need to contact the manufacturer’s customer service department or the retailer from whom you purchased the product. Before initiating a warranty claim‚ it is advisable to consult the troubleshooting section of this manual‚ as some issues can be resolved without requiring warranty service. Additionally‚ consider consulting the manufacturer’s website for specific warranty details‚ including the terms and conditions specific to your purchase. Proper handling and care of your Handy Heater Pure Warmth are crucial for maintaining warranty validity.

frigidaire dryer troubleshooting guide

Frigidaire Dryer Troubleshooting Guide⁚ Common Problems

This guide addresses frequent Frigidaire dryer issues⁚ failure to start‚ insufficient heating‚ and unexpected mid-cycle stops. Solutions range from simple checks to advanced component testing.

Dryer Won’t Start

A Frigidaire dryer refusing to start can stem from several sources. First‚ ensure the power cord is securely plugged into a functioning wall outlet. Check your home’s circuit breaker; a tripped breaker will prevent the dryer from operating. Carefully inspect the dryer door latch; a faulty latch often prevents the dryer from initiating a cycle. If the dryer still fails to start‚ the problem might lie within the dryer’s internal components such as a malfunctioning thermal fuse‚ a defective door switch‚ or a broken drum belt. These require more in-depth troubleshooting or professional repair. Remember to always disconnect the power before attempting any internal examination. Consult your owner’s manual or seek professional assistance if you’re unsure about any step.

Dryer Doesn’t Heat

If your Frigidaire dryer runs but fails to generate heat‚ several potential culprits exist. Begin by checking the dryer vent for clogs; lint buildup significantly hinders airflow and heat distribution. A blocked vent can cause overheating and safety shutdowns. Inspect the heating element for damage or breakage; a faulty element prevents heat generation. Examine the thermal fuse; this safety device might have blown due to overheating or a previous malfunction. Additionally‚ verify the continuity of the wiring harness connecting the heating element and other components; damaged or loose wires disrupt the electrical flow needed for heating. A malfunctioning high-limit thermostat‚ responsible for regulating temperature‚ can also be the reason for the lack of heat. If you are uncomfortable working with electrical components or gas lines (if applicable)‚ consult a qualified appliance repair technician.

Dryer Stops Mid-Cycle

A Frigidaire dryer unexpectedly ceasing operation mid-cycle can stem from various issues. First‚ check the power supply; ensure the dryer is properly plugged in and the circuit breaker hasn’t tripped. A tripped breaker indicates an overload‚ potentially from a faulty component. Examine the door latch; if it’s not securely closed‚ the dryer’s safety mechanisms might shut it down to prevent accidents. Inspect the control board for any error codes displayed on the control panel. These codes offer clues about the underlying problem. A malfunctioning motor might be the cause; if the drum stops spinning‚ the dryer might automatically halt the cycle. A faulty thermal fuse‚ designed to protect against overheating‚ could also interrupt operation. If the problem persists after checking these elements‚ a more in-depth assessment by a qualified technician may be necessary to diagnose and repair internal components.

Troubleshooting Steps⁚ Basic Checks

Begin troubleshooting by verifying power supply‚ inspecting the door latch for proper closure‚ and checking for tripped circuit breakers. These initial steps often resolve simple issues.

Check Power Supply and Connections

A seemingly obvious yet often overlooked step is ensuring your dryer is properly plugged into a functioning electrical outlet. Carefully examine the power cord for any visible damage‚ such as fraying or exposed wires. A damaged cord needs immediate replacement to prevent electrical hazards. Check the outlet itself by plugging in another appliance to confirm it’s working. Sometimes‚ the problem might not be the outlet itself but a loose connection between the cord and the dryer. Firmly push the plug into the outlet and ensure there’s no play or looseness. If the outlet is confirmed to be working‚ and the cord is undamaged‚ but the dryer remains unresponsive‚ the problem likely lies elsewhere within the dryer’s internal components. However‚ addressing these basic power supply and connection issues is the crucial first step in your troubleshooting efforts before moving on to more complex checks. Don’t underestimate the power of simple solutions!

Inspect the Door Latch

Many modern dryers incorporate sophisticated safety mechanisms that prevent operation unless the door is securely closed. A malfunctioning door latch is a common culprit for dryers refusing to start. Begin by visually inspecting the latch mechanism itself. Look for any signs of damage‚ such as broken parts or misalignment. Carefully examine the latch’s connection points to the dryer’s frame and door. A loose or disconnected latch can prevent the dryer from sensing the door is closed‚ thus disabling the starting sequence. Try gently closing and opening the door several times; sometimes‚ a simple re-engagement can resolve the issue. If the latch appears damaged or loose‚ you may need to replace it‚ a relatively straightforward repair for many DIY enthusiasts. Remember to consult your dryer’s manual or find online resources for specific instructions relevant to your Frigidaire model. A faulty door latch is often a simple fix that can restore your dryer to full functionality.

Examine the Circuit Breaker

A tripped circuit breaker is a frequently overlooked cause of dryer malfunctions. Overloaded circuits‚ particularly in older homes‚ can cause the breaker to trip‚ cutting power to the dryer. Locate your home’s electrical panel‚ usually found in the basement‚ garage‚ or utility closet. Identify the breaker that controls the dryer’s circuit; it’s often labeled accordingly. Check if the breaker is in the “off” position – indicated by a switch that is not fully aligned with the other breakers. If it’s tripped‚ you’ll see it visibly out of alignment. To reset the breaker‚ simply switch it to the “off” position and then immediately back to the “on” position. If the breaker trips again immediately‚ this suggests an ongoing electrical problem in the dryer’s circuit‚ potentially requiring professional attention. Before attempting any repairs‚ disconnect the dryer from the power source to ensure your safety. After resetting the breaker‚ try restarting the dryer. If the problem persists‚ further troubleshooting may be necessary‚ potentially involving a qualified electrician.

Advanced Troubleshooting⁚ Identifying Issues

This section delves into more complex Frigidaire dryer problems‚ including error code interpretation and component testing for experienced DIYers.

Understanding Frigidaire Dryer Error Codes

Frigidaire dryers utilize error codes displayed on the control panel to pinpoint specific malfunctions. These codes are crucial for effective troubleshooting‚ saving time and potentially costly repairs. Understanding these codes allows for efficient diagnosis‚ often eliminating the need for immediate professional service. Many online resources‚ including Frigidaire’s website and various repair forums‚ provide comprehensive lists of error codes and their corresponding meanings. By consulting these resources and cross-referencing the code displayed on your dryer‚ you can quickly narrow down the potential causes of the problem. This knowledge empowers you to make informed decisions about whether to attempt a DIY repair or contact a qualified technician. Remember to always consult your dryer’s user manual for specific instructions and safety precautions before undertaking any troubleshooting steps. Taking the time to understand these error codes can significantly improve your ability to resolve common issues and keep your dryer running smoothly. Don’t forget to check online forums for user experiences and tips related to specific error codes.

Testing Key Components (Thermal Fuse‚ Heating Element)

If your Frigidaire dryer isn’t heating‚ the thermal fuse and heating element are prime suspects. The thermal fuse‚ a safety device‚ protects against overheating. A blown fuse will prevent the dryer from heating. Testing involves using a multimeter to check for continuity; a blown fuse shows infinite resistance. Replacement is straightforward‚ requiring only basic tools and a new fuse. The heating element is responsible for generating heat. To test it‚ disconnect the power and carefully access the element. Using a multimeter‚ check for continuity; a broken element shows infinite resistance. A faulty heating element needs replacement‚ and this might require more technical expertise than replacing a fuse. Remember to always disconnect power before attempting any component testing or replacement. Consult your dryer’s service manual for detailed diagrams and instructions. Improper handling can lead to electrical shock or further damage. If you are uncomfortable working with electrical components‚ seek professional assistance. Online videos and tutorials can be helpful but are no substitute for proper safety precautions and technical knowledge.

Assessing the Drum Belt and Motor

A malfunctioning drum belt or motor can prevent your Frigidaire dryer from operating correctly. The drum belt transmits power from the motor to the drum‚ enabling clothes rotation. A worn‚ broken‚ or loose belt will result in a non-spinning or slowly spinning drum. Inspect the belt for visible damage such as cracks‚ fraying‚ or significant stretching. If damaged‚ replace it with a new belt of the correct size and type‚ readily available at appliance parts suppliers. The motor drives the drum’s rotation. A faulty motor will prevent the drum from spinning altogether. Testing a motor requires specialized tools and knowledge; it’s often best to call a technician for motor diagnosis and repair. However‚ visual inspection can sometimes reveal obvious issues like loose wiring or signs of burning. Before attempting any repairs‚ disconnect the dryer’s power. Consult your dryer’s service manual for diagrams and specific instructions for accessing and replacing the belt and motor. Improper handling can cause injury or further damage. If you lack experience with appliance repairs‚ professional assistance is recommended.

hail caesar 2nd edition pdf

Hail Caesar 2nd Edition PDF⁚ A Comprehensive Guide

This guide explores the updated Hail Caesar 2nd Edition rulebook, offering insights into its availability, digital versus physical formats, rulebook content, improvements over the first edition, army list management, gameplay mechanics, historical context, advanced rules, errata, community resources, third-party add-ons, and purchasing options. A detailed overview of this popular wargame awaits.

Availability and Download Options

The Hail Caesar 2nd Edition rulebook is readily available in both physical and digital formats. Physical copies can be purchased from various online retailers such as Amazon and directly from the Warlord Games website, often alongside other related products. The digital version, a PDF, offers convenience and immediate access. Warlord Games itself often provides download links for the PDF, sometimes offering free downloads under specific promotions or as part of bundle deals. Third-party sellers may also offer the PDF, though caution is advised to ensure legitimacy and avoid copyright infringement. Note that digital purchases typically provide a downloadable link after payment confirmation, allowing users to access the rulebook instantly. Checking the publisher’s website for official purchase links and verifying seller legitimacy is crucial before purchasing.

Digital vs. Physical Copies⁚ Key Differences

The choice between a digital (PDF) and physical copy of the Hail Caesar 2nd Edition rulebook hinges on personal preferences and practical considerations. A physical copy offers a tangible experience, ideal for those who prefer referencing a printed book, making annotations, and enjoying the tactile feel of a traditional rulebook. It’s also less susceptible to technological issues like lost files or software incompatibility. However, physical copies require storage space and are less portable. The digital PDF, conversely, offers immediate access, portability, and searchability. It’s easily stored on various devices and can be accessed anytime, anywhere with an internet connection or downloaded for offline use. The PDF might also be more cost-effective initially, depending on sales and promotions. However, printing the entire PDF might negate this advantage, and digital versions lack the tactile and annotating features of a physical book. Ultimately, the best choice depends on individual needs and priorities.

Rulebook Content Overview⁚ What’s Inside?

The Hail Caesar 2nd Edition rulebook, a comprehensive guide to ancient warfare gaming, boasts a wealth of content designed for both experienced players and newcomers. Within its pages, you’ll find detailed explanations of core game mechanics, including troop movement, combat resolution, morale, and special rules for various unit types. The rulebook meticulously covers the intricacies of army list creation, providing guidelines for selecting units, assigning points, and building balanced forces. Furthermore, it presents a wealth of historical context, offering insights into the historical periods and cultures represented in the game. Players will discover detailed explanations of historical battle tactics, troop formations, and weaponry, enriching their understanding of ancient warfare. Beyond the core rules, the book often includes advanced rules, scenarios, and optional rules to expand the gameplay experience, catering to a wide range of player preferences and strategic depth. The improved organization and presentation in this second edition ensure smooth navigation and easy reference.

Changes from the First Edition⁚ Improvements and Updates

The Hail Caesar 2nd Edition PDF showcases significant improvements over its predecessor. The most immediately noticeable change is the enhanced layout and organization. The updated rulebook features a more intuitive structure with clearer headings, subheadings, and a comprehensive index, making it easier to find specific rules and information. Many sections have been rewritten for greater clarity and precision, addressing common points of confusion from the first edition. The updated edition boasts improved diagrams and artwork, enhancing the visual appeal and aiding comprehension of complex rules. Furthermore, the second edition often incorporates player feedback, refining and streamlining existing rules based on community experience. New features might include updated army lists reflecting current historical understanding or the addition of new scenarios and optional rules to expand gameplay variety. The overall goal is to provide a refined and more accessible experience for all players, regardless of their experience level with the game. These enhancements elevate the game’s strategic depth and overall enjoyability.

Army List Creation and Management

Building and managing your army lists in Hail Caesar 2nd Edition is a crucial aspect of the game. The rulebook provides detailed guidelines for constructing historically accurate and balanced forces, reflecting various periods and cultures across ancient warfare. Players choose from a wide array of units, each possessing unique strengths and weaknesses, requiring strategic consideration in army composition. The system balances unit cost and effectiveness, preventing overwhelmingly powerful armies while allowing for diverse tactical approaches. The updated edition might include revised points values or updated unit options, reflecting historical research or player feedback. Tools and resources are often provided to aid in army list construction, perhaps including digital tools or downloadable templates. Careful consideration of unit types, special rules, and overall army synergy is key to creating a competitive and historically accurate force. The process allows for extensive customization, encouraging creativity and strategic depth in designing your ancient legions.

Gameplay Mechanics and Rules Clarifications

Hail Caesar 2nd Edition refines its core gameplay mechanics, offering clearer rules and streamlined processes. The updated rulebook likely addresses ambiguities from the previous edition, providing unambiguous explanations for common situations and edge cases. Combat resolution, often a complex aspect of wargames, is likely detailed with greater clarity, using improved diagrams and examples to illustrate the sequence of actions. Movement rules, crucial for tactical maneuvering, are probably revised for increased precision and clarity, avoiding potential misunderstandings. Morale checks, a significant factor in determining battle outcomes, may have undergone adjustments for better balance and historical accuracy. The updated rules likely strive for smoother game flow, reducing the need for frequent rulebook consultations during play. Special rules governing specific unit types or historical scenarios are probably refined to ensure they integrate seamlessly within the overall framework. The aim is a more intuitive and enjoyable gaming experience with fewer rule-related disputes.

Historical Context and Background

Hail Caesar’s historical depth is a key feature, providing players with a rich backdrop for their battles. The second edition likely expands on this, offering a more comprehensive overview of the historical periods covered, from the early Bronze Age to the medieval era. The rulebook probably delves deeper into the tactics, weaponry, and organizational structures of various ancient armies, providing context for the game’s mechanics. Detailed descriptions of key battles and campaigns might be included, adding to the game’s immersion. The inclusion of historical timelines and maps would enhance the player’s understanding of the historical setting, illustrating geographical contexts and significant conflicts; The text might highlight the evolution of warfare across different eras, explaining the changes in military organization, technology, and tactics. This detailed historical context adds a layer of authenticity to the gameplay, enriching the experience for players interested in military history. The enhanced historical background likely informs the game’s design, ensuring that the mechanics accurately reflect the realities of ancient warfare.

Advanced Rules and Scenarios⁚ Expanding Gameplay

The Hail Caesar 2nd Edition PDF likely introduces advanced rules to enhance strategic depth and replayability. These might include specialized unit types with unique abilities, reflecting historical variations in military organization and equipment. Complex terrain rules could add a tactical layer, forcing players to consider environmental factors in their battle plans. Furthermore, the inclusion of siege warfare rules would open up new strategic possibilities, adding another dimension to the game. The rulebook might detail different scenarios, providing pre-designed battle maps and objectives to spice up the gameplay. These scenarios could range from recreating famous historical battles to engaging in fictional conflicts, offering a variety of challenges. Advanced rules for combined arms warfare, incorporating different troop types and their strengths and weaknesses, would necessitate a greater level of strategic planning. The addition of new unit types, like elephants or specialized siege weaponry, could further expand strategic options and tactical considerations. The advanced rules, combined with varied scenarios, create a more dynamic and engaging experience for seasoned players seeking greater challenge and complexity.

Errata and FAQs⁚ Addressing Common Issues

The Hail Caesar 2nd Edition PDF, like any complex rulebook, might have minor errors or ambiguities that need clarification. A dedicated section addressing these issues is crucial for a smooth gaming experience. This section, typically called “errata,” would list any corrections or updates to the rules since the initial publication. These corrections might involve clarifying unclear wording, fixing mathematical errors in point costs or unit statistics, or resolving inconsistencies between different sections of the rulebook. Furthermore, a frequently asked questions (FAQ) section would tackle common player queries. These questions could range from rules clarifications on specific unit abilities or combat situations to guidance on army list construction or scenario setup. The FAQ aims to provide concise answers and examples, ensuring players understand the rules correctly and can resolve any disputes swiftly. Regular updates to both the errata and FAQ sections are vital, ensuring the rulebook remains accurate and accessible, thereby enhancing the overall gaming experience and community support.

Community Resources and Support⁚ Forums and Blogs

Engaging with a vibrant community is vital for any wargame, and Hail Caesar is no exception. The 2nd edition’s popularity fosters numerous online platforms dedicated to sharing knowledge, strategies, and experiences. Dedicated forums, often hosted on gaming websites or social media groups, allow players to discuss rules interpretations, share army lists, showcase painted miniatures, and even organize online or in-person games. These spaces are invaluable for resolving rule disagreements, finding opponents, and learning from experienced players. Blogs and online articles dedicated to Hail Caesar also contribute significantly to the community. These platforms offer in-depth analyses of the rules, strategic guides, army list building advice, painting tutorials, and historical context relevant to the game. The wealth of information shared by enthusiasts creates a collaborative learning environment, enriching the overall Hail Caesar experience. This active community support strengthens the longevity and enjoyment of the game for players of all skill levels.

Third-Party Resources and Add-ons

The thriving community surrounding Hail Caesar has spawned a wealth of third-party resources designed to enhance the gameplay experience. Numerous websites and online stores offer supplementary materials, including custom army lists, scenario packs, and alternative rule sets. These additions often cater to specific historical periods or army types not fully covered in the core rulebook, expanding the game’s versatility and replayability. Independent designers and publishers create unique content, from detailed historical background information to fully fleshed-out campaign systems. These resources can significantly deepen the game’s strategic complexity and offer players opportunities to explore niche historical conflicts or create unique military challenges. Some third-party creators also produce physical accessories, such as custom dice, tokens, and terrain pieces, enhancing the visual appeal and tactile experience of playing the game. These additions often reflect the creativity of the community, demonstrating its passion for the game and its desire to provide players with even more options for customized gameplay.

Where to Purchase⁚ Online and Retail Options

Acquiring the Hail Caesar 2nd Edition rulebook is straightforward, with various options catering to different preferences. The official Warlord Games website provides a direct digital download of the PDF version, offering immediate access for those who prefer digital manuals. This online purchase typically allows for quick and convenient acquisition, eliminating shipping times. Alternatively, physical copies of the rulebook can be purchased through the Warlord Games online store, offering the tangible experience of a printed manual. Many hobby game retailers, both online and brick-and-mortar, also stock the Hail Caesar 2nd Edition rulebook, providing diverse choices for those preferring to browse and purchase in person or through familiar online marketplaces. Amazon and other major online retailers frequently offer the rulebook alongside other wargaming products. Consider factors like shipping costs, preferred format (digital or physical), and any potential discounts or bundles when choosing your preferred purchasing method. The diverse range of options ensures players can easily access this comprehensive wargame rulebook.